
How to De-Winterize Your RV the Right Way in 2026

You pull the cover off in a Salt Lake City storage lot, expecting a simple spring reset. Instead, the coach smells stale, a little pink fluid appears at the outdoor shower, and you remember that the water heater bypass may still be engaged. That's the moment to slow down. Learning how to de-winterize your RV safely means more than making water flow again. You're checking for winter damage, clearing antifreeze, sanitizing the potable system, finding leaks before they reach a cabinet, and waking electrical, propane, and appliance systems in the right order.
Utah storage conditions make that inspection worthwhile. A coach that sat through a cold Wasatch Mountains winter can look fine from the driver's seat while hiding a cracked fitting, rodent-chewed wire, weak battery, or damaged roof seal. The process below follows the order we use when advising owners at Motor Sportsland, with a clear line between safe driveway work and problems that belong in a service bay. Take your time before the first trip to Jordanelle, Bear Lake, or the Great Salt Lake region, and your spring startup will be far less likely to become an expensive campground repair.
The First Morning You Pull the Cover Off
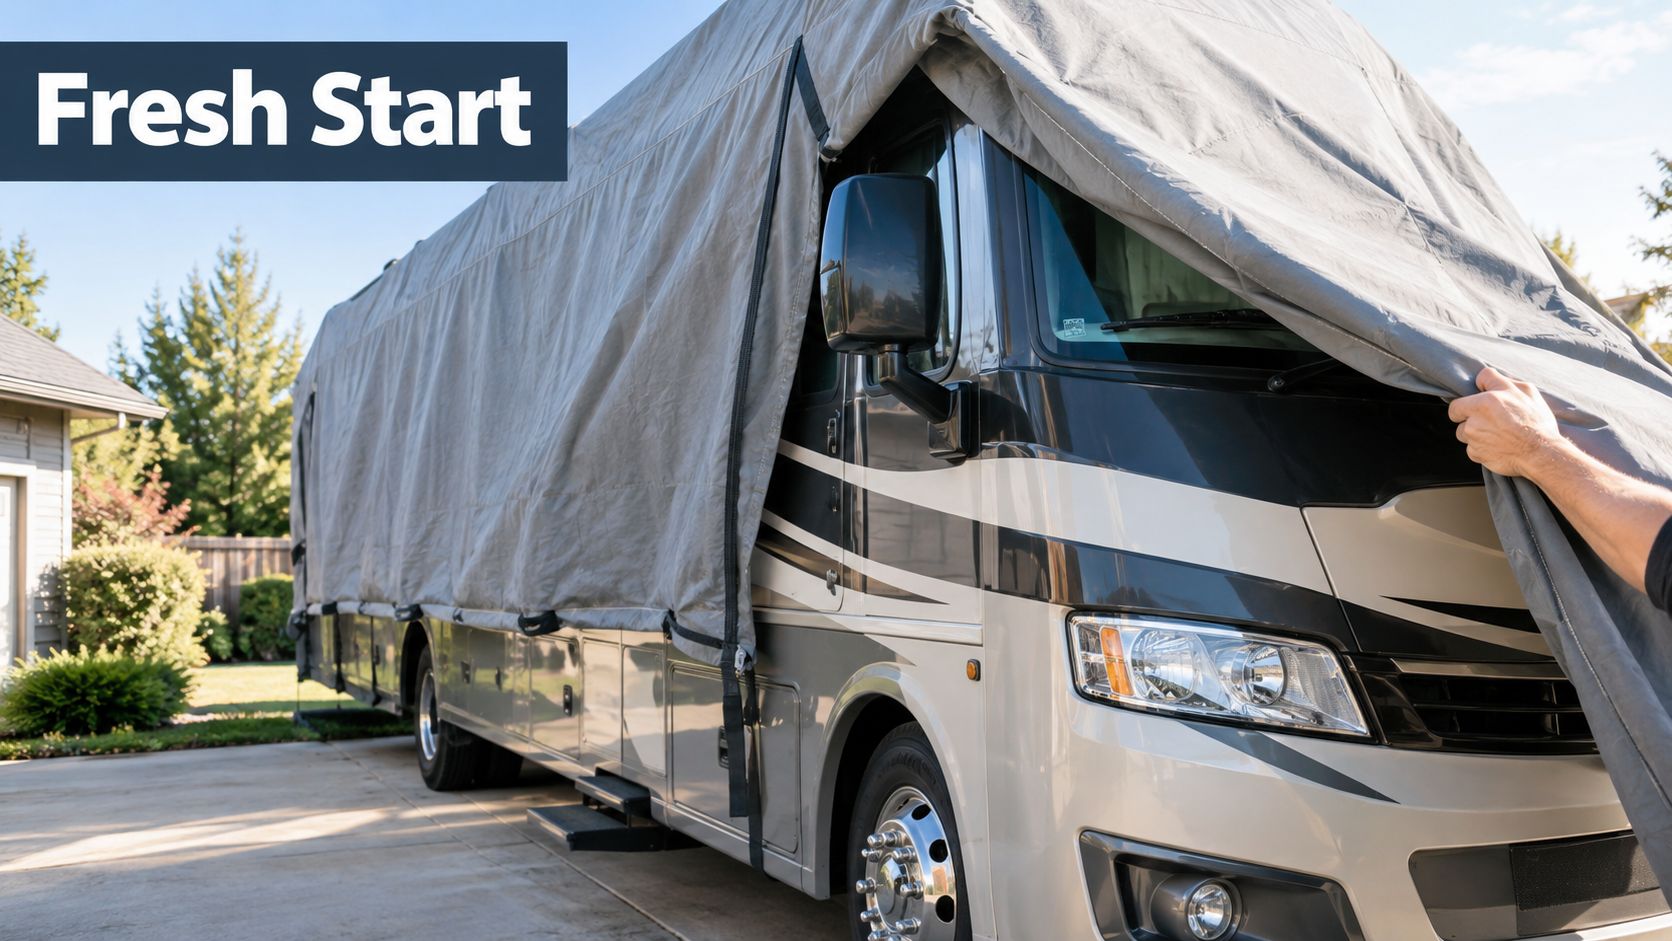
The first spring inspection should feel more like detective work than maintenance. I start at the front cap and move slowly around the coach before opening a faucet, connecting a hose, or turning on propane. A loose cover can rub against graphics, while a tight one can hide rodent activity, torn seals, and debris around vents.
Start outside, not at the water pump
Look beneath the coach for nesting material, chewed insulation, and loose wiring. Inspect the roof seams, antenna bases, vent covers, air-conditioner shroud, windows, slide seals, and exterior storage doors. A small opening matters because water introduced later can find its way into a wall or storage compartment.
Check the tires for visible cracking, flat spots, and obvious pressure loss. Inspect the valve stems and wheel areas, then look underneath for cracked low-point drain fittings or hanging lines. Don't treat a clean interior as proof that the exterior survived storage without damage.
Notice what changed over winter
Open the main compartments and use a flashlight. Look for droppings, shredded material, corrosion, damp insulation, and any odor that wasn't present when you stored the RV. A chewed wire near a battery compartment can become an electrical fault once power returns, and a damaged propane line deserves attention before any appliance is lit.
Service-bay habit: Don't pressurize a system you haven't visually inspected. Water turns a questionable fitting into an active leak before you have time to find the cause.
Once the walk-around is complete, shift from detective to technician. Write down anything unusual, photograph questionable areas, and keep the owner's manual nearby. The correct answer to when to de-winterize an RV also depends on whether freezing weather still threatens the plumbing, so don't restore water service while overnight conditions can return to freezing.
Tools, Supplies, and Pre-Flight Checks
Aviation crews don't begin a flight by discovering that a required gauge is missing. Use the same discipline here. Gather a bucket, garden hose, adjustable wrench, screwdrivers, flashlight, pressure gauge, white RV-safe drinking water hose, potable water sanitizer, nitrile gloves, eye protection, and shop rags before touching a valve.
A pressure regulator belongs between the campground or household spigot and the RV. It protects the coach from uncontrolled supply pressure while still allowing you to test the plumbing gradually. Keep access to a dump station or approved disposal point available, and never send chemical solutions where local rules prohibit them.
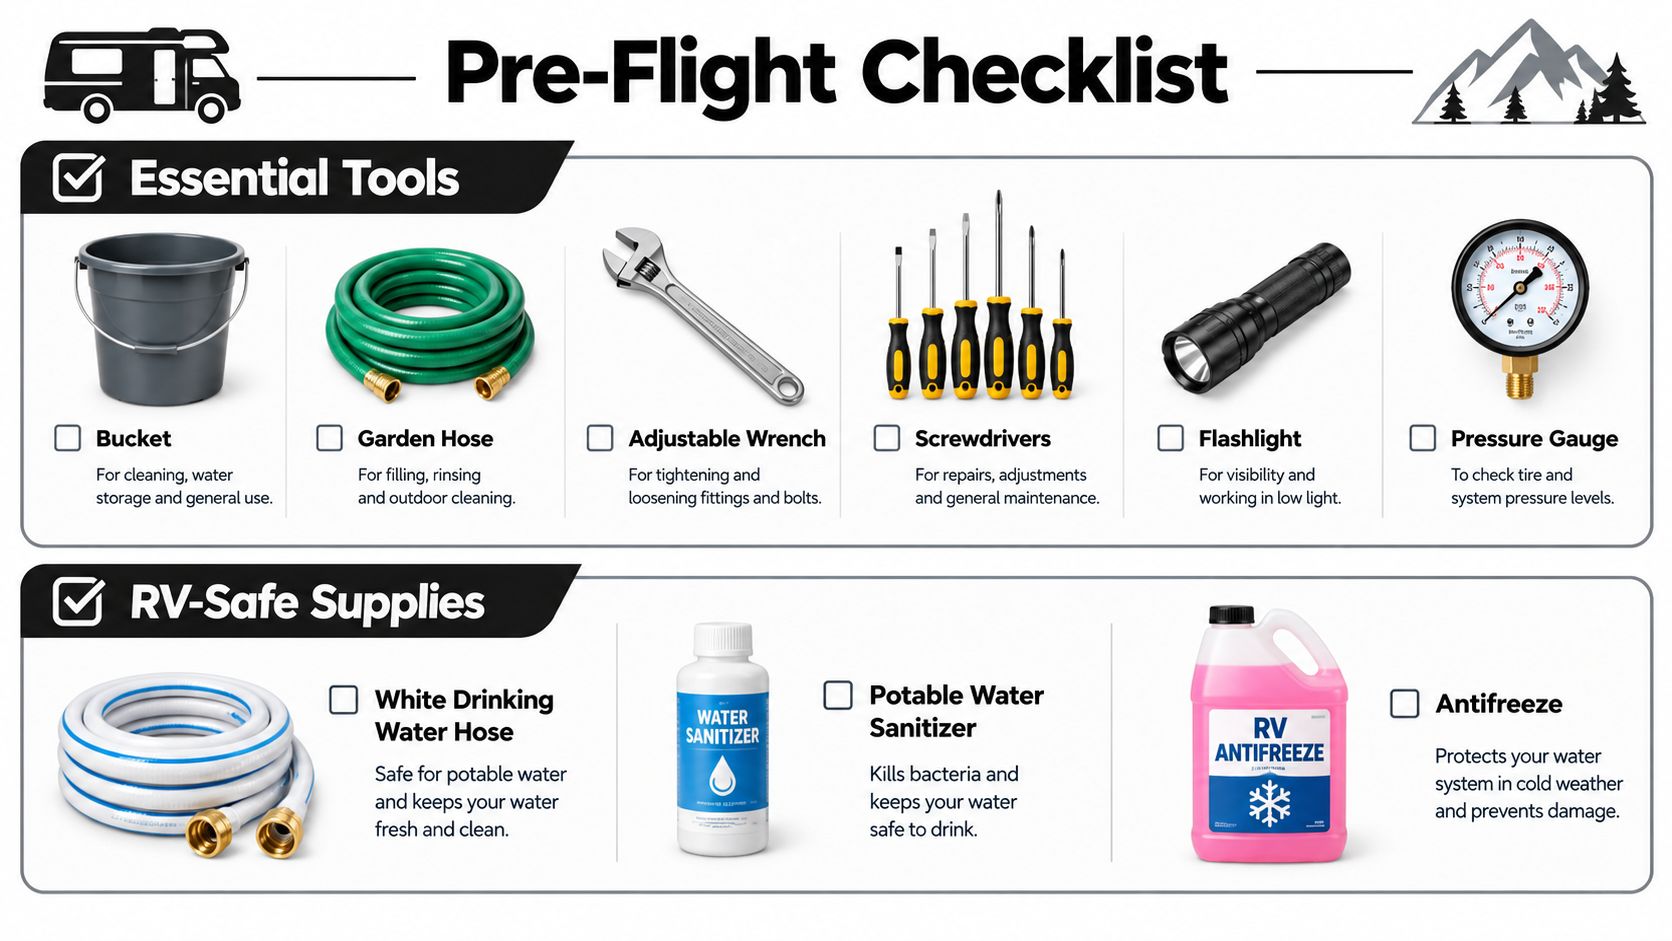
Use a written pre-flight checklist
Before water enters the coach, confirm:
- Water source: City water is off, and the white drinking-water hose is ready.
- Waste system: Black and gray dump valves are closed.
- Water heater: The bypass valve position is verified before flushing.
- Low-point drains: Every drain is identified, accessible, and ready to be capped after purging.
- Fresh tank: The capacity is known before you calculate sanitizer.
- Filters: Any cartridge removed for winter storage is either replaced or kept out of the flow path during sanitizing.
- Safety gear: Gloves, eye protection, rags, and a bucket are within reach.
The pressure gauge helps you find problems without guessing. The flashlight and dry paper towels help reveal seepage that a quick glance misses. A bucket keeps pink residue controlled around faucets, low-point drains, and the exterior shower.
Don't start the job and then make a hardware-store run for a missing hose or cap. Interruptions encourage owners to reconnect components out of order, skip a fixture, or leave an air pocket in a branch line. A complete setup makes RV spring maintenance cleaner, safer, and easier to document.
Purging Antifreeze and Resetting the Water Heater Bypass
The water heater bypass deserves attention before any flush. Keep the heater bypassed while clearing antifreeze from the rest of the plumbing, then return the valves to normal operation only after the lines are clean. This prevents antifreeze from entering the heater tank and avoids wasting 5–6 gallons in some systems, a problem described in RV water-heater bypass guidance.
Follow the purge order
Open the hot and cold faucets, then open the low-point drains. Route the pink fluid into a bucket where possible. Include the kitchen sink, bathroom sink, shower, toilet supply, and exterior shower. The outdoor shower is easy to forget, and its short hose can hold a pocket that reappears after the main fixtures look clear.
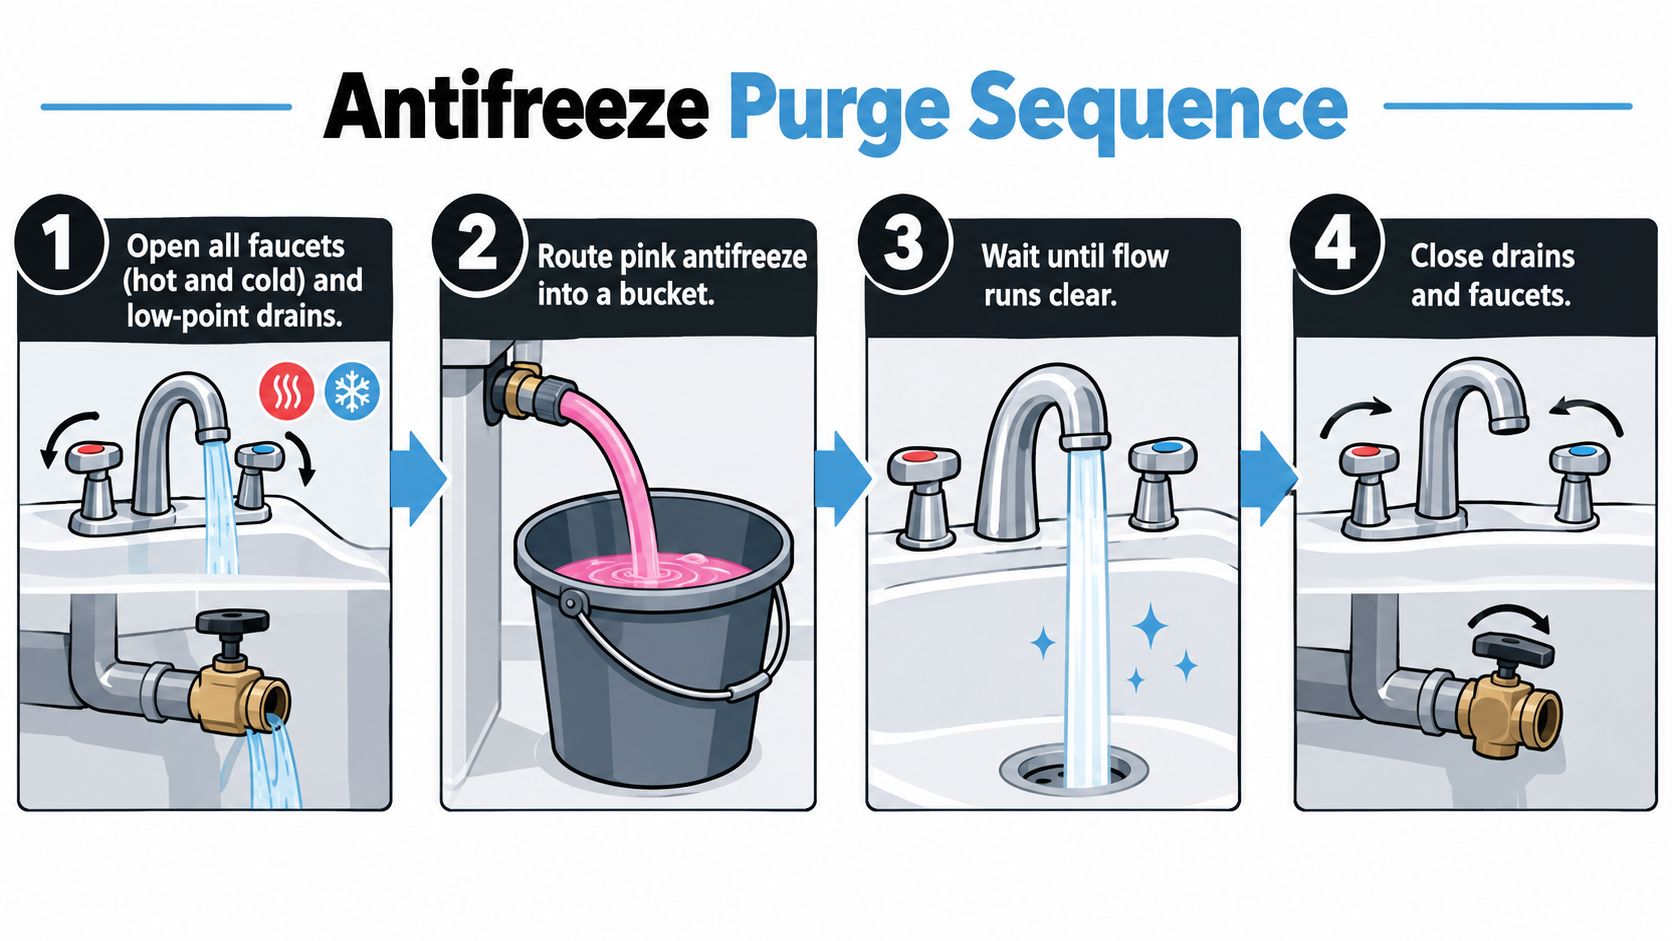
Connect the white drinking-water hose through a pressure regulator, but bring pressure up gradually. You can use city water or the fresh-water tank and pump, depending on your coach and the instructions in its manual. Cycle hot and cold lines separately, and continue until every fixture runs completely clear, not merely until the pink color fades.
If the bypass levers feel stuck, don't force them with excessive force. A damaged valve can create a larger repair than the original winterization. Check the filter housing too. A cartridge left in place may retain pink fluid and release it after the rest of the system appears clean.
Drain the heater without energizing it
Confirm the bypass valves are in the correct position before removing the water-heater drain plug or anode rod. Keep the heater empty while you work on the plumbing, and never turn on an electric heating element until the tank is confirmed full. Heating an empty tank can damage the element or the tank itself.
After the antifreeze smell disappears, close the low-point drains and faucets, then inspect the heater connection and drain opening for damage. Replace the drain plug or anode rod according to the appliance design, return the bypass to normal flow, and fill the tank slowly. Open a hot faucet to release air. Water should flow steadily before the heater receives power.
For general background on heater repairs and professional inspection, Stultz Plumbing's water-heater resource can help explain why an empty or malfunctioning tank should not be energized.
This video provides a visual reference for the purge sequence:
The purge is complete when hot and cold fixtures run clear, the pink color does not return after another cycle, and the water-heater bypass is ready for normal operation. Only then should you sanitize the fresh-water system.
Sanitizing the Fresh Water System
Flushing removes antifreeze. Sanitizing makes the system ready for drinking and cooking. The U.S. CDC says most RV manufacturers recommend draining, disinfecting, and flushing the water system at least annually or whenever the RV has been unused for a few months. That makes sanitation a foundational part of learning how to de-winterize your RV, not an optional finishing touch. The broader process and the commonly used bleach proportion are described in this RV water-system cleaning guide for Utah campers.
Mix by tank capacity
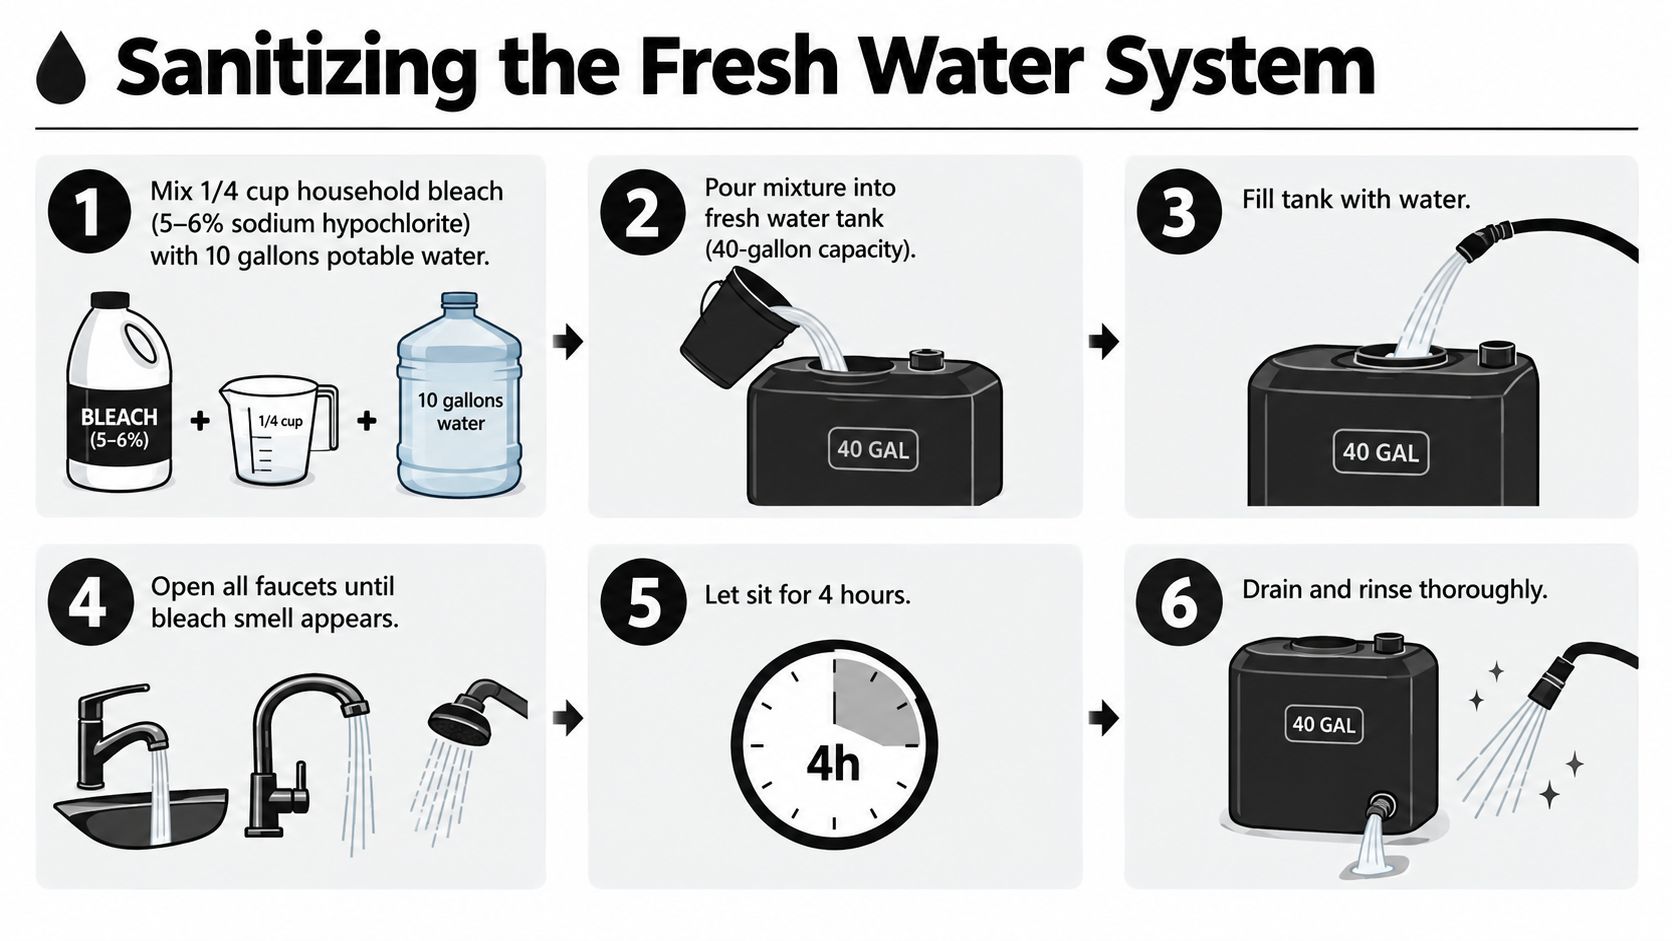
Use a measured solution rather than pouring bleach by feel. A common benchmark is 1/4 cup of bleach per 15 gallons of fresh-water capacity, and the source guidance also notes that a 60-gallon tank needs roughly 1 cup of bleach. Check your tank size before mixing because the amount scales with capacity. For the specific 40-gallon example used in this procedure, mix 1/4 cup of household bleach, 5–6% sodium hypochlorite, with 10 gallons of potable water, then add that mixture to the fresh tank and fill the tank with clean water.
Keep the water heater bypassed during this step so the sanitizer reaches the intended plumbing without filling the heater tank. Bypass filtration cartridges as well, or remove a cartridge that could absorb the solution and release a stale taste later.
Circulate, dwell, and rinse
Run the kitchen, bathroom, and exterior shower fixtures until you smell chlorine at each spout. Open both hot and cold sides, and flush the toilet bowl twice so the solution reaches that supply line. Then let the solution sit for at least 4 hours, with many RV instructions recommending 12 hours or overnight for additional confidence. Technical references describe at least 4 hours for a 50-ppm solution, while stronger owner-guide practices commonly use the longer dwell time. See the CDC RV sanitation recommendations for the annual and post-storage rationale.
After the dwell period, drain through every faucet and low-point drain. Refill with potable water and flush every line until the bleach odor is gone. You can use the requested 5–10 minute rinse as a practical final flush, but the smell and taste are the deciding checks, not the clock alone. A 4-in-1 test strip can provide an additional check, with the target described as 0–0.5 ppm chlorine.
Record the date, tank capacity, bleach concentration, and rinse result in your maintenance log. That record helps the next owner, your service advisor, and you when the RV returns from another storage season.
Pressurizing the System and Hunting for Hidden Leaks
A dry exterior doesn't prove the plumbing is sound. Freeze damage often appears only after the pump or city-water connection restores pressure. Use a controlled test at roughly 20–30 PSI, a range that makes small drops easier to notice than normal operating pressure, as outlined in this RV de-winterization checklist.
Run a controlled leak-down test
Close every low-point drain and faucet. Connect the pressure gauge, pressurize the system gradually, and then shut off the water source. Watch the gauge for 20–30 minutes. A drop greater than 2 PSI signals trouble in the procedure described above, so don't dismiss it as ordinary air movement.
Walk through the coach with a flashlight and a dry paper towel. Check under every sink P-trap, behind the toilet, around the pump head and fittings, near the water-heater anode area, and where low-point drains meet the frame. Inspect the city-water inlet, exterior shower quick-connect, tank-fill cap, and accessible hose junctions for hairline cracks.
| Check Point | Acceptable Reading | Action If Drop Detected |
|---|---|---|
| Main plumbing gauge | Holds within the test range during the observation period | Shut off the pump and isolate branches before inspecting fittings |
| Sink and shower connections | No damp paper towel or visible drip | Open the cabinet, dry the area, and identify the exact fitting |
| Pump head and fittings | No cycling after the source is closed | Inspect pump connections and consult the RV water-pump replacement guide |
| Water-heater area | No seepage around the drain or relief components | Stop testing and arrange service if the tank or valve leaks |
| Exterior shower and city inlet | No moisture or pressure loss at the connection | Replace damaged seals or have cracked fittings assessed |
If the pump cycles back on within a few minutes after the water source is shut off, the system is losing pressure somewhere. Isolate one branch at a time rather than repeatedly running the pump. For hose-management ideas before connecting at a campground, HYDAWAY's hose guide for travelers offers useful context on carrying and handling long water hoses.
Battery, Propane, and Appliance Wake-Up
Plumbing is only half of a spring commissioning. A coach can have clean water and still fail its first Utah trip because the battery is weak, a detector is silent, or a propane appliance won't establish a clean flame.
Restore 12-volt and shore power carefully
Start at the battery bay. Clean corrosion with a wire brush, tighten terminals to the manufacturer's specification, and top flooded cells with distilled water if the battery design requires it. Verify resting voltage is above 12.4V, then charge fully before travel. A swollen battery, damaged case, or battery that won't hold charge belongs in service rather than in a storage compartment.
Reconnect shore power through a surge protector. Let the converter run for an hour, then test each 120-volt outlet and press the GFCI reset. Repeated trips, heat at an outlet, melted insulation, or a converter that behaves erratically are reasons to stop. Use this RV battery maintenance guide for Utah adventures when you need a deeper battery check.
Treat propane as a leak test, not a lighting exercise
Open the propane valve slowly and apply soapy water to accessible fittings. Bubbles indicate a leak. Stop there and arrange inspection. If connections remain dry, light the range, oven, furnace, refrigerator, and water heater one at a time, watching for steady burner flames and unusual odors.
Replace the batteries in the carbon-monoxide and propane detectors, then confirm each test beep. Run the generator under 50% load for 30 minutes to clear stale fuel from the operating system. Finally, operate slide-outs, the awning, and stabilizing jacks with the engine running, watching for hesitation, grinding, or uneven movement.
When to DIY and When to Bring It to Motor Sportsland
Use a simple decision rule. Continue with driveway work only when the antifreeze purged cleanly, the bypass was corrected, the 20–30 PSI pressure check held, and the battery, propane system, and detectors behaved normally. If any one of those conditions fails, the risk is no longer limited to inconvenience.
| Symptom After De-Winterize | DIY Repair | Bring to Motor Sportsland |
|---|---|---|
| Pink fluid returns at a fixture | Repeat the fixture-by-fixture purge | Escalate if it persists after drains, filters, and exterior lines are checked |
| Fresh water smells or tastes wrong after flushing | Repeat sanitation and rinse thoroughly | Service inspection if the condition remains |
| A fitting drips under pressure | Shut off water and tighten only an accessible connection | Bring it in for leaks behind panels or damaged plumbing |
| Water-heater relief valve weeps while cold | Do not operate the heater | Request inspection of the valve and tank |
| Battery is dead, swollen, or won't hold charge | Clean terminals only if the battery is sound | Have the battery and charging system tested |
| Propane detector chirps after reopening the tank | Close the propane valve | Arrange professional gas-system inspection |
| GFCI trips repeatedly or an appliance won't light | Reset once and stop if it trips again | Use the service bay for electrical, furnace, or refrigerator faults |
| Roof, AC shroud, slide seal, or compartment shows critter damage | Photograph and isolate the area | Schedule inspection before travel |
Our team at Motor Sportsland can inspect plumbing, electrical systems, propane appliances, roof areas, and collision or exterior damage at the service center. Bring the coach in if you find a pinhole leak behind a panel, a weakened anode rod, low-voltage battery damage, or any fault you can't identify confidently. Scheduling spring work before Memorial Day weekend queues build gives technicians time to test the coach rather than rush a partial repair.
Motor Sportsland offers spring de-winterizing support, plumbing and electrical repairs, appliance checks, parts, and broader RV service for owners in Utah. Visit Motor Sportsland to browse RV options, find service information, or connect with our team before your first tow toward Jordanelle, Bear Lake, or the Wasatch Mountains.
RV De-Winterizing FAQ
What does de-winterizing an RV involve?
It reverses winter storage preparation. You inspect the coach, purge antifreeze or stale water, restore the water-heater bypass, sanitize the fresh-water system, pressurize the plumbing, and test electrical, propane, and appliance systems.
Should I sanitize after flushing RV antifreeze?
Yes. The CDC recommends draining, disinfecting, and flushing an RV water system at least annually or whenever the RV has been unused for a few months. Flushing removes residue, while sanitizing addresses the potable-water system before drinking or cooking.
How much bleach should I use?
A commonly used benchmark is 1/4 cup per 15 gallons of fresh-water capacity. A 60-gallon tank requires roughly 1 cup under that benchmark. Confirm your tank capacity and follow your RV and sanitizer guidance before mixing.
Why does pink antifreeze keep coming back?
Check the low-point drains, exterior shower, hot and cold branches, and any filter housing. A pocket can remain in a short line or cartridge and reappear after the main fixtures look clear.
When can I turn on the water heater?
Only after the bypass is returned to normal operation, the tank is filled, and water flows steadily from a hot faucet. Energizing an empty tank can damage the heating element or tank.
What leak symptoms require service?
Bring the RV in for pressure loss, pump cycling after the water source is shut off, leaks behind panels, a relief valve that weeps while cold, repeated GFCI trips, propane-detector alarms, or appliances that won't light cleanly. These signs can indicate damage that isn't safe or practical to diagnose casually in a driveway.
