
Replacing RV Slide-Out Seals

A Utah summer is hard on rubber
By the time the nights cool off, the seals around your slide-outs have taken months of dry heat and high-elevation UV. Rubber loses its flexibility, shrinks back from the corners and starts to check and crack along the bulb. That's why replacing RV slide-out seals shows up on so many fall punch lists around Millcreek and Spanish Fork. Done before the first real storm, it keeps wind-driven rain and blowing snow from finding your flooring and lower cabinets. Most owners can handle the seal work itself with patience and a clean work surface.
Start by finding out what's actually failing
Run the slide out on level ground with the coach powered and stable. Then walk the opening with a flashlight. You're looking at two different jobs that get lumped together: the bulb seal that squeezes shut when the room is retracted, and the wiper that rides against the slide wall and sheds water while the room moves.
Bad signs are easy to spot once you know them. A chalky, powdery surface. Cracks in the bulb that open up when you press it. Corners where the seal has pulled back and left a gap you can see daylight through. Flat spots that never spring back. Inside, check the corners of the slide floor for staining.
Don't reach or crawl under an extended room. If the slide moves unevenly, binds, drags at one end or the motor sounds like it's struggling, stop there and have our service department look at it. Slide mechanism adjustment and anything touching the drive motor or its wiring is shop work, not driveway work. Same goes for the seal along the top of a slide when it means getting on the roof, or for anything involving a slide topper.
Match the seal profile before you pull anything off
Slide seals come in a lot of profiles, and they are not interchangeable by eye. Measure what's on the coach, take a photo, and bring a short piece of the old seal with you if any of it has already fallen off. Our parts counter can match the profile to your unit. Don't guess on this one, because a seal that's close but not right will either hold the room open or never touch at all.
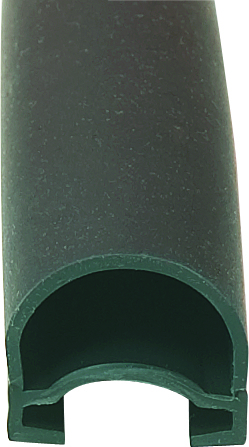
For a bulb-style seal with an EK base, the AP Products Modified EKD Seal, Black 1 x 1 x 35' is a modified EK D seal. The D-shaped bulb is the part that compresses when the room comes in, so it's what keeps weather out of the closed opening.
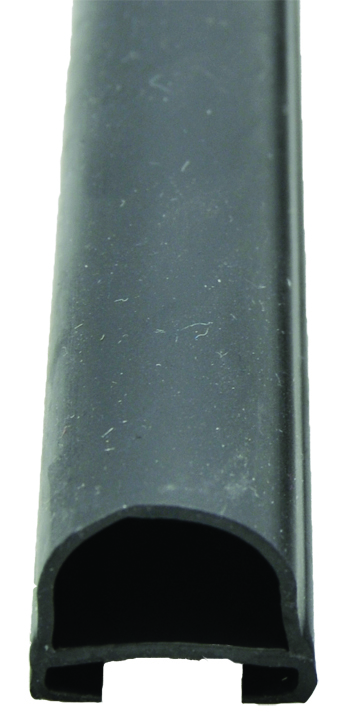
The AP Products D Seal - EKD Base Black 1" x 15/16 x 35' is another black EK D seal. It works the same way, with the base holding the seal in place and the D bulb doing the sealing.
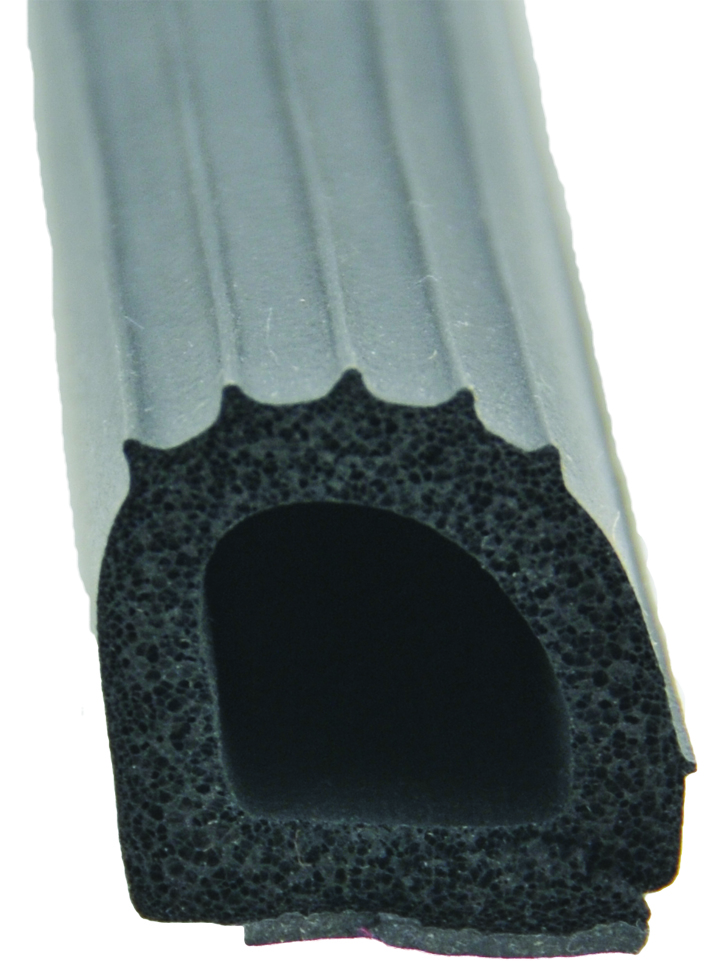
If your coach uses a foam bulb instead of a hollow rubber one, the AP Products Foam D Seal w/Hats 5/8" x 5/8" x 50' is a ribbed foam D seal with hats. The foam bulb compresses and recovers, and it comes in a longer 50-foot roll.
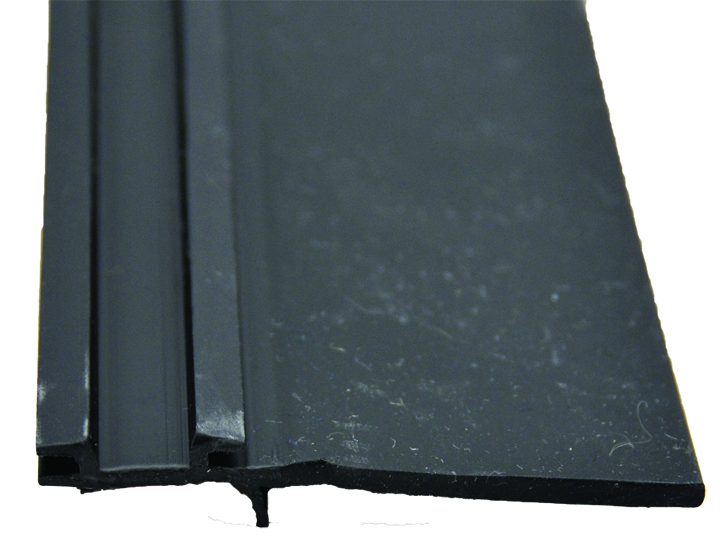
For the sweep side of the job, the AP Products EK Base W/2" Wiper Black 1/2" x 2 3/4" x 35' pairs an EK base with a 2-inch wiper. The wiper is the flexible flap that lays against the slide wall and pushes water and grit away as the room travels.
The AP Products EK Base W/2-7/8 Wiper Black 1/2" x 3 2/3" x 35' is the same idea with a wider 2-7/8 wiper. Wiper width matters, which is another reason to measure before ordering.
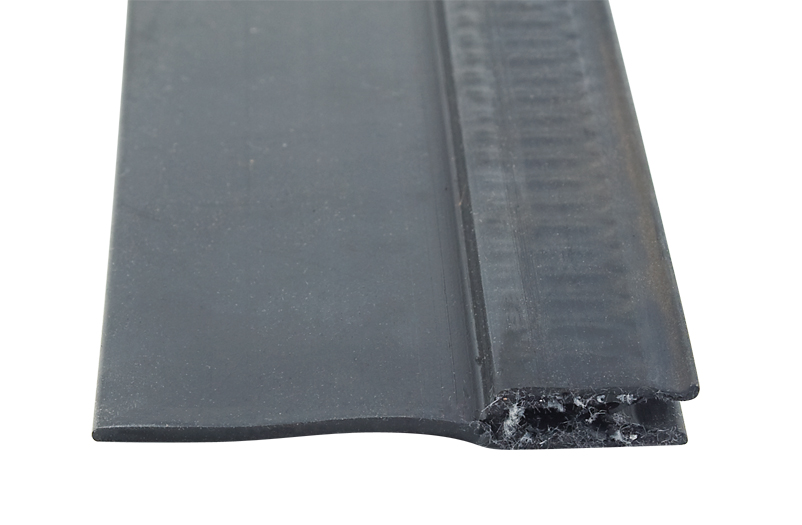
And if your setup uses a clip-on style rather than a base, the AP Products CLIP ON WIPER W/2 WIPER-7/16 X 3 X 35' is a clip-on wiper. Bring us a sample or a clear photo of the edge it attaches to and we'll sort out which family you're in.
Replacing RV Slide-Out Seals: doing the work
Pick a mild, dry day. Cold rubber fights you, and rubber sitting in 95-degree sun gets floppy and hard to keep straight. Extend the room and block off the area so nobody cycles the slide while your hands are in it.
Work one run at a time instead of stripping every side at once. Start at a corner and pull the old seal off steadily. It usually comes away in long pieces, though brittle, sun-baked seal likes to snap. Keep the removed piece. It's your length reference and your profile reference.
Clean the mounting surface completely. Old adhesive residue, dirt, dead sealant and bug nests all need to come off, because new seal will not seat over a lump. A plastic scraper and a mild cleaner do most of it. Let the surface dry before you install anything.
Lay the new seal in loose along the full run first and check it sits where the old one did. Then work it in from one end, pressing it home a foot at a time. Do not stretch it as you go. Stretched seal pulls back over the next few weeks and opens gaps at the corners, which is exactly the failure you're trying to fix. Leave it slightly long and trim the ends square when the run is seated.
Corners deserve your slow attention. That's where nearly every leak starts. Butt the ends tight against each other rather than leaving a hair of daylight, and make sure the bulb or the wiper still lays in the same direction it did before.
Check it afterward
Bring the room in and watch the seal as it closes. The bulb should compress evenly across the whole run, not bottom out in the middle while the ends float. The wiper should stay flat against the slide wall instead of folding over on itself or curling under.
Try a paper test. Close the room, slide a strip of paper into the joint at several points and see whether it drags the same everywhere. Loose spots tell you the seal isn't seated or the profile is off.
Then do a water test. With the room closed, run a garden hose over the opening from the outside for a few minutes while somebody watches the inside corners and the floor edge. No hose against the roof line, and don't pressure-wash a fresh seal.
Check it again after a week of cycling. Seal settles in, and that's when a corner gap or a lifted end will show. A rubber-safe conditioner a couple of times a year slows down the drying that got you here, and our parts counter can point you to something that won't attack the rubber.
Frequently asked questions
How often do slide seals need replacing?
There's no fixed interval, since it depends on sun exposure, how often the room cycles and how the coach is stored. In our climate, owners commonly get several years out of a set before cracking and shrinkage show up, and dry-camping in open sun shortens that.
Can I replace just the bad section?
You can, and plenty of people do when one short run has failed. Splices are potential leak points, though, so butt the ends tightly and keep an eye on that joint after the first few rains.
How do I know if I need a bulb seal or a wiper?
The bulb seal is the one that compresses when the room is fully in. The wiper is the flap riding against the moving slide wall. Many coaches use both, so bring measurements or a sample piece of each and our parts counter will match them.
What if the slide won't seal even with new rubber?
That usually points to slide adjustment or a mechanism issue rather than the seal. Have our service department check the room's alignment and travel before you buy more seal.
Should I cover the seals in storage?
Keeping the slides in and out of direct sun helps more than anything else. Clean the seals before storage and treat them with a conditioner made for rubber, and avoid petroleum-based products.
Parts in this post:
- AP Products Modified EKD Seal, Black 1 x 1 x 35'
- AP Products D Seal - EKD Base Black 1" x 15/16 x 35'
- AP Products Foam D Seal w/Hats 5/8" x 5/8" x 50'
- AP Products EK Base W/2" Wiper Black 1/2" x 2 3/4" x 35'
- AP Products CLIP ON WIPER W/2 WIPER-7/16 X 3 X 35'
- AP Products EK Base W/2 -7/8 Wiper Black 1/2" x 3 2/3" x 35'
Order now: call our parts counter at 801-262-2922, or stop in at either store, Millcreek in Salt Lake City or Spanish Fork. Browse all our RV parts and accessories.
