
How to Winterize an RV

Why Utah Weather Makes This Job Urgent
Water expands when it freezes. That's the whole problem. A half cup of water sitting in a low spot in your fresh water line turns into ice, the ice pushes outward, and the fitting splits. You won't know until spring, when you hook up the hose and find a puddle under the bed.
In the Salt Lake valley, we usually see the first hard freeze by late October. Up in the Uintas, at Bear Lake, or anywhere over about 7,000 feet, it comes weeks earlier. Learning how to winterize an RV is the single cheapest insurance you can buy against a plumbing repair bill, and the window for doing it in Utah is shorter than most people think.
The other thing about Utah is our shoulder season. You get a 70 degree Saturday in November and it's tempting to leave the rig ready for one more trip. The overnight lows are what get you. It can hit 22 degrees at 4 a.m. in Millcreek and be pleasant by noon. Freeze damage doesn't care what the afternoon looked like.
How to Winterize an RV, Step by Step
Plan on an hour or two the first time you do it. Work somewhere level so the tanks actually drain.
Start with the water heater. Turn it off and let it cool completely. Do not open the drain on a hot tank. Once it's cool, relieve the pressure, pull the drain plug or anode rod, and open the pressure relief valve so it drains fully. If your water heater runs on propane and you're unsure about shutting the gas down safely, have our service department handle it. Propane isn't a guessing game.
Drain everything else. Open the low point drains (usually two lines hanging under the belly, one hot and one cold). Open every faucet inside, hot and cold, plus the shower, the outside shower, and the toilet valve. Dump and flush the black and gray tanks, then drain the fresh water tank. Let it all run out before you close anything back up.
Bypass the water heater. Most rigs built in the last couple decades have a bypass valve kit already installed behind the water heater. Flip it to bypass so you aren't pumping six or ten gallons of antifreeze into a tank you just emptied. If you can't find yours or you're not sure which way the valves go, bring it by and we'll look at it with you.
Blow out the lines, then add antifreeze. These are two steps, not one or the other. Compressed air clears the bulk of the standing water out of the lines. Antifreeze fills whatever's left behind in traps, the pump head, and the low spots the air didn't reach. Skipping the antifreeze is how people end up with a cracked water pump.
Don't forget the drain traps. Pour antifreeze down the kitchen sink, the bathroom sink, the shower, and the toilet until you see pink in the bowl. Those P-traps hold water and they will crack.
The Parts That Do the Work
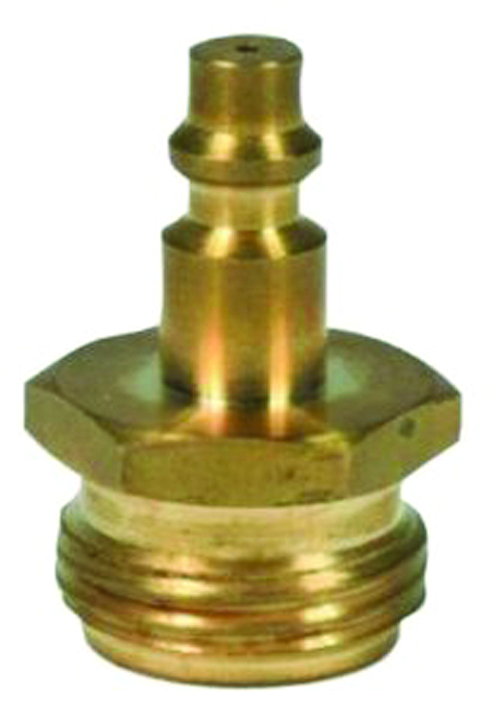
You need a way to get air into the system. The Camco Blow Out Plug, Quick Connect - Brass screws into your RV's city water inlet and attaches to an air compressor quick connect hose, so if you've already got a compressor with a quick connect setup in the garage, you're a few seconds from being hooked up. Brass holds up better than the plastic versions over repeated seasons.
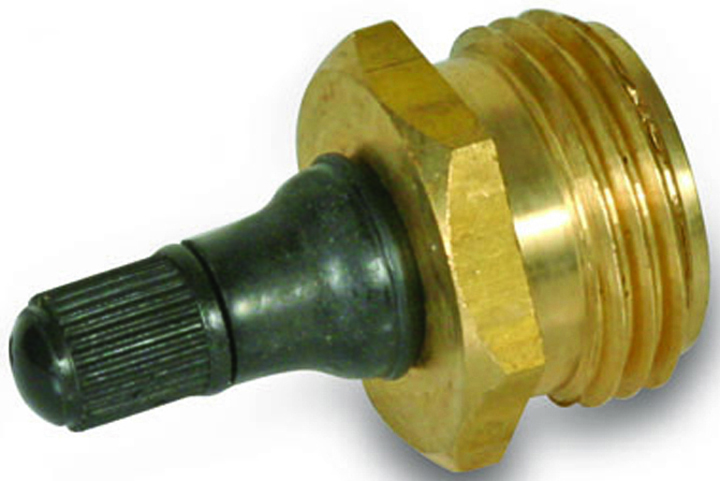
If you'd rather use a different air source, the Camco Blow Out Plug With Schrader Valve - Brass takes the same approach with a Schrader valve instead. Screw the plug into the city water inlet, open all your drains and faucets, then attach and activate your air pump until the lines run clear. Work one fixture at a time and close it once you get nothing but air.
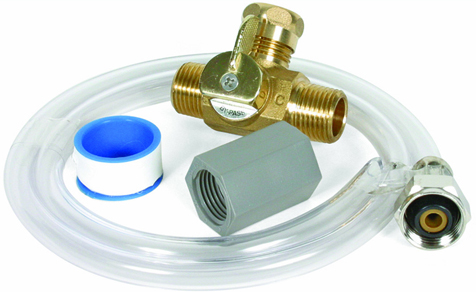
For getting antifreeze into the system, the Camco Pump Converter Winterizing Kit is the setup most people land on eventually. It's a permanent installation that goes in with an adjustable wrench, and it includes a brass valve, siphon hose, Teflon tape and pump adapters. Once it's in, winterizing becomes a matter of dropping the siphon hose into a jug and turning a valve. You install it once and use it every fall after that. Our parts counter can walk you through whether it'll work with your pump setup.
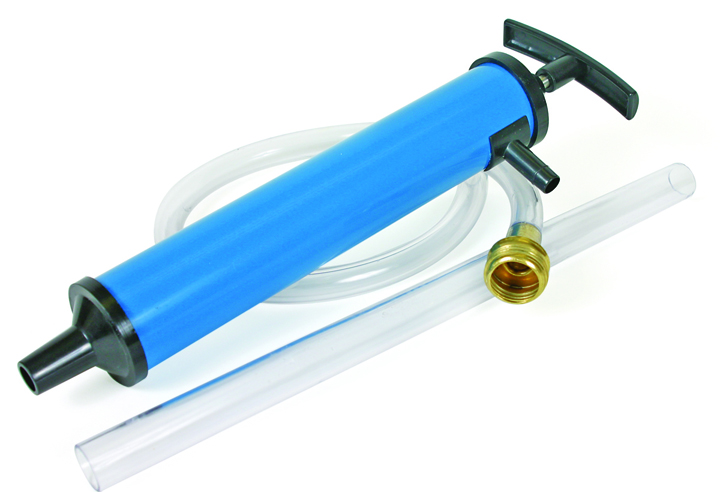
If you don't want to plumb anything in, the Camco Hand Pump Kit W/ Fittings pumps antifreeze directly into your waterlines and supply tanks. The kit comes with a flexible connecting line and a city water connection, so you're working from the outside of the coach. It's slower than running the onboard pump, but there's nothing to install and nothing to undo in the spring.
We can't tell you which fittings match your coach from a description over the counter alone, but bring in your year and model (or just take a photo of your inlet and pump) and the parts counter in Millcreek or Spanish Fork will sort it out.
What Else to Handle Before It Gets Cold
Pull the water filter cartridge if you run one. Antifreeze ruins them and they're cheap to replace in the spring.
Check the seals around your roof vents and any roof penetrations from the ground with binoculars if you can. Do not get on the roof to inspect or seal anything. Roof structure work goes to our service department. Same with your batteries and any 12 volt wiring questions. Battery maintenance over a Utah winter matters, and we'd rather do the disconnect and storage charge properly than have you guessing at it.
Leave the fridge propped open, prop the cabinet doors, and toss a couple of moisture absorbers inside. Our valleys go bone dry in January, but a closed-up trailer with any residual moisture will grow mildew.
One last note on timing. If you're storing the rig at a higher elevation property, in Heber, Park City, or anywhere up a canyon, move your winterizing date up by three or four weeks. Those areas can freeze hard in September.
Frequently asked questions
How much RV antifreeze will I need?
Most owners use two to three gallons for a typical travel trailer, more for a larger motorhome with a washer hookup or a second bathroom. Buy an extra jug. You'll use it on the drain traps and you'd rather have too much than run short halfway through.
Can I use automotive antifreeze instead?
No. Automotive antifreeze is toxic and it's not made for potable water systems. Use only the non-toxic RV antifreeze sold for plumbing systems.
Do I really need to blow out the lines if I'm using antifreeze?
Blowing out first removes standing water so the antifreeze doesn't get diluted below its effective concentration. It also uses less antifreeze overall. Most people who've had a freeze split do both from then on.
When should I de-winterize in the spring?
Wait until overnight lows stay above freezing consistently, which in the Salt Lake valley is usually mid to late April. Flush the fresh water system thoroughly until the pink is gone and the water runs clear at every faucet.
What if I already had a freeze before I got to this?
Bring it in. Cracks in fittings and pump housings often don't show until the system is back under pressure, and our service department can pressure test it and find the leaks before you take a trip.
Parts in this post:
- Camco Blow Out Plug, Quick Connect - Brass
- Camco Blow Out Plug With Schrader Valve - Brass
- Camco Pump Converter Winterizing Kit
- Camco Hand Pump Kit W/ Fittings
Order now: call our parts counter at 801-262-2922, or stop in at either store, Millcreek in Salt Lake City or Spanish Fork. Browse all our RV parts and accessories.
