
RV Carbon Monoxide Detector Guide: Utah Safety Tips

Modern RVs should have a UL 2034-certified carbon monoxide detector installed near sleeping areas, and most units need replacement within 5 to 10 years depending on the model. If your RV is older, stored for long stretches, or used off-grid around Utah, checking the detector's age, placement, and power source matters just as much as having one in the wall.
A lot of owners ask about this right before a trip. They're packing for Jordanelle, topping off propane, checking the batteries, and then they notice the little alarm on the wall and realize they haven't thought about it in years. That's normal. Carbon monoxide safety in an RV doesn't get much attention until a detector chirps, a recall notice shows up, or someone starts wondering whether the factory alarm still works after winter storage.
At Motor Sportsland, we talk about this with first-time buyers and longtime RV owners all the time. Utah camping adds a few real-world variables that generic advice skips over. Mountain weather changes fast, boondocking can drain batteries, and tight campsites can put generator exhaust closer to windows and entry doors than people expect. A good RV carbon monoxide detector helps, but the whole safety picture also includes placement, power, airflow, and whether your rig has any recall-related issues. If you understand those trade-offs, you'll make better choices before your next weekend on the road.
Why RV Carbon Monoxide Safety Matters More Than You Think
You pull into a campground above 7,000 feet, the temperature drops fast after sunset, and everybody shuts the windows to keep the heat in. The furnace runs longer than it did at home. In the morning, a generator starts two sites over while breakfast is going on inside your rig. That is a normal Utah camping sequence, and it is exactly why carbon monoxide safety deserves more attention than it usually gets.
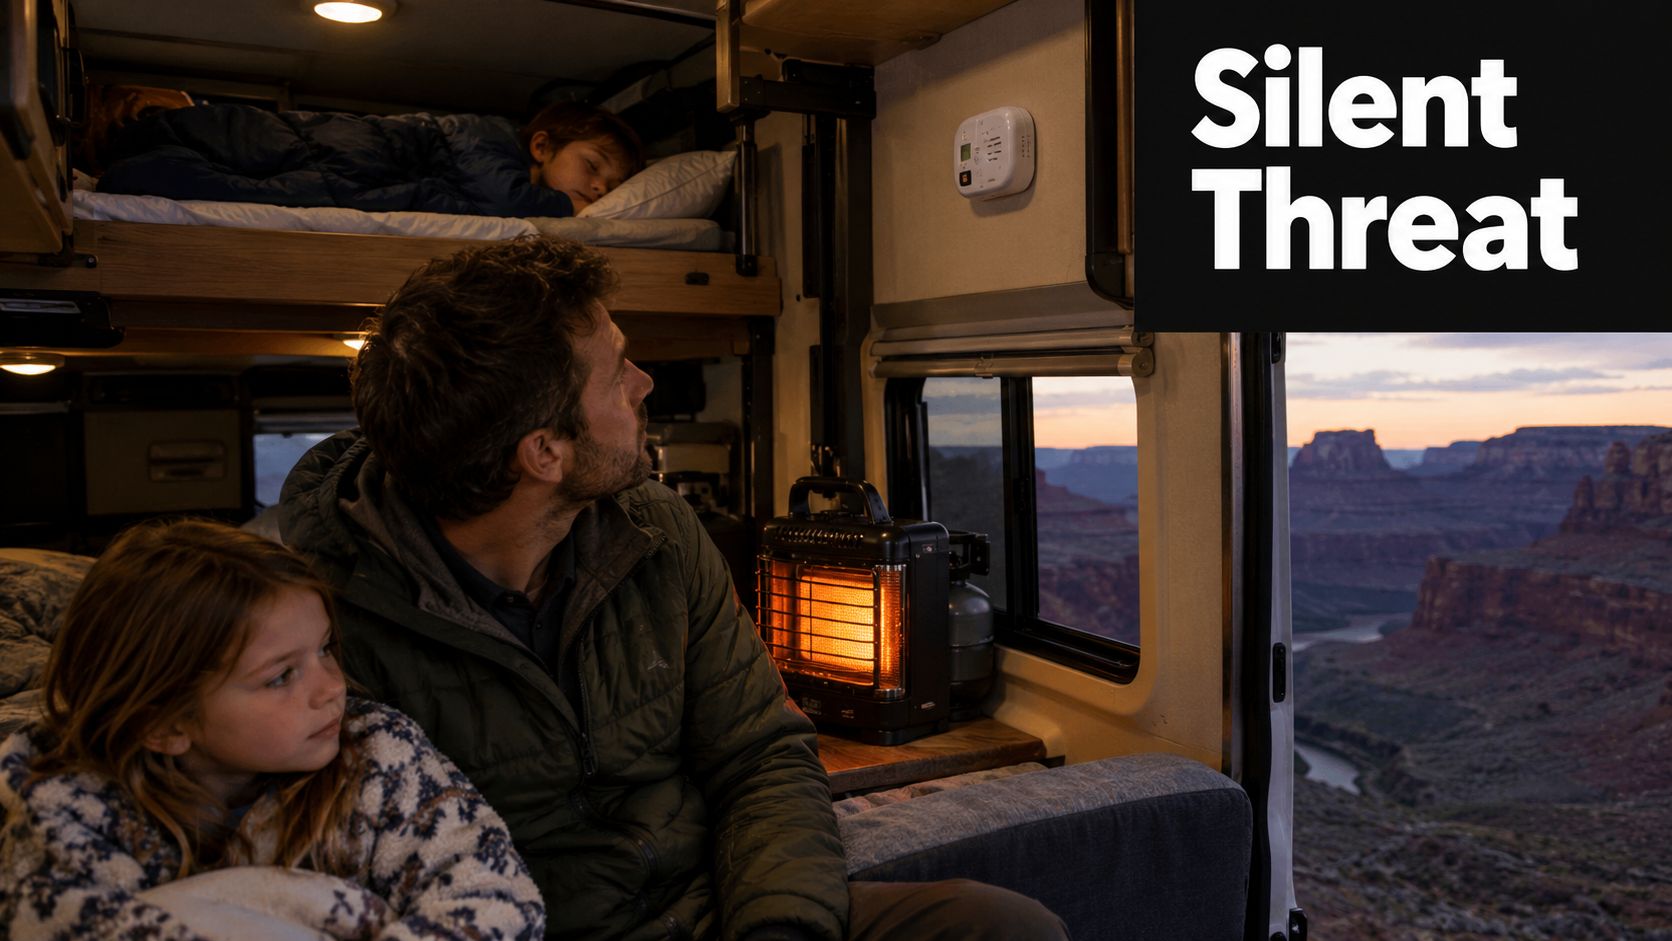
Carbon monoxide gives you very little warning. You cannot smell it, and you cannot judge by feel whether air inside a trailer or motorhome is carrying exhaust toward a bed, bunk, or rear corner. In service, we see owners stay on top of tires, roof sealant, and battery water, then assume the wall alarm is fine because it has not made noise. That assumption causes trouble.
Older RVs deserve extra scrutiny.
RV safety guidance changed over time, which is why used units can carry more risk than buyers expect. The RV Industry Association notes that carbon monoxide alarms became standard in new motorhomes in the 1990s and later expanded across towable RVs as industry requirements tightened (RVIA consumer safety information). In Utah, that matters because plenty of older fifth wheels, truck campers, and motorhomes still change hands through private sales, especially before hunting season and summer travel. A clean interior and a solid roof do not tell you whether the original detector is expired, missing, or tied into a weak 12 volt system.
I tell customers to treat the CO alarm the same way they treat tires on a used rig. If age is unknown, plan on replacing it.
Recent recall patterns add another reason to pay attention. We regularly advise owners to check not only whether a detector exists, but whether the alarm model, LP system, generator compartment, or appliance venting has been part of a recall campaign. A detector cannot make up for a furnace problem, an exhaust leak, or a failed appliance installation. It is one layer in the system.
A related point gets missed in home safety conversations too. If you want a plain-language overview of warning signs around household gas issues, this article on how to detect a gas leak at home is a useful companion read. Propane leaks and carbon monoxide are different hazards, but RV owners often mix them together, especially when their coach has a combo alarm.
Utah travel creates a few common risk moments that generic install advice often skips:
- Cold shoulder-season camping: Furnaces cycle longer, windows stay closed, and sleeping areas stay sealed up for hours.
- Dry camping and race-weekend generator use: Exhaust direction changes with wind, site spacing, and where the rig is parked.
- High-use mornings at trailheads and busy campgrounds: Engine exhaust, water-heater operation, and stovetop cooking can overlap in a short window.
- Post-storage departures: Weak house batteries, disabled detectors, and dirty burner assemblies show up after winter, not during checkout.
If your generator service is overdue, address that before the next trip. Our guide to RV generator maintenance and common service checks covers the issues that affect safe operation as well as reliability.
How RV Carbon Monoxide Detectors Actually Work
A good RV carbon monoxide detector doesn't act like a panic button that sounds the instant any trace of CO appears. It's designed to respond according to time and concentration thresholds. That surprises a lot of owners who assume silence means zero carbon monoxide is present.
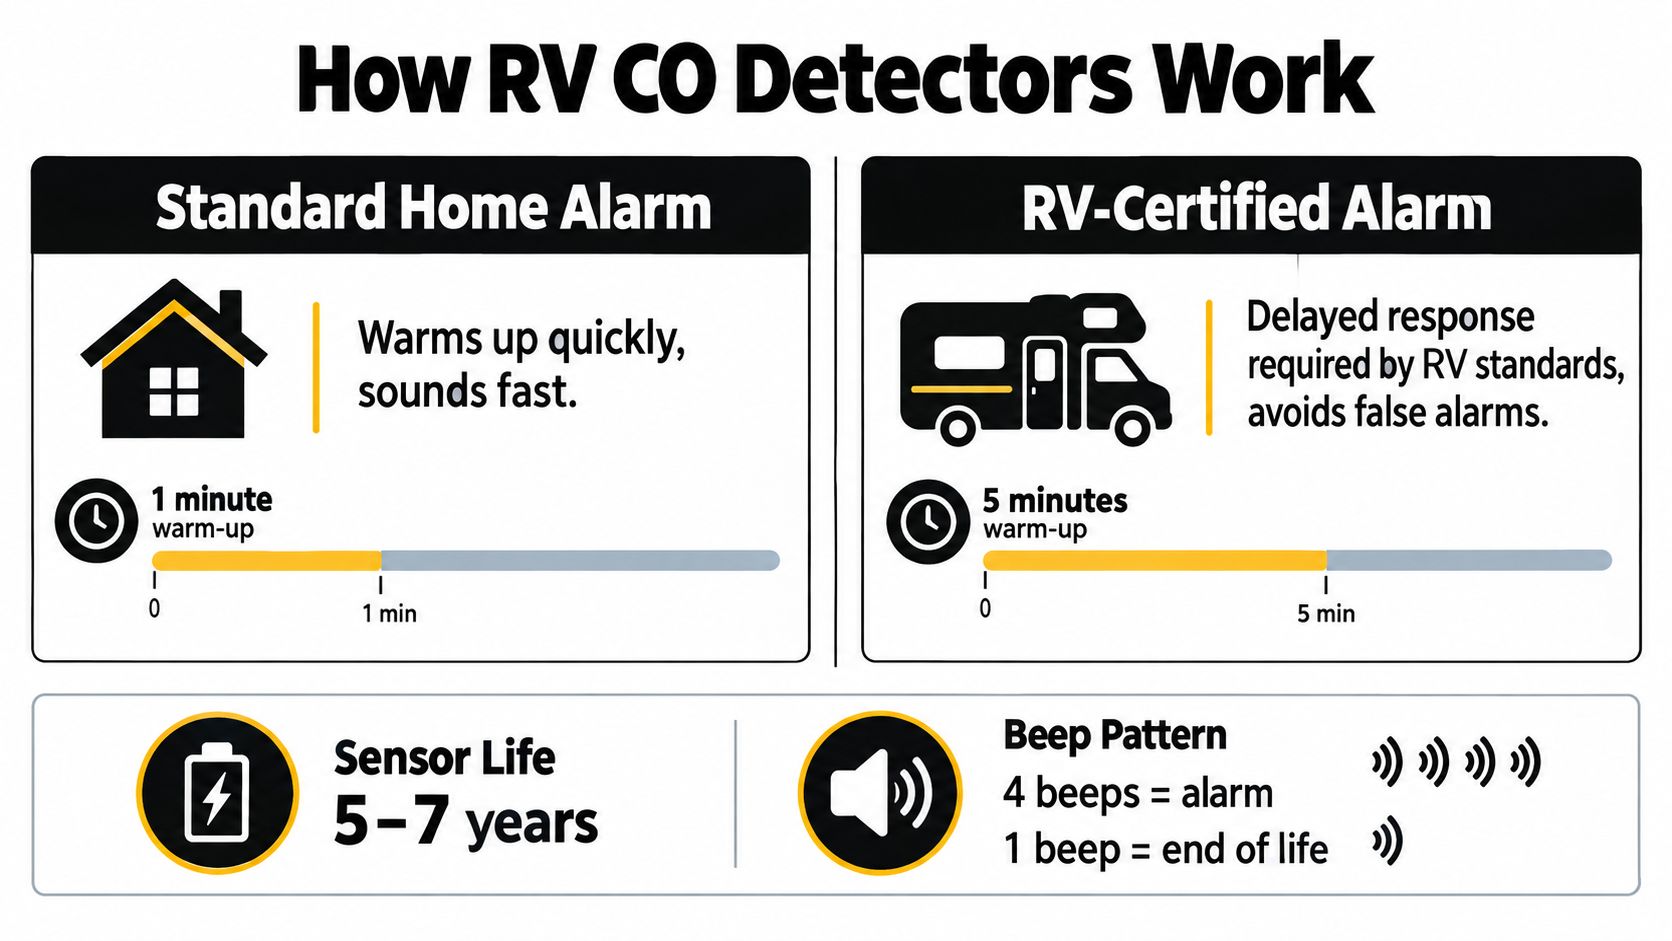
The alarm is delayed by design
UL 2034 behavior requirements for carbon monoxide alarms state that they must not signal below 30 ppm, must alarm at 70 ppm within 60 to 240 minutes, at 150 ppm within 10 to 50 minutes, and at 400 ppm within 4 to 15 minutes (UL 2034 requirements via Intertek).
That delay isn't a flaw. It's intended to reduce nuisance alarms from short, low-level exposure. In an RV, where cooking, startup cycles, and changing ventilation patterns can create brief fluctuations, that balance matters. The trade-off is simple. You should never assume the detector will instantly warn you about every presence event.
One listed RV detector shows a typical electrochemical sensor response profile of 70 ppm in 60 to 120 minutes, 150 ppm in 10 to 30 minutes, and 400 ppm in 4 to 15 minutes, along with a 4-beep alarm pattern and a flashing red LED indicator. The same resource notes that many RV units have a service life of 5 to 10 years from the manufacture date and are commonly listed to UL 2034 RV and UL 1484 RV (RV detector product listing and specs).
What owners usually misunderstand
The most common misunderstanding is thinking the detector should react like a propane alarm. It doesn't.
- Carbon monoxide detection: Built around exposure thresholds over time.
- Propane detection: Focused on a different gas behavior and a different hazard.
- Combo units: Often installed low because propane is heavier than air, even though carbon monoxide disperses more evenly.
Industry guidance also distinguishes those gas behaviors clearly. Propane is heavier than air and should be detected low, while carbon monoxide disperses more evenly, which is why combo alarms are often mounted low primarily for propane coverage (RV combo alarm placement explanation).
A quiet CO alarm doesn't prove perfect air quality. It only tells you the detector hasn't met its alarm threshold.
What the lights and beeps actually tell you
Owners tend to ignore indicators until they hear a chirp in the middle of the night. That's backwards. Learn the pattern before you need it.
| Signal | What it usually means |
|---|---|
| 4 beeps | Carbon monoxide alarm event on many RV units |
| Flashing red LED | Active alarm or alert status on supported models |
| End-of-life chirp | Sensor has aged out and the detector needs replacement |
| No power indication | Hardwired unit may have lost RV power or failed |
If you want a broader homeowner-friendly refresher on alarm basics and the difference between smoke and CO protection, this guide to carbon monoxide detectors covers the fundamentals in plain language.
Choosing Between Battery, Hardwired, Plug-In, and Smart Detectors
The right RV carbon monoxide detector depends less on marketing and more on how your RV is used. A couple who stays in full-hookup parks has different needs than a family that boondocks outside Moab, stores the trailer through winter, and relies on the house battery for long stretches.
Match the detector to the RV's power reality
Hardwired RV detectors are common because they tie into the coach electrical system. That's convenient until the battery is low, disconnected, or neglected in storage. Battery-powered units avoid that issue, but they add another maintenance item. Plug-in units can make sense in larger rigs with available outlets, but they're less flexible in many compact floorplans.
A practical way to look at it is this:
| Detector type | Where it works well | Trade-off to know |
|---|---|---|
| Battery-only | Older trailers, easy add-on installs, backup coverage | Batteries still need regular attention |
| Hardwired 12V | Factory-style installs, clean look, everyday convenience | Vulnerable if coach power is drained or disconnected |
| Plug-in | Larger motorhomes with steady outlet access | Placement options can be limited |
| Smart detector | Owners who want app alerts and status visibility | More features means more setup and more things to monitor |
The power-loss question matters
One underserved issue in RV safety content is what happens when power drops out. A discussion of UL 2034 updates highlighted a new requirement for a secondary power supply. That matters because many RV problems happen during shore-power loss, inverter issues, battery drain, or storage disconnects, which are exactly the times owners assume the hardwired alarm is still protecting them (discussion of RV CO incident trends and UL 2034 update topic).
For Utah owners, this comes up after winter storage more than people expect. A rig sits for months, the battery weakens, and the owner heads out thinking every factory safety device is live because it's still mounted in place. Sometimes it isn't.
Combo alarms often make more sense than single-purpose units
In many travel trailers and fifth wheels, a combo CO/LP unit is the practical choice because it covers two different hazards without taking up extra wall space. That doesn't mean it solves every problem. It means the placement has to respect both gases, and you still need to confirm the unit is intended for RV use.
Consider your habits before you buy:
- You camp off-grid often: Add a backup strategy if your primary detector depends on coach power.
- You bought an older used RV: A fresh, RV-rated replacement is usually the safer move than trusting the existing alarm.
- You have bunks or a separate bedroom: Think about sleeping-area coverage first, not just convenience.
- You want phone alerts: Smart features are useful, but they're not a substitute for a loud local alarm inside the RV.
The right answer isn't always one detector. In some layouts, adding another alarm near a second sleeping area gives more confidence than replacing a single factory unit with a fancier one.
Best Placement Rules for RVs and Why Airflow Matters
Placement is where a lot of good intentions go bad. An owner buys the right detector, installs it where the old one was, and assumes the job is done. In RVs, airflow, sleeping layout, and wall space can change how quickly a detector responds.
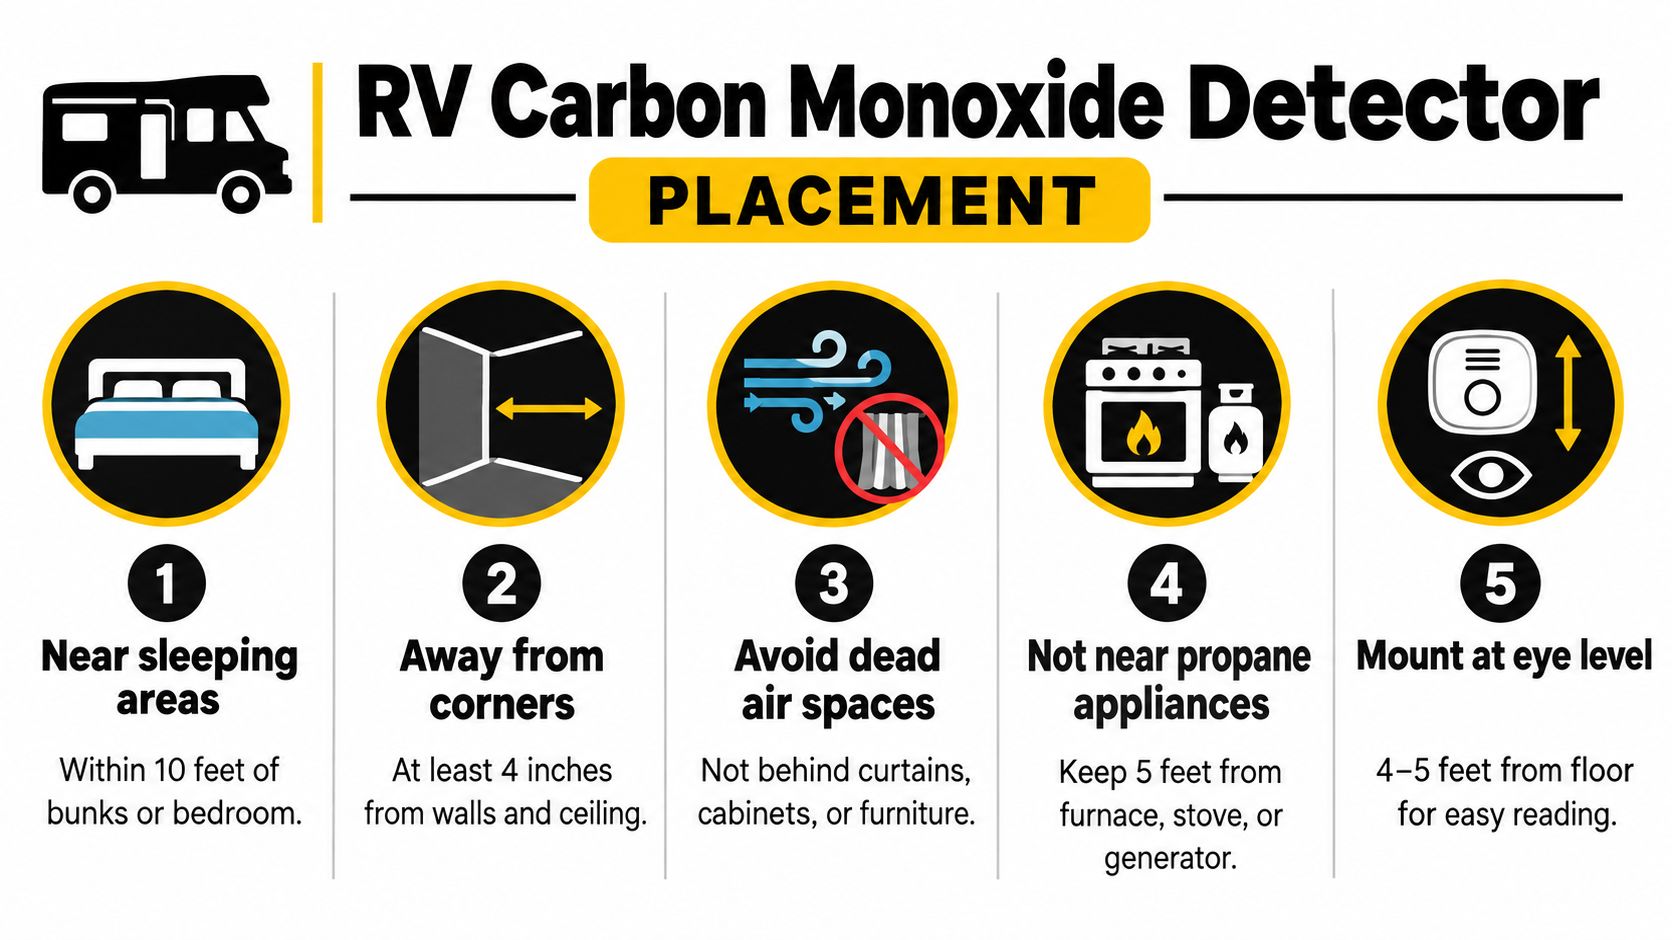
Start with the sleeping area
NFPA 1192 and RVIA guidance places CO detection within 15 feet of sleeping areas and away from vents and strong airflow because moving air can dilute or redirect CO plumes and increase response time (RV CO detector placement guide). A separate RV guidance summary repeats the same sleeping-area principle and notes that RV-specific placement differs from house rules because compact interiors change exposure patterns (RV placement overview).
That's the first anchor point. Put the detector where people sleep and breathe. Don't put it where it's easiest to screw into the wall.
Places that often cause trouble
We see a few recurring mistakes in bunkhouses, smaller trailers, and older motorhomes:
- Next to an air vent: Strong airflow can delay a realistic reading.
- Right by a window: Fresh air movement can dilute the plume.
- Hidden behind furniture or a curtain: The detector may stay accessible, but the air around it doesn't reflect the room well.
- Mounted only for convenience near the entry: Better for your hand, worse for overnight protection.
Placement check: Stand where each person sleeps. If the alarm is far from that breathing zone or directly in moving air, the location needs another look.
Utah-specific placement judgment
Utah campers often deal with two patterns that affect detector performance. One is cold-weather camping, where owners seal up the RV tightly and run the furnace longer. The other is shoulder-season travel with doors, roof vents, and fans opening and closing all day as temperatures swing. In both cases, air doesn't move through the cabin the same way it would in a house.
Slide-outs can complicate things too. A detector that looks well placed with the slide in may sit in a strange dead spot with the slide out. In rear-bunk and front-bedroom layouts, the right answer is often to cover the sleeping zones rather than relying on one alarm in the main living area.
Installing and Testing Your RV Carbon Monoxide Detector
A detector that's powered but never tested isn't enough. A detector that's mounted correctly but tied into a weak electrical circuit isn't enough either. Installation and verification need to happen together.
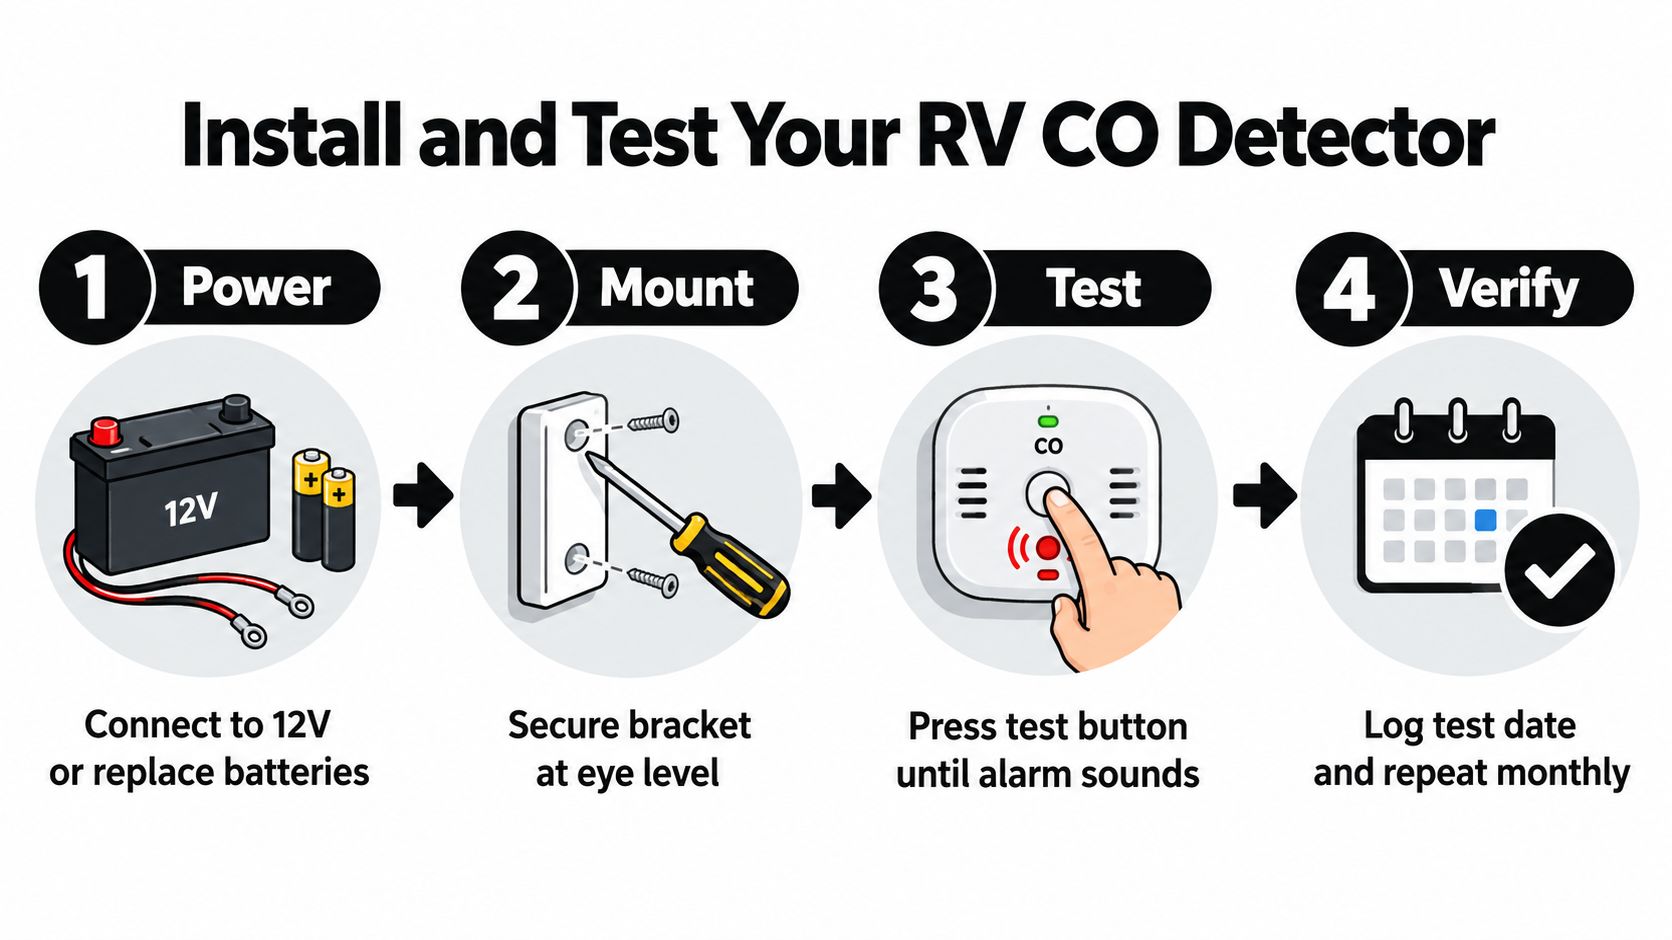
A clean install beats a rushed replacement
When owners swap a detector, the goal isn't just to make the chirping stop. The goal is to restore reliable protection.
Use this workflow:
- Confirm the power type. Check whether the unit is battery-based, hardwired, or part of a combo LP/CO system.
- Verify the location before mounting. If the old unit was in a poor spot, don't assume you need to reuse it.
- Install according to the RV-rated model's instructions. Match the unit to your coach setup rather than forcing a house-style device into an RV application.
- Test immediately after install. Press the test button and confirm the alarm pattern, lights, and power status.
If you want a better feel for what's happening behind the panel, our article on understanding your RV electrical system is a good primer before you start tracing wires or replacing a hardwired alarm.
Here's a helpful visual walkthrough:
What to test regularly
Testing should be simple enough that you'll do it.
- Before a trip: Press the test button and confirm the alarm sounds.
- After storage: Verify the detector still has power and didn't age out over the off-season.
- After electrical work: Recheck operation if batteries, disconnects, converters, or fuse panels were serviced.
- After replacing the house battery: Confirm the detector came back online.
Don't judge the detector by the status light alone. Press the test button and make it prove it can still alert you.
If a hardwired detector won't test properly, don't keep guessing. RV electrical systems are straightforward when everything is healthy, but a poor ground, weak battery condition, or failed device can all look similar to the owner.
Troubleshooting False Alarms, Recalls, and System Gaps
A lot of people stop trusting their RV carbon monoxide detector after one nuisance event. The alarm goes off during cooking, chirps after a battery issue, or acts strangely after storage, and the owner starts thinking the detector is the problem every time. Sometimes it is. Sometimes it's warning you about a bigger system issue.
False alarm or real warning
Start with the basics. Dust, contamination, weak power, and awkward placement can all create confusion. So can installing a combo detector too close to a cooking area or another source of interference.
Common troubleshooting checks include:
- Clean the detector face and vents: Dust buildup can affect performance.
- Check for low-voltage conditions: Hardwired alarms can behave unpredictably when coach power is unstable.
- Review what was happening when it sounded: Furnace cycle, cooking, generator use, or heavy moisture can provide clues.
- Look at placement: If it sits in a direct airflow path or too close to an appliance area, the location may be part of the problem.
That said, owners shouldn't assume every alarm is “just sensitive.” If the alarm sounds repeatedly under realistic use, the RV deserves inspection.
Recent recalls changed the conversation
Recall trends have made this more of a full-system safety issue than a simple detector swap. In 2025, recall notices tied to Transport Canada and NHTSA covered RVs where carbon monoxide detectors may not have been installed, or may fail because water intrusion disables under-step electrical components that include the CO/LP detector. A 2026 recall notice also described RVs where rerouting generator exhaust and adding an additional carbon monoxide detector were required (summary of recent RV recall patterns).
That's a big shift in how owners should think. The weak point might not be the alarm body on the wall. It could be exhaust routing, compartment sealing, or water intrusion in the electrical path that keeps the detector alive.
What actually works
The most effective approach is to treat carbon monoxide protection like a system:
| Problem type | What usually helps |
|---|---|
| Aging detector | Replace the unit with an RV-rated model |
| Repeated nuisance alarms | Reassess placement, contamination, and nearby appliance use |
| Power interruption risk | Add backup planning and verify operation after battery events |
| Recall-affected layout | Address exhaust routing or compartment corrections, not just the detector |
Motor Sportsland can handle RV service inspections and electrical diagnosis, but it's only one option among the practical routes owners have when a detector problem may be tied to wiring, mounting, or a larger coach issue.
Standards, Replacement Schedules, and Local Service Options
A detector can look fine on the wall and still be past its safe service life. I see that with used RVs all the time, especially units that have spent years in Utah storage lots, then head straight into summer travel through hot valleys and higher-elevation passes. Age, power interruptions, dust, and vibration all matter more than how clean the coach looks.
The label on the alarm is the first place to check. Look for the manufacture date, the model number, and the listing information. Many RV carbon monoxide alarms are built with a defined service life, often in the 5 to 10 year range, and the earlier guidance in this article noted that older units should be serviced or replaced. In shop practice, the manufacture date matters more than the day you bought the trailer or motorhome.
A replacement schedule that fits actual RV use in Utah
Utah puts different stress on detectors than year-round mild climates. Winter battery disconnects can leave owners assuming a hardwired alarm is still ready for spring. Long stretches of washboard roads, steep grade changes, and shoulder-season condensation can also expose weak wiring connections or aging combo CO/LP units.
A practical schedule looks like this:
- Read the detector label once a year: Confirm the manufacture date and model, not just whether the test button chirps.
- Replace by the unit's stated service life: If the alarm is nearing the end of its listed range, plan replacement before the next long trip.
- Test at spring de-winterization: This is often when failed units, low-voltage issues, and dead backups show up.
- Check recall history by VIN and component: Recent RV recalls have involved missing detectors, failed detector circuits, and exhaust corrections, not just a bad alarm body.
Safety planning also overlaps with ownership costs after a claim, a repair, or a used-RV purchase. This guide can help you compare rv insurance costs while you review the rest of your protection setup.
If the detector age is unclear, the wiring is suspect, or the coach has recall-related questions, a service inspection saves guesswork. Motor Sportsland offers RV service for detector checks, electrical diagnosis, and recall-related inspection work before the next trip.
FAQ
How often should I replace an RV carbon monoxide detector?
Follow the service life printed on the unit. Many RV alarms fall in the 5 to 10 year range, and older units deserve closer review even if they still power on.
Where should an RV carbon monoxide detector be installed?
Follow the detector manufacturer's instructions and the RV builder's layout. If a previous owner moved or replaced a unit, verify that placement still suits the sleeping area and actual airflow in the coach.
Can I trust a hardwired detector during storage or battery problems?
Only if the power path and any backup function are still working properly. After winter storage or a battery swap, test the unit and confirm it has not lost power or faulted out.
Why didn't my detector go off right away?
CO alarms respond based on exposure level over time. A delayed alarm can still be operating as designed, which is why any suspected exhaust issue in an RV deserves immediate inspection.
Do I need a separate propane detector too?
Maybe. Some RVs use a combo unit, while others rely on separate devices. Verify what your coach has instead of assuming one alarm covers both hazards.
Should I replace the detector after buying a used RV?
If you cannot verify its age, listing, and operation, replacement is the safer call. That is especially true on older Utah rigs that have seen repeated storage cycles, battery disconnects, or prior water intrusion.
