
How to Empty RV Tanks: A Utah Owner’s Guide

Pulling into a dump station for the first time can make even a confident new owner tense up. If you're at Jordanelle on a Sunday morning or trying to get out of Bear Lake before the line builds, it's easy to feel like everyone else knows exactly what they're doing while you're staring at valves, hoses, and caps.
Emptying RV tanks isn't glamorous. It is, however, a simple skill once you know the order, the gear, and the few mistakes that cause most messes. The biggest problems we see usually come from rushing, using the wrong hose, or misunderstanding how the black tank flush works.
This guide walks through how to empty RV tanks in a way that keeps the process clean, predictable, and easier on your plumbing. You'll learn what gear matters, why the black tank goes first, how to use a flush system without creating back-pressure trouble, and what to do after you dump so the next trip starts clean.
Questions about dumping at home come up a lot too, especially with Utah owners trying to avoid campground lines. If that's on your mind, it helps to understand the legal and plumbing side first, including greywater system costs and permits. For more waste-handling basics, see this RV waste disposal guide.
Introduction
The first time you empty RV tanks, the process feels more complicated than it is. There are a few moving parts, but the routine becomes second nature fast when you follow the same sequence every time.
Most owners don't need fancy tricks. They need a repeatable method that works at a full-hookup site, a campground dump station, or on the way home from a weekend in the Wasatch.
The cleanest dump routine is usually the simplest one. Set up carefully, slow down, and never improvise with plumbing gear that wasn't meant for waste water.
A good dump starts before you touch a valve. Your hose connection has to be secure, your rinse hose needs to be separate from any drinking water hose, and your tank should be ready to drain properly instead of doing a weak, messy dump that leaves solids behind.
Utah conditions add a few wrinkles. Dry air can make odors seem worse when tanks sit too long, colder shoulder-season nights can stiffen hoses and valves, and busy campground stations reward owners who arrive prepared instead of figuring it out on the spot.
Gathering Your Essential Dumping Gear
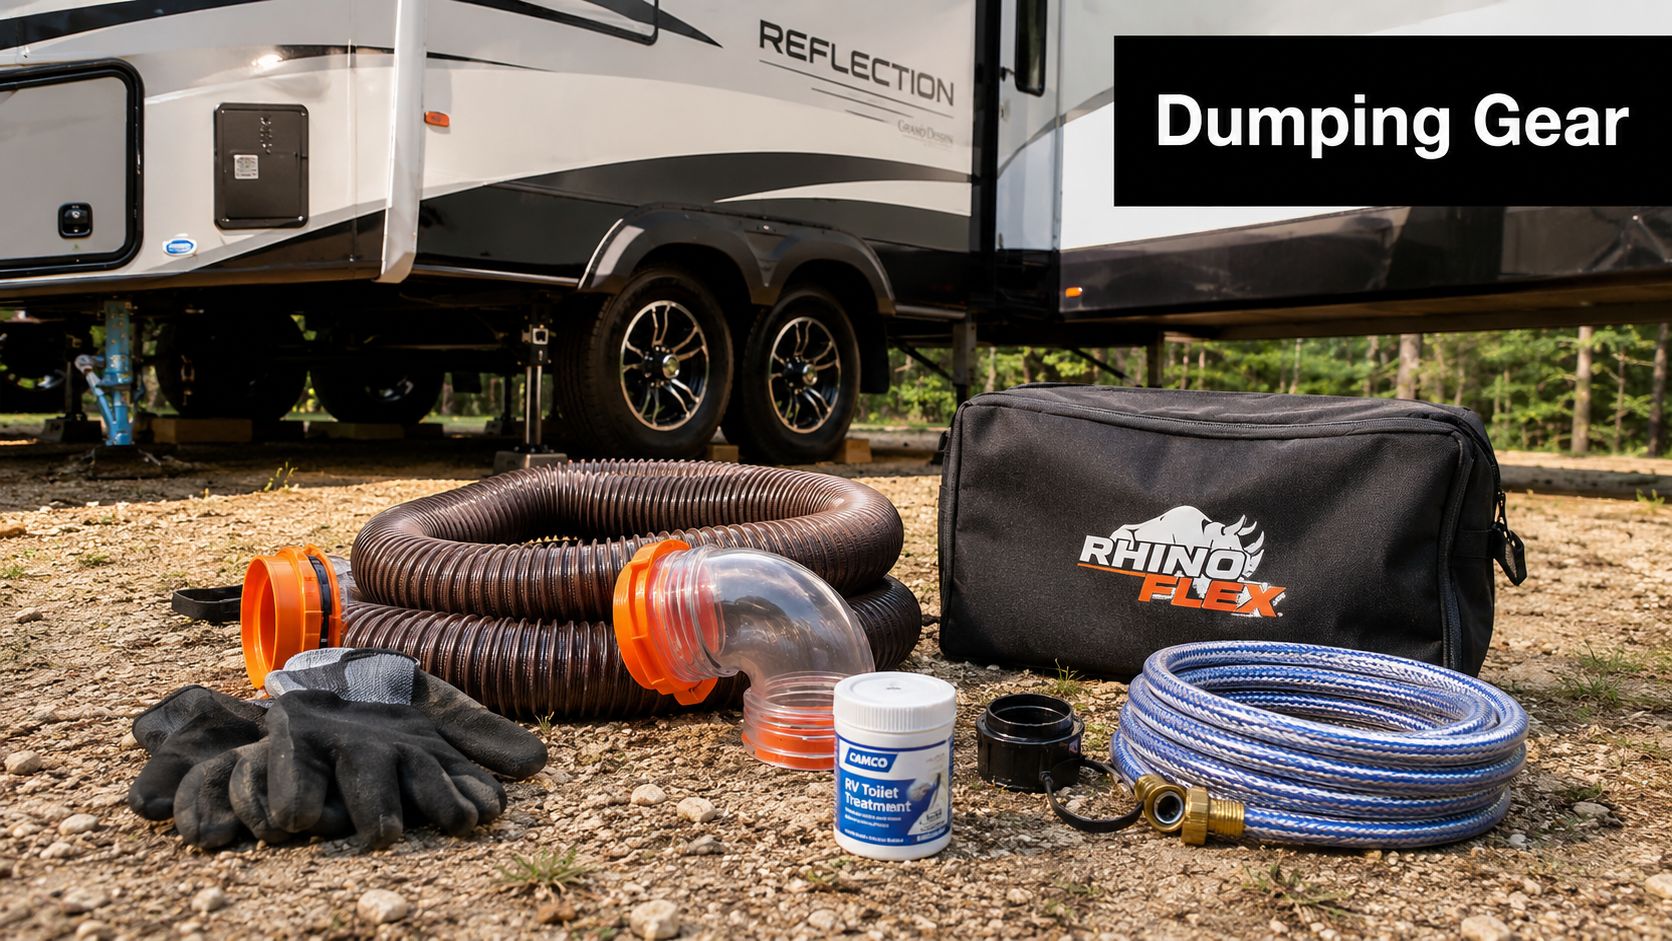
The right gear makes dumping routine. The wrong gear turns it into a cleanup job.
Cheap sewer hoses are the classic example. They seem fine until they kink, split, or refuse to hold a fitting securely. That usually happens at the worst possible moment, when the tank is already open and you're committed.
What belongs in your dump kit
A solid dump kit should live in one place so you're never hunting for pieces at the station.
| RV Dumping Gear Checklist | Why It's Essential |
|---|---|
| Sewer hose | Carries waste from the RV outlet to the dump inlet. A sturdy hose resists pinholes, splits, and kinks. |
| Clear elbow | Lets you see flow and know when the rinse water is running clear. |
| Disposable gloves | Keeps the process sanitary and lets you handle fittings without bringing residue back into the coach. |
| Sewer hose support | Helps maintain downhill flow and reduces low spots where waste can sit in the hose. |
| Dedicated rinse hose | Used only for tank rinsing and never for drinking water. |
| Tank treatment | Helps keep residue and odor under control after the dump is finished. |
One item many owners add later is a macerator setup. It's useful in certain situations, especially when gravity isn't working in your favor, and this guide on RV macerator pump basics helps explain when that upgrade makes sense.
Why each tool matters
Some gear matters more than people think.
- Sewer hose quality: A better hose seals more reliably and is easier to handle in cold weather.
- Clear elbow: This isn't a gimmick. Being able to see the flow tells you when the tank is rinsed.
- Gloves: Keep several pairs in the same bin as your hose so you're not reusing a pair you meant to throw out.
- Dedicated rinse hose: This hose should never be confused with your fresh-water hose. Mark it clearly.
- Hose support: At a sloped or uneven dump station, support helps waste move out instead of settling in low points.
Practical rule: Keep your dump gear separate from fresh-water gear. Different storage bin, different hose color, different routine.
A small parts tote also helps. Caps, extra seals, gloves, and treatment packets disappear fast when they're loose in a compartment.
If you're buying gear for the first time, skip the bargain-bin setup. A dump kit isn't the place to save a few dollars if it creates leaks, poor drainage, or repeated replacements.
The Step-by-Step Tank Dumping Process
You pull into a dump station after a long drive, someone is waiting behind you, and that is when small mistakes happen. A clean dump comes from doing the same steps in the same order every time, even when you are tired or the weather is cold.
In our Salt Lake City service bay, we see the same preventable problems over and over. Owners dump too soon, leave the black valve open at a campsite, or trust the black tank flush to do more cleaning than it can. The process is simple once you know what matters.
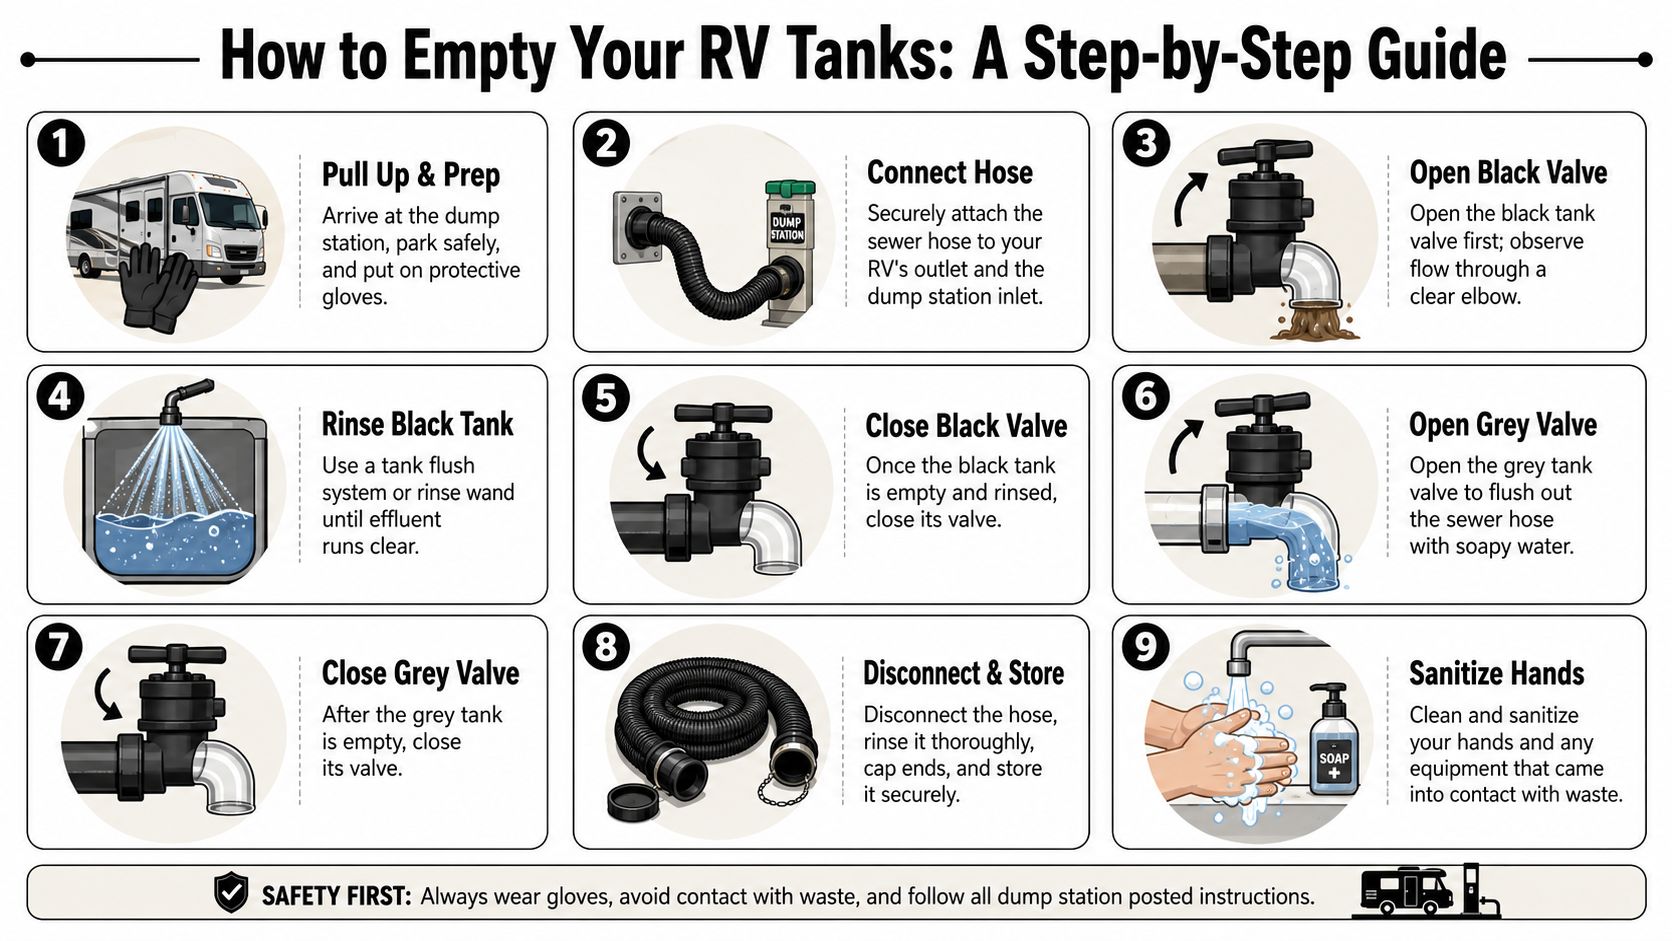
Set up before you touch the valves
Park so the sewer outlet and dump inlet line up with as little twist in the hose as possible. Put on gloves, remove the cap carefully, and connect the sewer hose to the RV first, then to the dump inlet. A clear elbow at the outlet helps you confirm when flow has slowed and when rinse water is running cleaner.
If the pad is uneven, use a hose support or reposition the hose by hand so it keeps a steady downhill run. In Utah, that matters more than many first-time owners expect. At older campgrounds and some rural dump stations, the angle is not always ideal, and low spots in the hose can trap waste instead of moving it through.
Wait to dump until the black tank has enough liquid in it to carry solids out well. That usually means dumping after real use, not after every small stop. The RV Industry Association's guide to using dump stations properly reinforces the same idea: waste moves out better when the tank has enough volume behind it.
Dump the black tank first
Open the black tank valve slowly and let it run until the flow drops to a trickle. Leave it open long enough for the tank to finish draining. New owners often hear the first rush stop and assume the job is done. It usually is not.
Close the valve once the black tank is empty, then decide whether the tank needs a rinse. If your coach does not have a built-in flush, adding water through the toilet can help loosen leftover material. If it does have a flush inlet, use it carefully.
Black tank first, grey tank second. The grey water helps wash residue out of the sewer hose before you disconnect.
That order is not just cleaner. It also cuts down on the mess around the cap and fittings when you pack everything away.
Use the black tank flush the right way
The black tank flush is useful, but it is not a magic button. It sprays the inside of the tank to help remove leftover waste and sensor residue. It does not replace having enough water in the tank during normal use, and it does not mean you should leave the area while it is running.
Keep the black tank valve open while the flush is on so rinse water can drain out as it enters. Use only your dedicated non-potable rinse hose. Never connect your fresh-water drinking hose to that fitting.
One myth I hear all the time is that a flush system can break up any clog if you just let it run long enough. That is how owners end up with water backing up into the coach or leaking at a fitting. The University of Arizona Cooperative Extension's sanitation guidance on RV wastewater handling lines up with what we tell customers in the shop: control the flow, monitor the outlet, and do not leave pressurized rinse water unattended.
Watch the clear elbow while the flush runs. When the water looks much cleaner, shut the rinse off first, then let the remaining water drain out before closing the black valve.
For many owners, a quick walkthrough helps more than a written explanation. This video shows the overall process:
Finish with the grey tank
After the black valve is closed, open the grey tank valve. Let sink and shower water move through the hose and rinse out what is left inside. If your grey tank is nearly empty, you will get less of that cleaning benefit, so it often makes sense to wait and dump both tanks together instead of emptying the grey tank too early.
Once the grey tank is done, close the valve and disconnect carefully. Rinse the outside of the hose if the station provides non-potable water. Cap the hose ends before storage.
At home, be careful with assumptions about where you can dump. A residential sewer cleanout may look convenient, but local rules, slope, and access all matter. Along the Wasatch Front, I tell owners to verify city and county requirements before trying any at-home setup. What works on one property in Utah County may not be allowed or practical in Salt Lake County.
Clean departure habits
Finish the job with a quick check:
- Confirm both dump valves are fully closed.
- Reinstall the cap securely.
- Wipe or rinse any drips from the area.
- Store sewer gear in its own bin or compartment.
- Wash or sanitize your hands after the gloves come off.
The ugly mistakes usually happen in the first minute or the last minute. Slow down for both.
Post-Dump Tank Care and Odor Control
You can do everything right at the dump station and still create the next problem on your way out. We see that a lot in our Salt Lake City service department. A first-time owner dumps thoroughly, stores the hose neatly, then leaves the black tank bone dry. By the next trip, waste has a dry surface to stick to, odor shows up early, and the monitor panel starts lying.
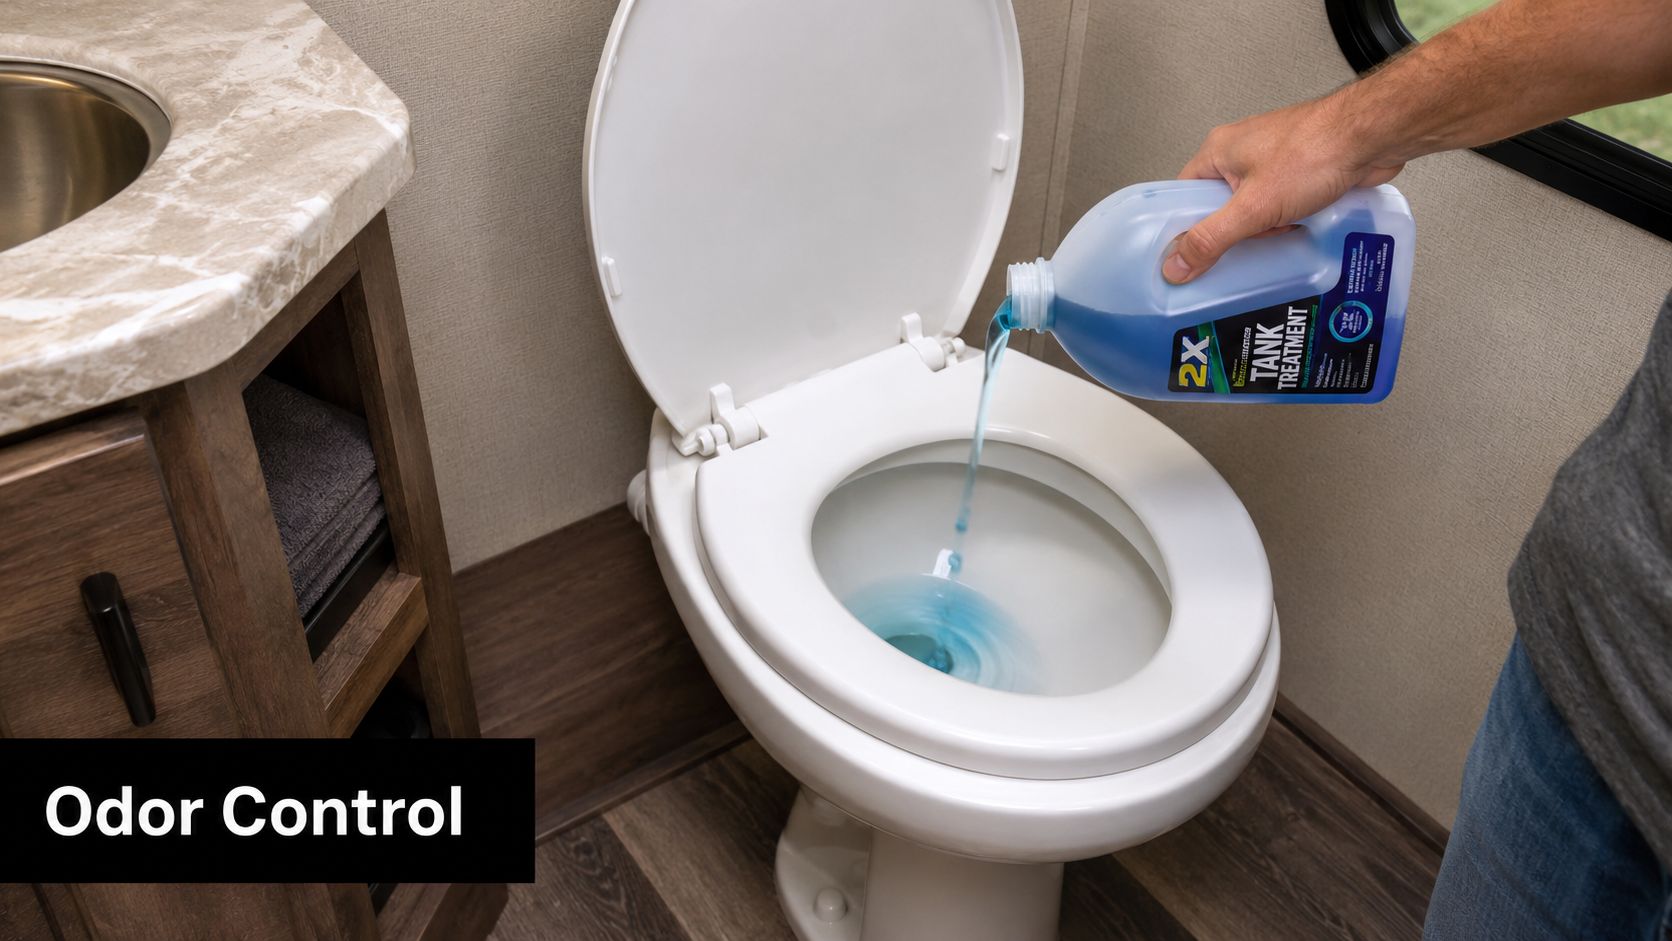
Prime the black tank before you leave
Put water back into the black tank after dumping. A few gallons through the toilet gives the tank floor a wet base, which helps waste move instead of sticking on the next use.
That step gets skipped all the time.
A good routine is simple:
- Add water first: Send several gallons into the black tank through the toilet.
- Add treatment second: Treatments work better when they go into water, not a dry tank.
- Check your water situation before you leave: If you are traveling across Utah between sparse fill options, make sure you still have enough fresh water for toilet use and basic cleanup.
One myth I hear a lot is that a black tank should be left dry so it stays “cleaner.” In real use, the opposite is usually true. Dry tanks let solids harden and cling. Another common myth is that a built-in black tank flush replaces this step. It does not. The flush helps rinse the tank, but it does not leave the water reserve you want for the next trip.
Treatments help, but they do not fix bad habits
Tank treatment has a job, but it is not miracle fluid. If the tank was poorly rinsed, if solids sat too long, or if the tank starts dry every trip, no bottle is going to cover that up for long.
Enzyme and bacteria-based products are a solid choice for regular maintenance, especially for RVs that sit between weekend trips. Strong deodorizing chemicals may knock down smell quickly, but they do not solve buildup. I usually tell owners to pick a treatment they will use consistently, then stay with the same routine long enough to see how the tank responds. If you want help choosing, this guide to RV black tank treatment options breaks down the common product types.
A healthy black tank should smell controlled, not heavily scented. If odor keeps coming back inside the coach, check for leftover residue, a dry tank floor, or a venting issue before blaming the treatment.
Grey tank odor is different, and just as common
Grey tank smell catches plenty of new owners off guard. Sink and shower water sounds harmless, but grease, soap film, toothpaste, food scraps, and hair build a nasty layer over time. On hot Utah days, that smell gets stronger fast, especially if the RV sits closed up between trips.
Use drain strainers in the kitchen and bath. Run enough water when washing dishes to move residue through the line. If the galley tank starts smelling sour, clean the drains and use a grey-tank-safe cleaner occasionally.
At-home dumping myths show up here too. Owners sometimes assume grey water is mild enough to dump almost anywhere on private property. Local rules say otherwise, and practical issues matter too. Around the Wasatch Front, I tell people to verify what their city allows before trying any home sewer setup. Legal access, slope, and cleanup options all matter more than internet shortcuts.
Help your sensors by keeping residue down
Bad sensor readings are often a cleanliness problem, not an electrical failure. Paper and residue cling to the tank walls and probe points, then the monitor keeps showing part full after a dump.
Better rinse habits help. Leaving some water in the black tank after dumping helps too. If your sensors are still inaccurate once your routine improves, then it makes sense to inspect the hardware.
Troubleshooting Common Dumping Problems
You finish dumping, pull the hose, and the job still does not feel done. The tank drains slowly, the monitor says one-third full, or a sewer smell shows up inside the coach on the drive home. Those are the problems that make new owners think they did something wrong. Usually, the issue is a specific mechanical or maintenance problem, and you can narrow it down fast if you know what to check first.
When solids build up or flow slows down
A slow black tank dump usually means one of two things. Waste built up inside the tank because there was not enough water in it, or the restriction is sitting near the termination outlet.
Owners often call the first problem a pyramid plug. I see it most often after dry camping, quick roadside bathroom stops, or anytime someone leaves the black valve open at a full-hookup site. The liquid drains away, the solids stay behind, and the next dump turns into a weak trickle.
Start with the least aggressive fix. Close the valve, add water back into the tank, use a tank treatment that is meant to soften waste, and let it sit long enough to work. Then dump again and rinse thoroughly. Forcing a wand, stick, or random high-pressure nozzle into the system can damage fittings, spray waste where you do not want it, or push the clog into a harder spot to reach.
If the flow stays weak after a proper soak and rinse, stop there. A packed blockage or collapsed valve opening is usually a shop job.
Stuck valve handles and false sensor readings
A stiff dump valve needs inspection, not muscle. Sometimes waste paper or residue is hanging up the gate. Sometimes the cable is binding, or the valve body is starting to fail from age, road grime, or a small leak that dried things out around the seals.
Do not yank on the handle.
If it normally pulls with two fingers and now takes your whole arm, there is a reason. Broken handles are common. Broken handles attached to a half-open black valve are worse.
Sensor readings are a different headache. If the panel still shows partly full right after dumping, the usual cause is residue on the probes or tank wall, not a bad monitor. Better rinse habits fix a lot of these complaints. So does leaving a few gallons of clean water in the black tank after you finish, instead of storing it bone dry between trips.
For odors that seem to come from inside the RV rather than the dump outlet area, check the simple stuff first. A dry trap, a venting issue, or a drain that needs cleaning can mimic tank trouble. MG Drain Services' sewer odor guide does a good job explaining how traps and venting create indoor sewer smells, and the same basics often help RV owners narrow down the source.
Can you dump RV tanks at home
Utah owners ask this all the time, especially after their first crowded dump station line on a Sunday afternoon. The short answer is maybe, but only if your property has a legal, sanitary connection that is built for it. A garden hose to the curb, a cleanout cap with no backflow protection, or a homemade setup in the yard is not the answer.
The myth I hear most is that home dumping is fine as long as you are careful. That is not how city code, sewer design, or cleanup risk works. Around Salt Lake City and the Wasatch Front, local requirements can vary by municipality, and private property does not automatically mean approved disposal. The practical concerns matter just as much as the legal ones. Slope, hose control, spill containment, and access to a proper sewer connection all decide whether a home setup is realistic or a mess waiting to happen.
The same goes for black tank flush systems. Owners sometimes assume the built-in flush can clear any clog if they just run water long enough. It helps rinse the tank. It does not magically cut through a heavy pyramid plug, and it should never be left unattended. I have seen more than one coach come in with water damage because someone walked away while the flush was running and the tank overfilled through the toilet.
If you are not sure your home connection is legal and properly set up, use an approved dump station instead. If the system has a persistent clog, a leaking valve, or a handle that feels like it is about to snap, professional diagnosis is cheaper than repairing the damage from one bad DIY attempt.
Seasonal Care and When to Call The Pros
A lot of Utah tank problems show up after the RV has been sitting, not while you are using it. A trailer can spend July at Bear Lake, then sit through a hard Wasatch Front freeze by November. If any water or waste is left in the wrong spot, spring can start with a stuck valve, a cracked fitting, or a leak under the belly.
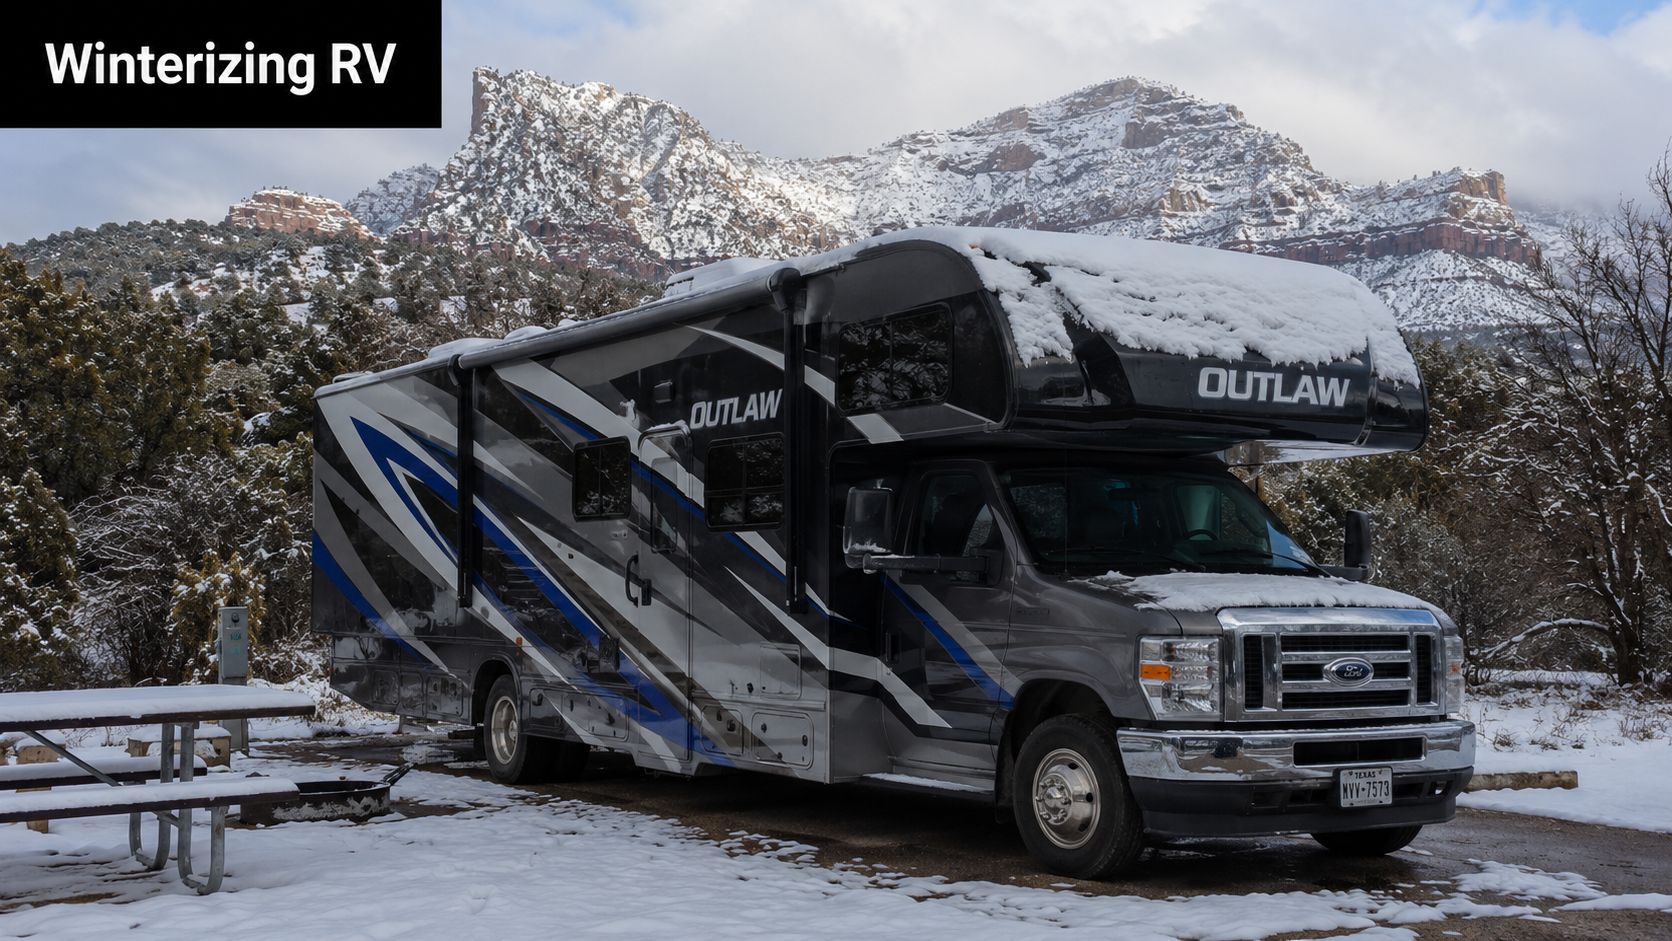
Winter storage matters in Utah
Before storage, fully dump and rinse the tanks, then winterize the plumbing the right way. A quick drain is rarely enough. Waste valves, elbows, and low sections of pipe can hold liquid even after the tanks look empty.
Homeowners who already think through steps to winterize your home already understand the basic problem. Water expands when it freezes. In an RV, that can split plastic fittings, deform seals, and leave you chasing odor or seepage once temperatures rise.
Use RV antifreeze where the manufacturer calls for it, and use RV-specific winterizing procedures for your coach. Do not pour in automotive fluids, and do not assume the black tank flush line is protected just because the tank itself was drained. That flush circuit is one of the areas owners miss most often in our Salt Lake City service bays.
Know where DIY should stop
Routine dumping, rinsing, and winter prep are well within reach for a careful owner. A few warning signs mean it is time to get a shop involved before a small mess turns into a repair bill.
Call for professional help if you notice any of these:
- A valve that will not close all the way: Even a slow seep at the termination point usually gets worse, not better.
- A black tank flush that is not acting normally: The flush system is for rinsing, not clearing major clogs. It should be used with the black valve open and watched the entire time. Running it too long or walking away can force water back up into the coach.
- Tank readings that stay wrong after cleaning: Dirty sensors are common. Ongoing false readings can point to wiring issues, failed sensors, or buildup that needs more than a rinse.
- Leaks around the tank, fittings, or sewer outlet: Waste-system leaks need proper diagnosis, cleanup, and repair.
- A handle that is very hard to pull or feels like it may break: Forcing it can damage the cable or valve blade and turn a service visit into a bigger job.
I tell new owners this all the time. If the fix involves pressure, force, guesswork, or opening up the underbelly, stop and get help. That is especially true in Utah after a cold snap, when frozen leftovers in a line or valve can hide until the first warm day and then start leaking.
Conclusion
Learning how to empty RV tanks is one of those ownership milestones that feels awkward once, then routine after that. The process stays simple when you start with the right gear, dump in the right order, rinse thoroughly, and leave water in the black tank for the next trip.
The habits that matter most are straightforward. Wait until the black tank is ready for a proper dump. Open the black tank first. Use the grey tank as your hose rinse. Prime the black tank afterward so solids don't start drying onto the floor before your next campsite.
That little routine pays off whether you're camped near the Great Salt Lake, heading south through Utah County, or getting ready for a longer run across the Mountain West. Clean tanks make for easier departures, fewer odors, and a lot less frustration.
Whether you're shopping for your first RV, replacing worn-out gear, or dealing with a tank issue that needs expert attention, local help makes the learning curve much easier.
FAQ
How full should the black tank be before dumping
Wait until the black tank is reasonably full before dumping. A fuller tank creates better flow, which does a better job carrying paper and solids out of the tank.
If you dump too early, especially after a quick overnight stop, liquids can run off while heavier waste stays behind. In the shop, that is one of the common reasons we see buildup problems start.
Which tank do you empty first on an RV
Open the black tank first, then the grey tank.
That order matters for a simple reason. Grey water helps rinse the sewer hose after the black tank finishes draining, so cleanup is less messy.
How long should you flush an RV black tank
Flush it until the discharge looks clear and the flow settles down. On some rigs that is quick. On others, especially if the tank was very full or the coach has been sitting, it can take longer than new owners expect.
Do not rely on a fixed timer alone. Tank shape, hose routing, campground water pressure, and buildup inside the tank all change how long a proper rinse takes.
What do you put in the black tank after dumping
Put fresh water back into the black tank after dumping. Do not leave it bone dry.
A few gallons in the bottom gives the next use a wet base, which helps keep waste from hardening on the floor of the tank. If you use a tank treatment, add it after the water so it can mix and spread where it needs to.
Can you use the black tank flush with the valve closed
No. Keep the black tank valve open while using the black tank flush.
This is one of the biggest myths we hear from first-time owners. The flush system is for rinsing, not for filling the tank and walking away. Leave that valve closed too long and you can send wastewater back where you do not want it. That mistake can turn a routine dump into an interior cleanup job.
Can you dump RV tanks at home in Utah
Maybe, but only if your setup is legal and connected to an approved sewer cleanout or similar disposal point. Do not assume a driveway, gutter, septic access, or yard drain is fine just because someone online said they do it.
Around Utah, local rules and property plumbing setups matter a lot. In the Salt Lake City area, I tell owners to verify the disposal point before trying it at home. If there is any doubt, use a dump station. It is cheaper than fixing a plumbing mistake or dealing with a citation.
If you need help choosing your first RV, stocking up on waste-system supplies, or scheduling service for a valve, sensor, or tank issue, Motor Sportsland is here for you. Browse inventory online, plan your next upgrade, or stop by our Salt Lake City area showroom and service team for practical help from people who work on RVs every day.
