
RV Battery Maintenance: Power Your Utah Adventures

A lot of RV battery problems don't show up when you're packing for a trip. They show up the night before a Bear Lake weekend when the lights dim, the tongue jack slows down, or the battery is flat after the trailer has been sitting on the Wasatch Front for a few weeks. That's usually when owners realize battery care isn't just a side task. It's part of keeping the whole coach usable.
At our Salt Lake City service center, we see the same pattern every season. A battery that looked “fine” got drained in storage by detectors or control boards. A flooded battery never got its water checked. A new lithium setup got treated like an old lead-acid battery during winter storage. None of those failures are mysterious, and most are preventable.
Good RV battery maintenance is mostly about doing a few simple things on schedule and knowing which battery chemistry you have. If you understand that, you'll avoid a lot of dead mornings, weak slide-outs, and premature battery replacement. This guide is the practical version we'd give a Utah owner who wants dependable power from spring startup through winter storage.
Understanding Your RV Battery Options
The first step in RV battery maintenance is knowing which battery is sitting in your compartment. Owners often say “my RV battery” like they all behave the same. They don't.
The three common house battery types are flooded lead-acid, AGM, and lithium. They all store 12V power for your coach systems, but they need different care, tolerate discharge differently, and have different service-life expectations.
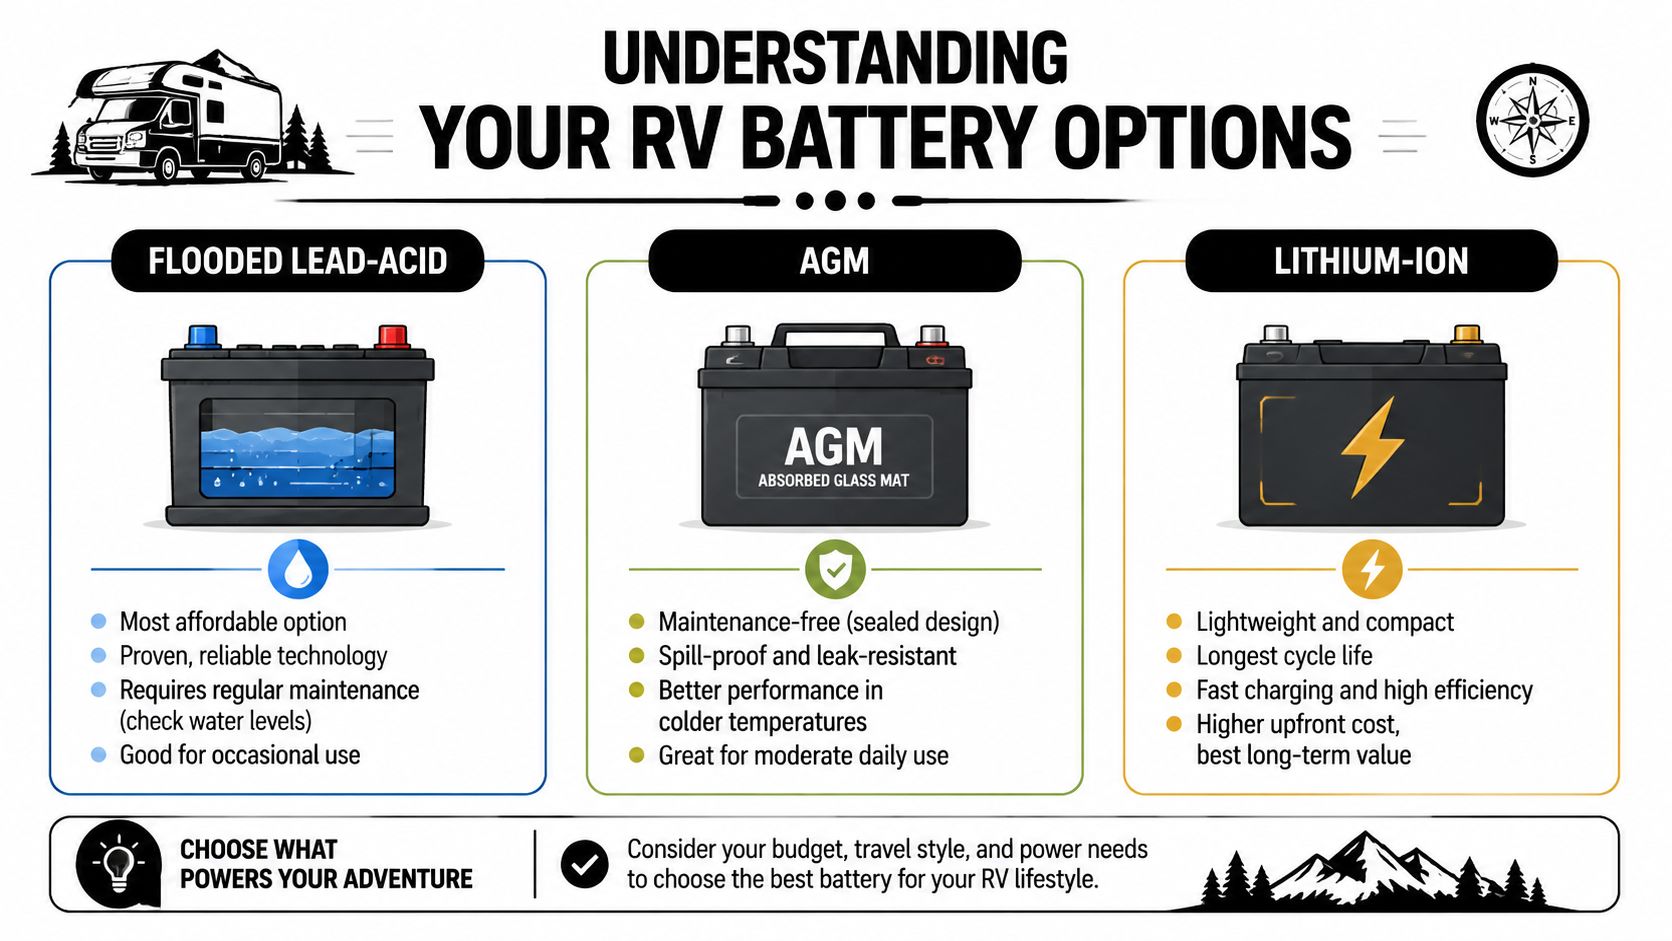
Flooded lead-acid batteries
Flooded batteries are the old standby. They're common in entry-level travel trailers and in RVs where owners want a familiar, lower-cost setup. They work, but they ask for attention.
They need periodic water checks, terminal cleaning, and closer charge management. They also don't like being run down. For owners who want a better grip on the rest of the 12V system around that battery bank, our team's guide to the RV electrical system is a useful companion read.
AGM and lithium batteries
AGM batteries are still lead-acid batteries, but they're sealed and don't require the same watering routine. They're appealing to owners who want less mess and less routine hands-on maintenance. That doesn't mean maintenance-free forever. You still need to watch charge habits, cable condition, and storage procedures.
Lithium RV batteries changed what many owners expect from a house battery. Historical life ranges commonly cited for RV use are 2 to 3 years for flooded lead-acid, 2 to 4 years for AGM, and 5 to 10 years for lithium, according to this RV battery lifespan overview. That same source also notes that lead-acid batteries are generally recommended to stay above 50% charge, while lithium can be discharged much deeper and is usually kept above about 20% for best longevity.
Shop-floor reality: The battery that feels cheapest up front isn't always the one that asks the least from you over time.
What this means in Utah
Utah makes battery differences more obvious. Summer boondocking puts steady demand on your 12V system. Winter storage punishes neglected batteries. High-demand rigs with modern electronics also expose weak charging habits fast.
Here's the practical comparison:
| Battery type | Routine upkeep | Discharge tolerance | Typical service life |
|---|---|---|---|
| Flooded lead-acid | Monthly water and terminal checks | Lower tolerance for deep discharge | 2 to 3 years |
| AGM | Less routine physical maintenance | Better than flooded, still lead-acid limits | 2 to 4 years |
| Lithium | Very little routine physical maintenance | Deeper usable discharge | 5 to 10 years |
If you're not sure which battery you have, look at the label before doing anything else. That single step prevents a lot of bad advice from being applied to the wrong battery.
Your Essential Monthly Maintenance Routine
You pull into a Bear Lake campground on Friday, hit the lights, and the coach feels weak before dinner. In our Salt Lake City shop, that story usually starts a month earlier with a battery compartment nobody opened.
A good monthly routine catches the small problems that strand RV owners later. It also matters more in Utah than in milder places. Summer heat speeds up water loss in flooded batteries. Cold snaps along the Wasatch Front expose batteries that were left partly discharged. Higher elevation trips can also magnify weak charging and poor connections in tech-heavy rigs with inverters, leveling systems, and always-on monitors.
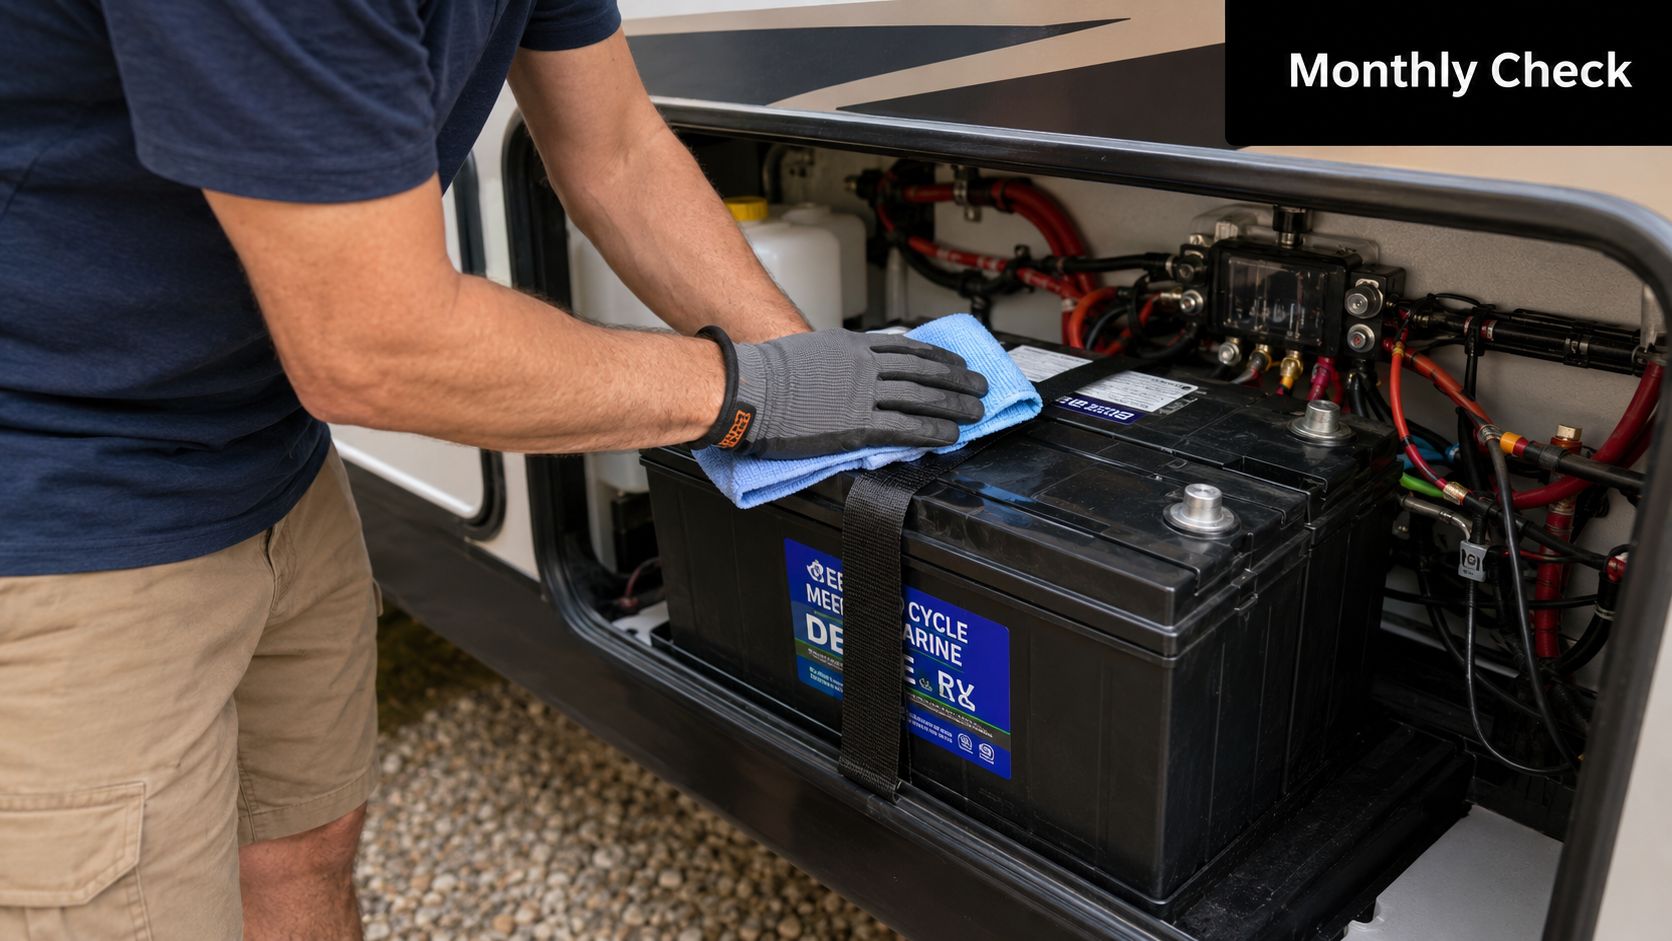
Start with a visual check
Open the compartment and look before you touch anything.
Check for swelling, cracks, wet spots, loose hold-downs, rubbed cables, and corrosion around the posts. On travel trailers and fifth wheels, battery movement from rough roads is a common problem. A battery that shifts even a little can loosen a connection or wear through insulation over time.
Pay attention to smell too. A sharp sulfur odor, heavy corrosion, or damp residue usually points to overcharging, poor ventilation, or a battery already failing.
Clean terminals the right way
Corrosion adds resistance. Resistance cuts charging efficiency and creates heat at the connection.
Disconnect power safely first. Clean the posts and cable ends with a baking-soda-and-water solution, keep the mixture out of the cells, dry everything, and tighten the connections firmly when you reinstall them. A loose terminal can mimic a bad battery, especially when furnace loads hit on a cold Utah morning.
If you want to match your battery care to the charger you're using, our guide to choosing an RV battery charger helps you sort out what works for your setup.
Check water only on flooded lead-acid batteries
AGM and lithium batteries do not get this step. Prying open a sealed battery causes problems, not maintenance.
For flooded batteries, remove the caps and look into each cell once a month. Add distilled water if the level is low. Fill only to the proper level, not to the top. Overfilling can force electrolyte out during charging, which creates a mess and speeds up corrosion in the battery tray.
In our service bays, neglected water levels show up a lot after hot-weather trips and long periods on shore power.
Read voltage before camp problems show up
A digital multimeter tells you more than the wall monitor panel does. Panel lights are fine for a quick glance, but they often miss a battery that is drifting downward or a connection that is starting to fail.
Take a resting voltage reading after the battery has been off charge and off major loads for a bit. If a lead-acid battery keeps coming back low after charging, or drops faster than it used to, address it early. That usually means checking for a parasitic draw, a charger problem, or battery age catching up with you.
Owners who boondock with portable solar or backup power can also benefit from understanding off-grid power limits. For that, your guide to portable power is a useful companion read.
A quick visual walkthrough helps if you want to see the basics in action:
A monthly routine that works
Use this checklist every month, and before any longer Utah trip:
- Inspect the case, tray, and cables for damage, movement, and rubbing
- Clean corrosion promptly and retighten every connection
- Check electrolyte level only if you have flooded lead-acid batteries
- Test resting voltage with a multimeter instead of relying on panel lights alone
- Look for parasitic drains from stereos, propane detectors, control boards, and aftermarket accessories
- Recharge soon after use instead of parking the RV with the battery partly discharged
This routine is simple, but it saves batteries. The rigs that make it through summer trips and winter storage with fewer surprises are usually the ones that get checked on schedule, not the ones that get attention only after the lights dim.
Smart Charging Practices for Longevity
A charger can help your battery, or slowly ruin it. The difference is usually in how it charges.
For lead-acid batteries, discharge depth has a direct effect on service life. One battery-industry source says discharging a lead-acid RV battery to 50% each day can make it last about twice as long as discharging it to 20% each day, and it recommends stage charging with bulk, absorption, and float rather than continuous trickle charging. That guidance appears in this battery longevity and charging overview.
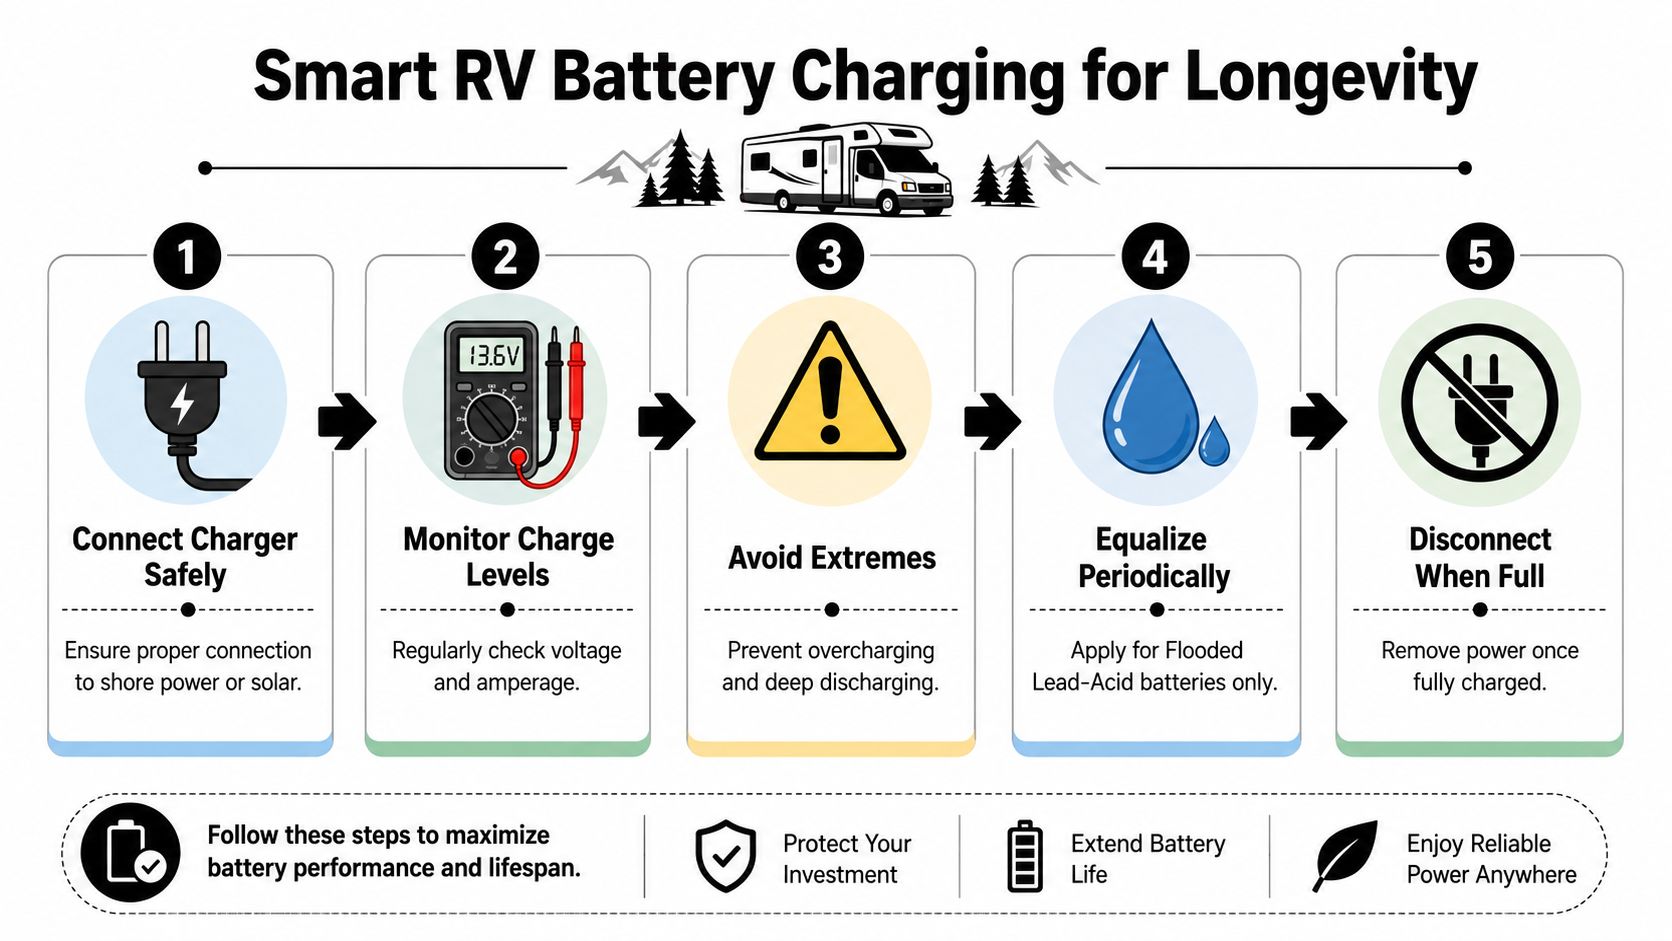
What stage charging actually does
A proper multi-stage charger doesn't blast the battery with the same output all day.
- Bulk stage brings the battery up quickly when it's low.
- Absorption stage finishes the charge more carefully.
- Float stage maintains charge without the same overcharge risk.
That matters in real life because a battery that sits on the wrong charger can get cooked. Heat and overcharging are common battery killers, especially during long storage periods with constant shore power.
What works and what doesn't
What works:
- A charger matched to your battery chemistry
- A converter or charger that uses bulk, absorption, and float
- Recharging after meaningful discharge instead of waiting for symptoms
- Watching charging behavior in storage instead of assuming “plugged in” means safe
What doesn't:
- Old single-stage charging habits
- Leaving a battery on the wrong trickle setup for long stretches
- Assuming lithium and lead-acid want the same charging profile
- Ignoring heat and battery-box ventilation
If you're sorting out charger compatibility, battery chemistry, or replacement options, our RV battery charger guide breaks that down in plain language.
Equalization needs caution
Owners hear about equalization and sometimes think it's a cure-all. It isn't.
Equalization is a controlled maintenance charge used on some flooded lead-acid batteries. It's not for AGM. It's not for lithium. And it isn't something to do casually just because a battery seems weak. The charger and battery both need to support it, and you need to monitor the process.
Charging rule: Match the charger to the battery chemistry first. Most charging mistakes start there.
If you camp off-grid and want a broader look at battery-backed portable systems, solar charging, and backup power choices, this outside resource on portable power for off-grid use is worth reading alongside your RV setup planning.
Utah Winter Storage and Battery Preservation
Utah winter is where careless battery habits get expensive. We see it every year. The RV gets parked after one last fall trip, the owner assumes it'll be fine until spring, and by the time camping weather comes back, the battery is weak, sulfated, frozen, or just done.
The biggest mistake is treating all batteries the same in storage. That's especially risky now that many owners have moved into lithium-equipped trailers and fifth wheels. Lead-acid and lithium don't want the same winter plan.
Lead-acid and lithium need different storage protocols
For winter storage, the key distinction is simple. Lithium should be stored at 50% state of charge and above 50°F, while lead-acid should be fully charged. The same guidance also warns that discharging lithium below 20% state of charge in cold temperatures can permanently reduce cycle life, according to this LiFePO4 RV storage guide.
That's the point many owners miss.
A lead-acid battery stored partially discharged is vulnerable. A lithium battery stored like a lead-acid battery can also be mishandled. If you remember one winter rule, remember this one: know the chemistry before setting storage charge level.
The storage mistakes we see most often
Some winter failures are almost predictable:
- Parking the RV with a low lead-acid battery
- Leaving a lithium battery excessively discharged in cold weather
- Assuming the battery disconnect is off when it isn't fully isolating the bank
- Trusting the wall monitor instead of confirming actual battery condition
- Forgetting that storage temperatures and battery temperatures aren't always the same
On the Wasatch Front, overnight cold snaps expose weak storage practices fast. A battery that might limp through a mild climate often doesn't get the same mercy here.
Parasitic loads are the silent winter drain
A parked RV is rarely all the way off. Propane detectors, appliance boards, and other electronics can keep drawing power in storage. Owners often think the battery “just died,” when the actual problem was a slow steady drain over time.
That's why we push battery isolation hard before long storage. If your RV has a real battery disconnect, use it. If it doesn't fully isolate the battery bank, disconnecting the negative terminal is often the cleaner answer.
If the RV is parked for winter, “everything is turned off” doesn't mean the battery is protected.
A Utah storage routine that prevents trouble
For lead-acid batteries, store them fully charged and keep checking their condition during storage. For lithium, follow the battery-specific storage guidance and temperature limits. In both cases, reduce parasitic drain as much as possible.
A practical winter checklist looks like this:
- Identify the battery type before doing anything else.
- Charge it correctly for storage, based on chemistry.
- Isolate the battery from RV loads.
- Check condition monthly instead of waiting until spring.
- Bring it back into service carefully before the first trip of the season.
When spring arrives, pair battery recommissioning with the rest of your startup work. Our article on how to de-winterize a camper helps owners line those systems back up before the season starts.
Troubleshooting Common Battery Problems
Battery trouble usually shows up as a symptom, not a diagnosis. The lights flicker. The jack is slow. The battery reads fine after charging but doesn't hold overnight. Start with the symptom and work backward.
Flickering lights or weak 12V performance
If interior lights dim when the water pump kicks on, or your tongue jack sounds strained, check the simple things first.
Look for:
- Loose battery connections that create voltage drop under load
- Corroded terminals that reduce current flow
- A battery that's low on charge
- A battery that has aged to the point where voltage falls quickly under demand
A multimeter helps more than guesswork. A battery can look okay on a panel and still sag badly when you ask it to do work.
Battery won't hold a charge in storage
When a battery charges up and then seems dead after sitting, don't jump straight to replacement. In many RVs, parasitic loads from propane detectors and appliance boards can gradually drain batteries in storage, and a battery disconnect switch or negative-terminal disconnect materially reduces that risk. A practical best practice is to fully charge the battery, disconnect it, then check voltage monthly and recharge whenever it falls to 80% or lower, according to this RV battery storage care guide.
That's one of the most common real-world causes of “mystery” battery failure.
Rotten egg smell or excessive heat
Take this seriously. A sulfur smell around the battery compartment often points to overcharging or battery damage. Shut down charging, ventilate the area, and inspect the system carefully before using it again.
Heat matters. So does smell. So does a battery case that looks swollen or stressed. Those aren't nuisance signs.
A battery problem becomes an electrical-system problem fast when charging equipment is involved.
Heavy corrosion keeps coming back
If you clean terminals and corrosion returns quickly, the battery may not be the only issue. Charging behavior, venting, cable condition, or battery age may all be involved.
For owners who like structured diagnostic thinking, a general guide to electrical troubleshooting can help you approach faults logically. The RV side still has its own quirks, but the basic discipline of ruling out connection, load, and source issues in order is useful.
A simple diagnostic order
When your battery system acts up, use this order:
- Check the battery posts and cable ends
- Look for corrosion, looseness, or damaged cables
- Confirm charge state with a meter
- Think about recent storage or charging habits
- Suspect parasitic drains if the battery dies while parked
- Stop using the system if there's heat, odor, swelling, or leaking
That process saves time because it catches easy fixes first without ignoring safety problems.
When to Call the Motor Sportsland Service Pros
A battery issue can look simple on Friday night and turn into a canceled trip by Saturday morning. We see that a lot in Utah. A trailer sits fine in storage along the Wasatch Front, then the owner heads for Bear Lake or a higher-elevation campground and finds the battery weak, the converter acting odd, or a lithium upgrade that never charged the way it should.
Basic upkeep belongs in the driveway. Repeated electrical faults belong on a test bench with the right tools.
Bring in a technician if the same battery problem keeps coming back after you have handled the normal checks. At that point, the job usually involves the full charging system, battery condition under load, cable integrity, fuse protection, and hidden draws from modern RV equipment. In newer rigs, the battery often supports more electronics than owners expect, so a small fault can keep showing up as a dead battery.
Problems that usually need a shop
Shop-level diagnosis makes sense when you're dealing with issues like these:
- The battery still dies after you've disconnected obvious loads and confirmed your storage routine
- The converter or charger appears inconsistent, undercharging one day and overworking the battery the next
- You've gone through more than one battery in a short period
- You're switching from lead-acid to lithium and need the charging profile and system compatibility verified
- You want parasitic draw testing on a tech-heavy RV with monitors, detectors, entertainment gear, or aftermarket accessories
- You see battery damage, overheating, leaking, or other unsafe charging behavior
Those problems usually need meter-based testing under load and charging-system checks that are hard to do accurately in a driveway, campground, or storage lot.
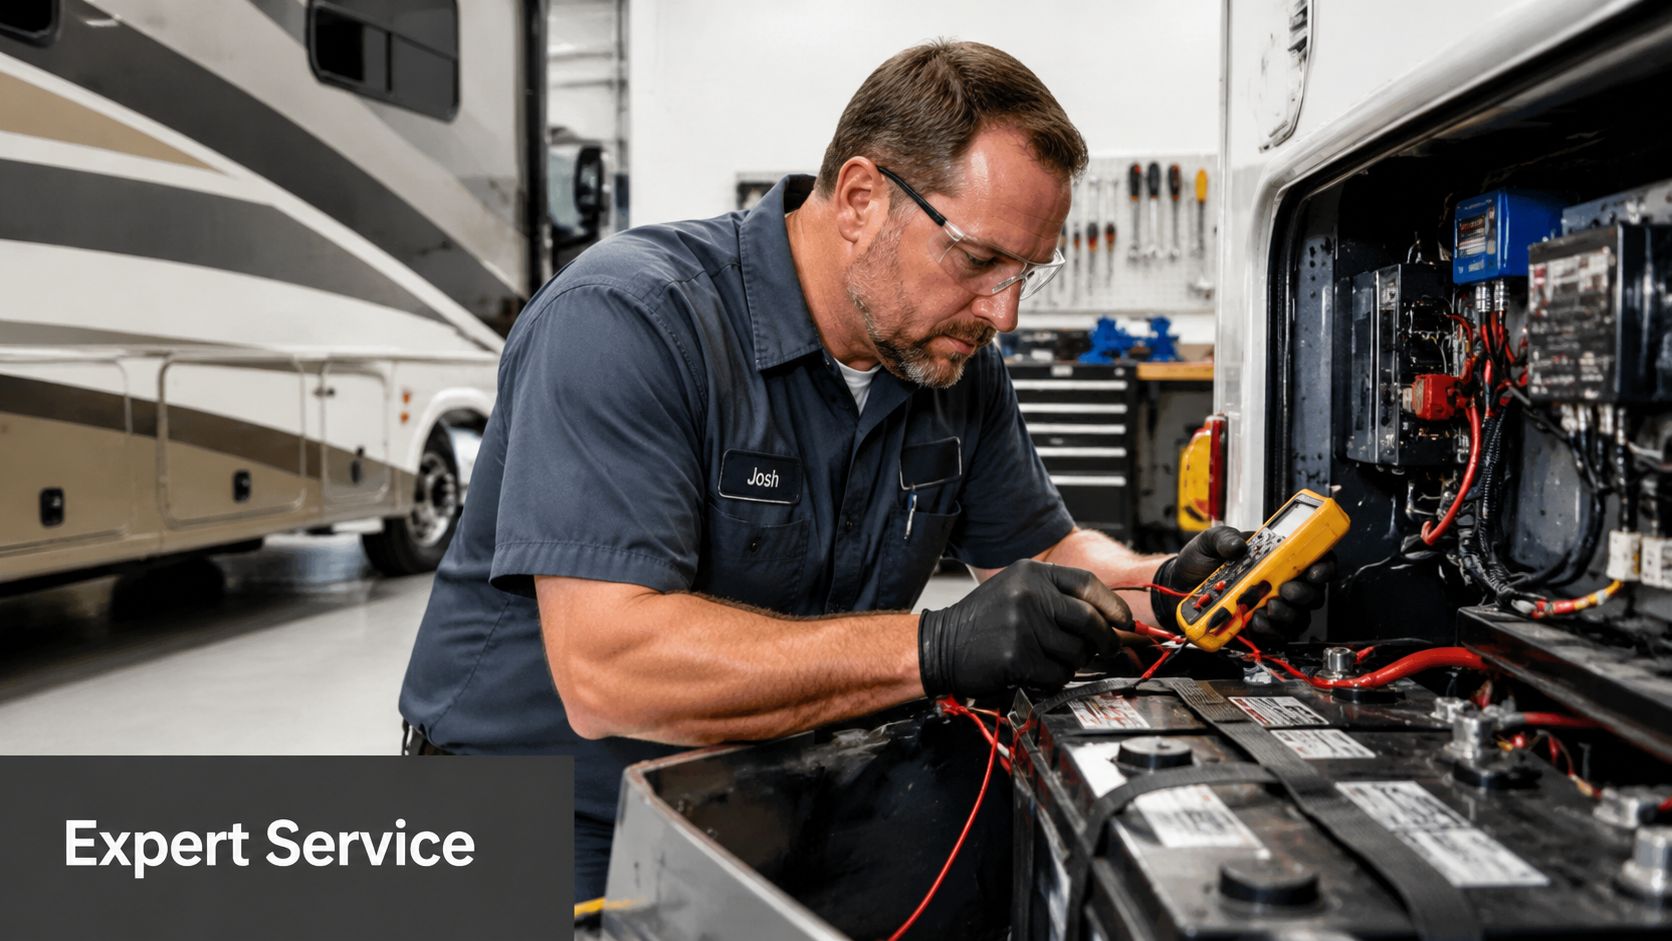
Why professional diagnosis saves time and parts
Battery faults overlap. A tired battery can mask a charging problem. A charger problem can ruin a healthy battery. A parasitic draw can make both look bad. If you start replacing parts before the fault is proven, you can spend real money and still have the same no-start problem before the next trip.
Our service team sorts that out by testing the system as a system. We check whether the trouble is the battery itself, the charger or converter, wiring resistance, poor connections, or a parked draw that is draining the bank between trips. If you need help weighing a replacement battery, charger setup, or broader electrical repair, Motor Sportsland offers local service and sales support for Utah RV owners.
The practical line for DIY owners
Handle routine care yourself if you're comfortable with it:
- Monthly visual checks
- Terminal cleaning
- Flooded battery water checks
- Basic voltage checks
- Battery disconnect steps before storage
Call for service when the fault is persistent, safety-related, or tied to charging behavior. That is the point where good diagnosis saves a battery bank, protects your RV's electrical system, and gives you a better shot at a trouble-free camping season.
FAQ
How often should I check my RV battery?
Check the battery bank once a month during camping season, and add a quick pre-trip check before heading into the Uintas, Bear Lake, or any higher-elevation campground. Cold mornings and furnace use will expose a weak battery faster than a driveway check at home.
If you run flooded lead-acid batteries, include the electrolyte level in that routine. AGM and lithium batteries skip the watering step, but they still need a visual inspection and a voltage check.
What voltage is too low for a lead-acid RV battery?
For a resting lead-acid battery, 12.4 volts is a good line to use for recharging. Letting it sit lower for long periods encourages sulfation, and sulfation cuts service life.
If the battery drops back into the low range soon after charging, stop assuming it only needs more time on the charger. We often find a charging issue, a weak battery, or a parasitic draw causing the repeat problem.
Do AGM batteries need water added?
No. AGM batteries are sealed, so there is no watering schedule.
They still need proper charging voltage, tight cable connections, and occasional inspection for swelling or heat damage. In our shop, failed AGM batteries are often maintenance-free in name only. Owners skip the basic checks, then get surprised when the battery quits early.
Should I leave my RV plugged in all winter?
Only if the converter or charger is built for long-term maintenance charging and you have confirmed it is working correctly. Older single-stage converters can overcharge a battery for months, especially during Wasatch Front winter storage, and that will dry out or cook a lead-acid bank.
A better plan is to store the RV with the battery disconnect engaged and use a charger with the right profile for your battery type. Then verify battery condition periodically instead of assuming shore power is doing the job safely.
How should I store a lithium RV battery in winter?
Store lithium batteries partially charged and keep them above freezing when possible. Full charge for months at a time is not ideal, and charging a cold lithium battery can cause real damage if the battery does not have low-temperature charging protection.
Follow the battery maker's storage range and charging limits. That detail matters more in Utah than many owners expect, because an RV sitting outside in January can see overnight temperatures well below the safe charging range.
Why does my RV battery die while the trailer is parked?
Parasitic draw is one of the most common causes we see on late-model RVs. Propane and CO detectors, stereo memory, control boards, Wi-Fi gear, trackers, and leveling systems can keep pulling power even when the coach looks shut down.
A battery disconnect solves many of these cases. If the battery still goes flat with the disconnect in place, the next suspects are a weak battery, a wiring fault, or a charging system that never fully topped it off after the last trip.
When is a battery problem no longer a DIY job?
Bring in a pro when the battery keeps dying after you have charged it correctly, when voltage readings do not match how the RV behaves, or when you see swelling, corrosion that keeps returning, or melted cable ends.
Get help right away if you smell sulfur or the battery gets hot while charging. At that point, proper testing protects the battery bank, the converter, and the next Utah trip on your calendar.
