
RV Exterior Sealant Guide: Prevent Water Damage

Pulling an RV out of winter storage in Utah should feel exciting. You're thinking about Bear Lake, Jordanelle, or a long weekend down by Moab. Then you spot a faint stain near a window, a soft trim corner, or a bead of caulk that's curled up and let go. That's usually where the problem starts, not where it ends.
Water can enter RVs subtly. Snow load, freeze-thaw cycles, summer sun, and hard afternoon storms along the Wasatch all work the seams year-round. Most owners don't have a catastrophic failure first. They have a tiny opening, then trapped moisture, then hidden damage behind walls, around roof decking, or inside framing.
That's why choosing and applying the right RV exterior sealant matters so much. A good seal job isn't just about making seams look tidy. It's about protecting the structure, the insulation, the interior finish, and the resale value of the rig. The process is straightforward when you know which seal goes where, what prep is important, and what shortcuts always come back as leaks.
Your RVs Worst Enemy Water Damage in the Wasatch
A customer opens the entry door after winter storage, catches a musty smell, and spots a stain above the front window. From outside, the rig can still look decent. Inside, the leak may have been working for months.
That is how water damage usually shows up in our Salt Lake City shop. The first visible clue is rarely the first point of failure. Snow sitting on the roof, spring runoff, hard rain, and repeated freeze-thaw cycles around the Wasatch work every roof penetration, window frame, marker light, and corner molding. A tiny gap can wick water into wood backers, insulation, and wall panels long before caulk looks terrible from the ground.
Repair costs vary a lot once moisture gets into framing or roof decking, but they climb fast. What starts as a failed seal at a window or roof flange can turn into panel replacement, rot repair, and interior tear-out.
One point gets missed all the time. The exposed bead of caulk is usually the secondary seal, not the main one.
On many RV components, the primary water seal is butyl tape compressed behind the flange. The outer sealant bead protects the edge from direct water entry, UV exposure, and dirt, but it does not replace that hidden seal. DIY repairs fail when someone smears fresh caulk over a leaking window frame without pulling the part, checking the butyl, and resealing the assembly with the right product for that component. If you want to understand how roof-specific products fit into that system, our guide to Dicor self-leveling sealant for RV roof seams and flanges covers that side of the job.
Practical rule: If sealant is cracked, separated, shrunken, or loose at an edge, assume water has had a path in.
The inspection also needs to match the part. Roof penetrations, sidewall trim, windows, clearance lights, and corner moldings do not all fail the same way, and they should not all be treated with the same tube from the hardware shelf. The same logic shows up in residential roofing. Hail King Professionals on roof sealant explains why matching sealant to the surface matters there too.
The fix starts with finding the failed seal layer, not covering the symptom. That distinction saves RV owners a lot of repeat leaks.
Choosing the Right RV Exterior Sealant for the Job
Walking into a parts counter and grabbing the first tube labeled “RV sealant” is how people end up resealing the same spot twice. Different parts of an RV move differently, shed water differently, and see different amounts of sun and heat. Roof seams, window frames, baggage doors, trim rails, and metal transitions don't all want the same product.
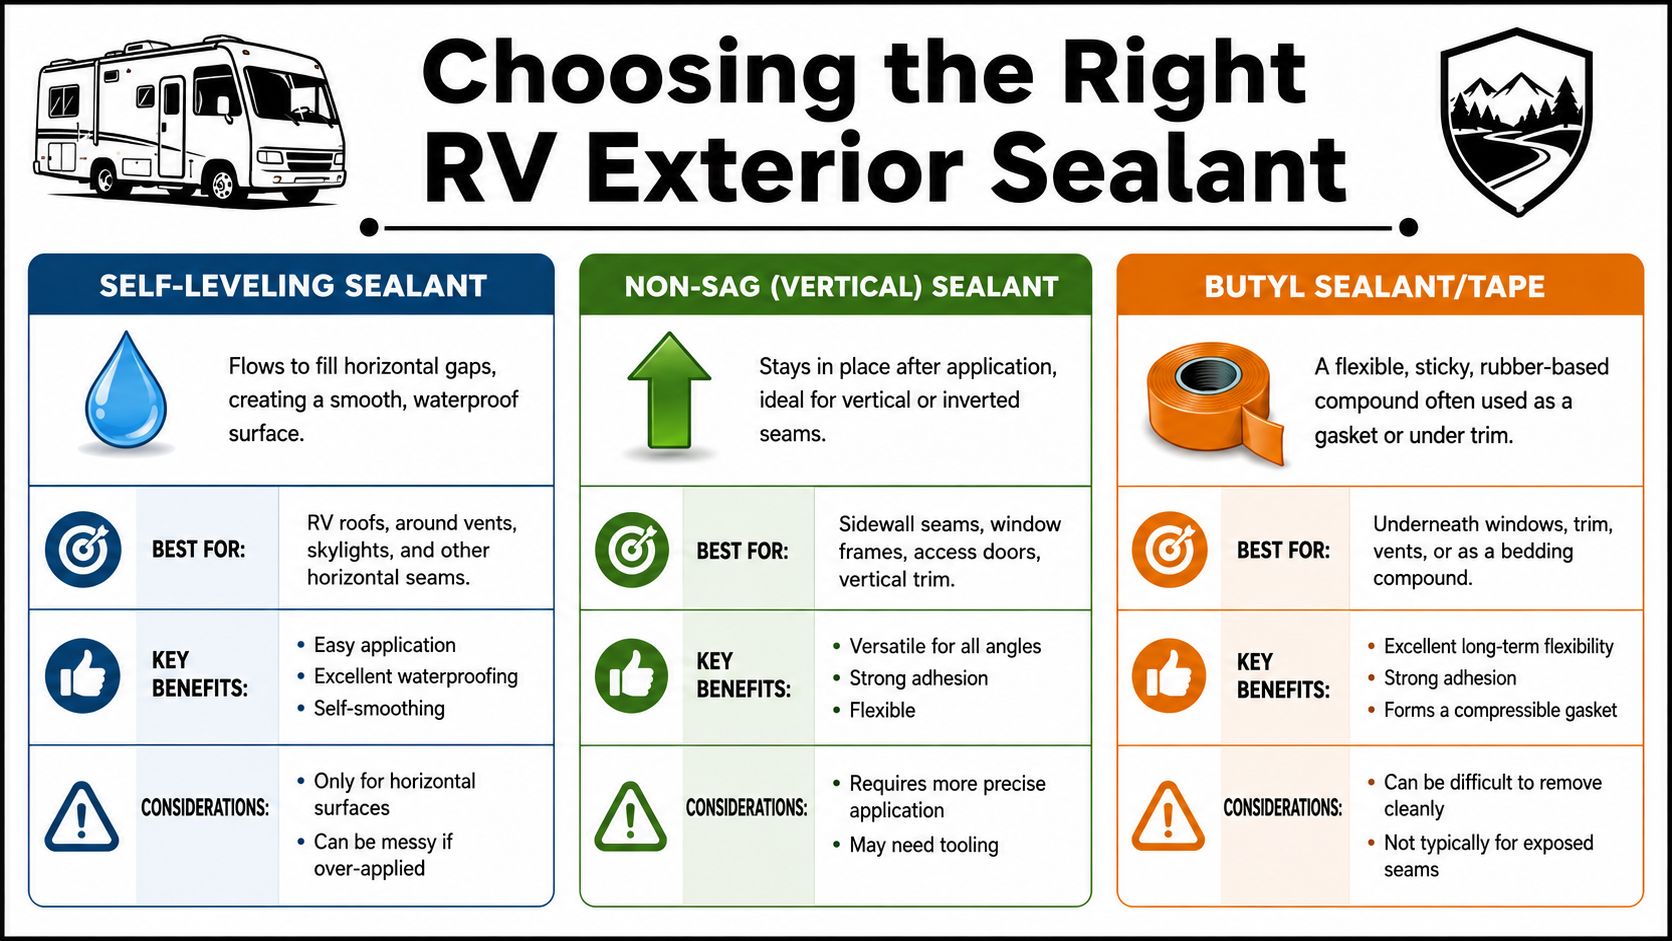
The three categories that matter most
The first category is self-leveling sealant. This is the material you use on horizontal roof surfaces where you want the bead to flow out and cover a flange or seam. It's right for roof vents, skylights, plumbing vents, and many roof edge details.
The second category is non-sag sealant. This stays where you put it, so it works on sidewalls, around windows, at compartment doors, and along vertical trim. If you use a self-leveling product on a vertical seam, it can slump and leave thin spots.
The third category is butyl tape. This is the one many owners overlook. It belongs behind flanges and trim pieces, compressed between surfaces. It isn't usually the exposed finish bead you see from outside.
Why silicone usually isn't the answer
For exterior RV work, the better performers are usually modern polyurethane or hybrid formulations. The market for high-performance RV exterior sealants is dominated by moisture-curing polyurethane formulations, which offer superior adhesion, flexibility, and UV resistance compared to traditional silicone alternatives, as described in this review of urethane-based RV sealant performance.
That lines up with what techs see in the bay. Standard household silicone often looks decent on day one and causes headaches later. It can leave residue, complicate future repairs, and it often isn't the best match for the constant movement of RV materials.
Use a product for the surface and orientation, not for the label on the front of the tube.
RV sealant comparison
| Sealant Type | Best For | Key Property |
|---|---|---|
| Self-leveling sealant | Roof seams, vents, skylights, other horizontal surfaces | Flows out to form a smooth waterproof layer |
| Non-sag vertical sealant | Windows, doors, trim, sidewall penetrations | Stays in place and holds a clean bead |
| Butyl tape | Under flanges, windows, trim, vents | Compresses into a primary gasket-style seal |
Product selection by component
A few names come up often for good reason. Sikaflex 221, 3M 5200, and Geocel MHRV 2300 are well-known moisture-curing polyurethane options used where strong adhesion and weather resistance matter. Field-tested performers such as OSI Quad Max, Vulkem Max, and 3M Fast Cure 4000 UV are also recognized for permanent flexibility and resistance to temperature swings.
For horizontal roof work, a purpose-built lap sealant is usually the right move. If you want a deeper look at that style of product, our guide to Dicor self-leveling sealant is a useful reference.
If you're the kind of owner who likes comparing sealing systems across different parts of the home and RV world, this explainer from Hail King Professionals on roof sealant is worth reading for broader context on how sealants protect exposed assemblies.
Essential Tools and Proper Surface Preparation
The part commonly avoided is the part that decides whether the repair lasts. Prep work isn't glamorous, but it's the difference between a seal that bonds and a bead that peels back after a few storms.
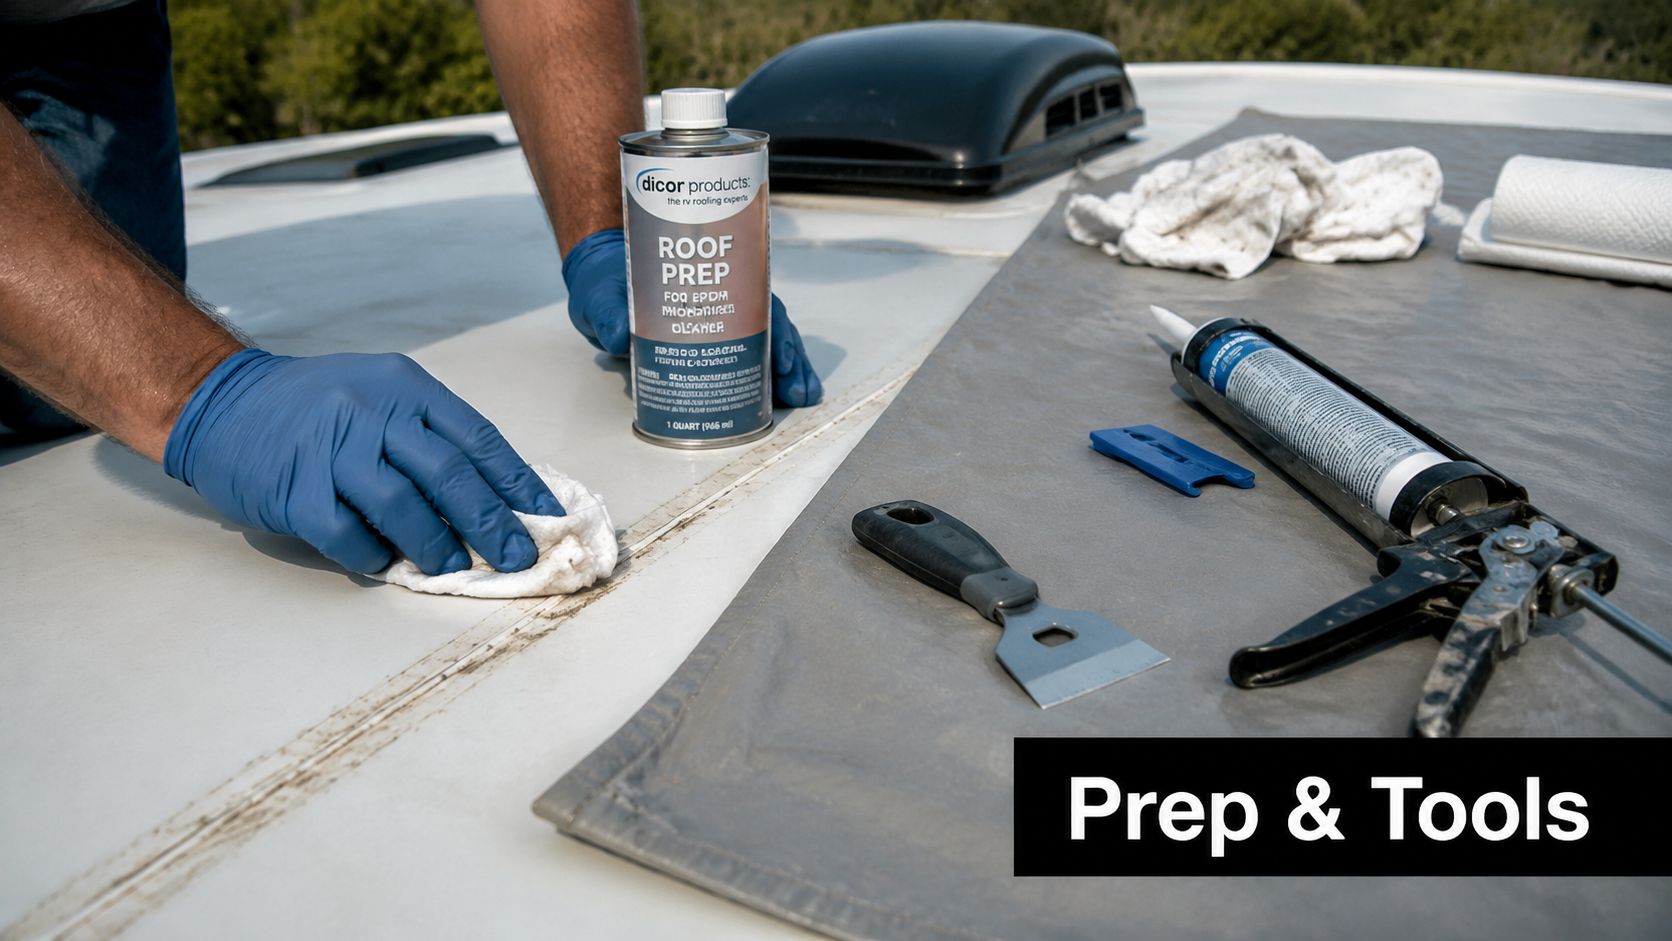
The basic tool kit
A solid DIY setup doesn't need to be fancy. It does need to be the right gear.
- Caulking gun: Use a smooth-rod or dripless gun so you can control bead size.
- Plastic scrapers: These help remove failed sealant without gouging roofing material.
- Gloves: Sealant work gets messy fast.
- Clean rags: You'll use more than you think.
- Cleaner approved for the surface: Match the cleaner to the roof or sidewall material.
- Painter's tape when appearance matters: Especially around windows and trim.
- Step ladder and stable roof access: Don't rush this part.
Metal scrapers can be fine in some places, but they're a bad habit on many roof membranes. One slip can create a bigger problem than the leak you started with.
The hidden seal that matters most
This is the misunderstanding that causes a lot of repeat leaks. The primary water seal is butyl tape compressed between the mating surfaces. The exterior caulk or lap sealant is the secondary seal that protects the butyl from UV and weather, as shown in this technician-focused explanation of butyl tape versus exterior sealant.
That means if a window, vent, or trim piece has lost the butyl seal underneath, smearing more sealant around the outside may hide the problem, but it doesn't fix the root cause. The water barrier is supposed to be behind the flange.
If the flange is loose, the butyl has dried out, or the opening was installed badly, exterior caulk alone won't save it.
What proper prep actually looks like
Start by checking whether you're doing a touch-up or a tear-out and rebuild. If the old sealant is still bonded well and only has a small void, a careful refresh may work. If it's brittle, layered, contaminated, or separating from the surface, strip it back.
Then clean the area completely. Dirt, chalking, oxidation, old silicone residue, and loose sealant all interfere with adhesion. On roof projects, the same discipline matters when adding accessories. Our article on how to mount a solar panel to an RV roof shows the same principle. The bond is only as good as the surface underneath it.
A Step by Step Guide to Applying Sealant Like a Pro
A clean-looking bead can still leak. We see that in the shop all the time after a Utah winter, especially around vents, marker lights, and window frames. Good application starts with knowing what the sealant is supposed to do at that spot. On many components, butyl tape is the primary seal behind the flange, and the exterior bead is there to weatherproof the edge and protect that assembly. If the joint itself has failed underneath, stop and reset the component instead of burying it in more caulk.
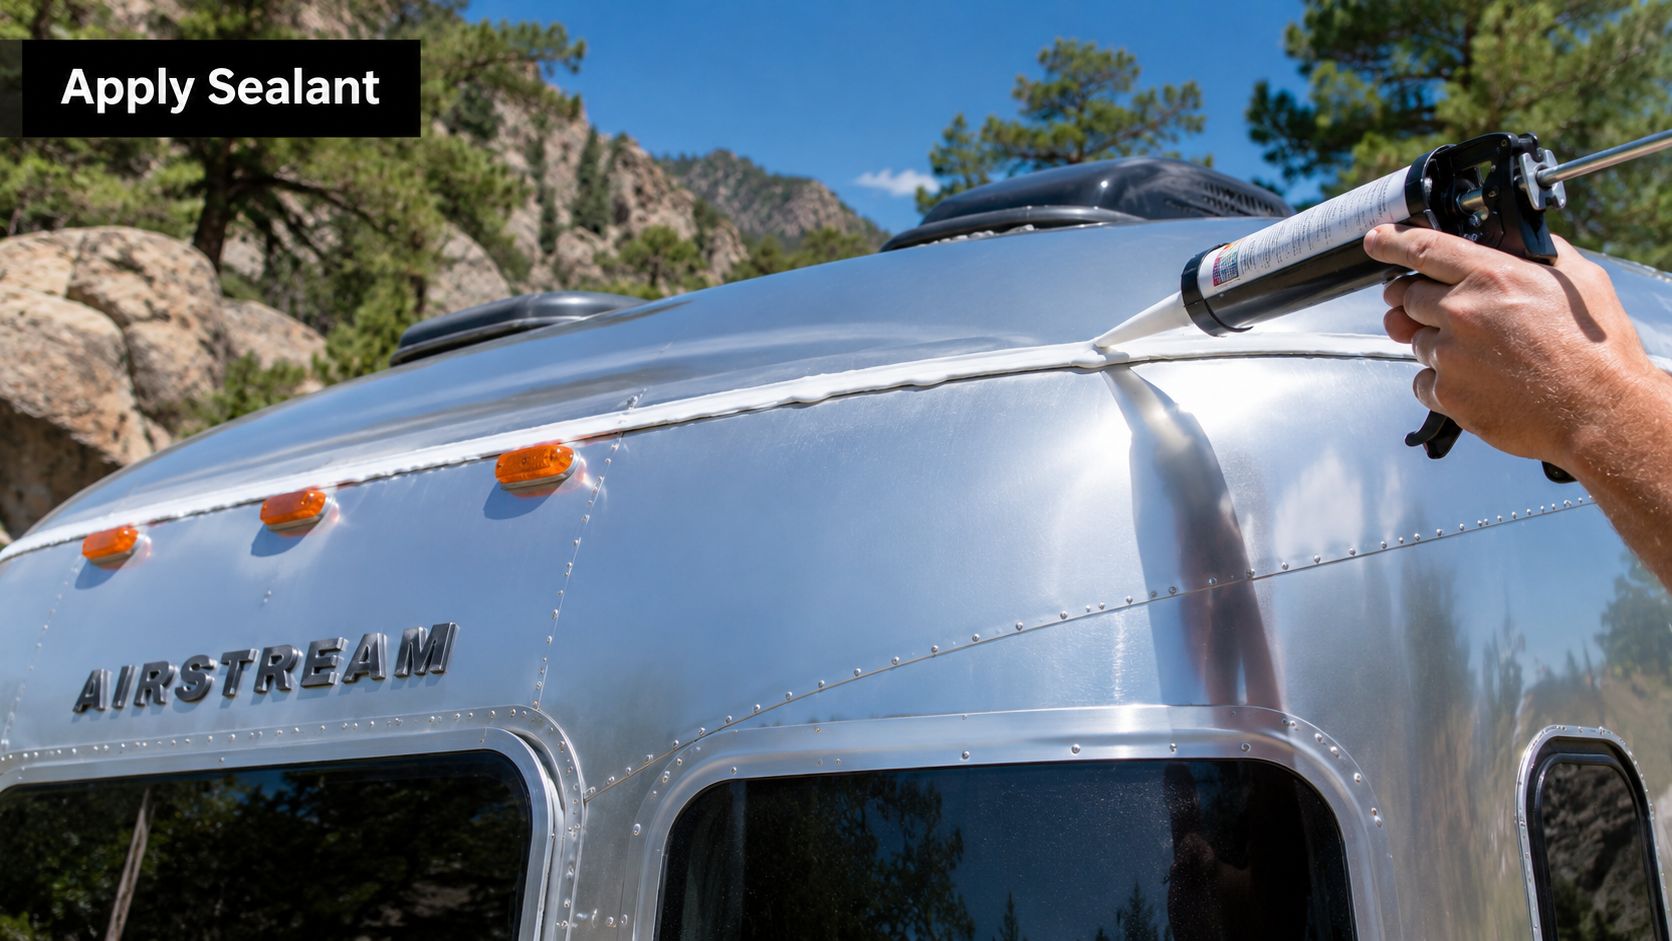
Start with weather and material planning
Plan the job for moderate temperatures and dry conditions. If the tube is cold, the sealant guns poorly and tends to skip. If the roof is hot from direct sun, the product gets loose fast and is harder to control. In our Salt Lake City shop, we usually stage the rig inside or work in the morning so the surface is dry, cool enough to handle, and not collecting dust in the wind.
Have more material on hand than you expect to need. Running short halfway through a roof seam leads to rushed joints and mismatched products. Keep the tubes at room temperature, read the label, and confirm whether that area needs self-leveling or non-sag sealant before you cut the nozzle.
The shop-floor sequence
This is the sequence we use when we want a repair to hold up through freeze-thaw cycles, summer sun, and highway vibration:
Verify the joint and the product
Match the sealant to the roof or sidewall material, then match it again to the orientation of the seam. Horizontal roof seams usually want a self-leveling lap sealant. Vertical trim, windows, lights, and corner moldings usually need a non-sag product that stays where you put it.Inspect before you apply
Press gently around the flange or trim. If it moves, if fasteners are backing out, or if the seam has obvious gaps underneath, address that first. Fresh sealant over a loose part is a temporary cover, not a repair.Cut the nozzle small
Start with a modest opening at an angle. A smaller cut gives better control around screw heads, corners, and short transitions. You can always trim more off. You cannot put it back.Lay one continuous bead with steady pressure
Keep the gun moving at a consistent speed so the bead wets out to both sides of the seam. On roof penetrations, cover the flange edge and the fastener heads. Around window frames and trim, keep the bead centered on the joint instead of spreading it wide for appearance.Watch the overlap points
Start and stop locations are where many leaks begin. Overlap the new bead into the previous section while it is still workable, and give extra attention to corners, termination bars, and any place two materials meet.Tool only if the product and location call for it
Self-leveling products usually settle on their own. Non-sag sealants around vertical trim may benefit from light tooling to press the bead into the joint and clean the edge. Overworking the bead just smears material where you do not need it.
Roof seams versus vertical trim
Roof seams and sidewall seams should not be treated the same way.
On the roof, the priority is complete coverage over the seam and fasteners. A missed screw head or a thin spot at a lap joint is enough to let water in. Along vertical trim, windows, and lights, control matters more. Too much material traps dirt, looks rough, and often pulls away at the edges because the bead is too heavy.
Aim for full contact, not excess volume. The bead should bridge the joint evenly, with no pinholes, skips, or dry edges.
For a visual walk-through, this short clip is a useful companion to the written process.
Where owners usually waste material
The waste usually comes from trying to make sealant do a rebuild job.
- Around vents: The whole flange gets buried instead of sealing the perimeter and covering the fasteners.
- At corners: The bead gets broken into short starts and stops, which leaves weak overlap points.
- Over old buildup: New product gets stacked on top of cracked or loose sealant instead of removing the failed section and starting fresh.
A tidy bead helps, but appearance is not the primary criterion. Effectiveness hinges on whether the right sealant is in the right place, bonded to a clean surface, with the underlying joint still sound.
Curing Times and Common Mistakes to Avoid
A lot of leaks start after the repair looks finished.
An owner seals a roof vent in the afternoon, drives home, and parks through a cold Utah night. The bead skins over, but underneath it has not cured enough to handle flex, wind, or moisture. A day or two later, the edge lifts, dust gets under it, and water has a path in.
Cure time always depends on the product, surface temperature, sun exposure, and humidity. Some self-leveling and lap sealants can handle light rain fairly quickly, but full cure usually takes longer than owners expect. In our shop, we tell people to read the tube, then give it extra time if the weather is cool or the coach is parked in shade. Waiting a little longer is cheaper than paying for RV roof leak repair costs after water gets past a rushed repair.
The biggest mistake I see is asking caulk to do the job of the seal underneath it. Secondary sealant is there to protect the joint from weather and UV. It is not a substitute for a failed window flange seal, a dried-out butyl tape bed, or loose hardware. If the primary seal has failed, adding more caulk on top only hides the problem for a while.
Layer buildup is the next issue. Old sealant stacked over older sealant gets stiff, loses adhesion at the edges, and cracks as the coach moves down the road. Once buildup gets thick or loose, cut it back and rebuild the area correctly instead of burying it again.
Weather timing matters too. Cold sealant is harder to gun and bond well. Hot surfaces can make some products skin too fast. Wind carries dust into a fresh bead, and afternoon storms in northern Utah can ruin a repair before it sets.
A better routine is straightforward:
- Check the product temperature range before you start.
- Apply early enough to give the sealant a full, quiet cure window.
- Keep the RV out of rain, wash bays, and road travel until the product has cured.
- Do not seal over damp surfaces, chalky oxidation, or silicone residue.
- If a window, vent, or trim piece is leaking from behind the flange, pull it and replace the butyl tape instead of adding another cosmetic bead.
That last point saves people the most money. Choosing the right sealant matters, but choosing the right type of seal matters more. Butyl tape handles the compression seal behind many flanges. Exterior caulk protects exposed seams and edges. Mix those roles up, and the repair often fails long before the tube says it should.
Surface prep and cure time feel slow on the front end. Replacing rotten wall structure is slower.
Maintenance Schedules and When to Call for Service
A coach can look sealed and still be taking on water.
In our Salt Lake City shop, the rigs that surprise owners the most are the ones with clean-looking caulk and hidden failure behind a window flange, marker light, or roof attachment. Utah weather is hard on seal systems. Intense sun dries exposed sealant, winter freeze-thaw cycles open small gaps, and storage under trees or snow adds more stress. That is why inspection needs to be scheduled, not left to chance.
A good owner routine is simple. Inspect the exterior seals in spring and fall. Get on the roof at least once a year, wash it, and inspect every penetration and transition while the surface is clean enough to show cracks, lifting edges, and movement. Older coaches, full-time units, and RVs stored outdoors usually need more frequent checks.
The DIY checklist
Keep the inspection focused and slow. You are not just looking for ugly caulk. You are checking whether the right seal is still doing the right job.
- Watch for edge lift and shrinkage: If sealant is pulling away from the surface, water can track behind it.
- Check high-movement areas first: Front and rear caps, roof transitions, gutter rails, and ladder mounts tend to show trouble early.
- Inspect every opening: Windows, clearance lights, vents, appliance doors, and trim pieces all have their own leak paths.
- Look for signs behind the bead: Staining, rusty fasteners, loose trim, or bubbling wall material often point to a failed primary seal behind the flange, not just worn exterior caulk.
- Press gently inside if you suspect a leak: Soft wallboard or floor means stop and book service.

One detail DIYers miss all the time is the difference between maintenance and concealment. Refreshing a weathered exterior bead on a compatible seam is normal maintenance. Adding more caulk over a leaking window that has lost its butyl tape seal usually traps the problem in place and lets water keep working behind the wall.
That layered approach is common in other weatherproofing systems too. The exposed material is only part of the defense, which is why the moisture-control logic behind Superior Home Improvement ice shield makes sense here as well. Different materials, same principle. The backing layer and the outer layer each have a separate job.
When the job has moved past DIY
Call for service when the repair requires disassembly, not just surface maintenance. That includes windows or vents leaking from behind the flange, thick old sealant buildup that needs to be cut back, recurring leaks in the same spot, soft spots, interior staining, musty odor, or several seams failing at once.
Those are the jobs where we pull the component, replace the butyl or bedding material, inspect the substrate, and then reseal the exterior with the product matched to that part of the RV. If you want a clearer picture of what delayed repairs can cost, our breakdown of RV roof leak repair cost shows how fast a small leak can turn into structural work.
Your Guide to a Watertight RV and FAQ
The owners who avoid expensive water problems usually do three things well. They inspect on a schedule, they use the right RV exterior sealant for the specific component, and they understand that exposed caulk is only part of the sealing system.
The biggest takeaway is the one many people miss. Butyl tape is the primary seal behind the flange. Exterior sealant is the weather shield over that assembly. If you get that distinction right, a lot of product decisions get easier and a lot of leak-chasing goes away.
For broader weatherproofing context outside the RV world, this guide to Superior Home Improvement ice shield is a helpful example of how layered moisture protection works in other exposed structures too. Different materials, same principle. Water protection works best when the system underneath and the exposed outer layer both do their jobs.
FAQ
| Question | Answer |
|---|---|
| What is the best RV exterior sealant for a roof seam? | Use a self-leveling roof sealant made for RV roof applications and matched to the roof material. Horizontal seams want a product that flows and covers evenly. |
| Can I use silicone on my RV exterior? | In most exterior RV applications, standard silicone isn't the first choice. It can create serviceability problems later and often isn't the best match for long-term RV movement. |
| What is butyl tape used for on an RV? | Butyl tape is typically used behind flanges such as windows, vents, and trim. It acts as the primary compressed water seal between mating surfaces. |
| How often should I inspect my RV seals? | A spring and fall inspection schedule is the smart baseline, with a closer look before long trips and after rough weather. |
| How do I know if I should remove old sealant first? | If the old material is loose, brittle, contaminated, or built up in multiple layers, remove it and reset the seam instead of piling more on top. |
| How many tubes of sealant does a typical RV need? | Material needs vary by size and seam complexity. A full reseal takes more than most owners expect, so buy enough before you start and don't plan on one or two tubes handling the whole coach. |
If you want help choosing the right product, scheduling a reseal, or finding an RV that's ready for Utah camping season, contact Motor Sportsland. You can browse inventory on the site, stop by our Salt Lake City area showroom, or schedule service with our team for leak checks, repairs, and maintenance that keep your RV road-ready.
