
RV Waste Tank Guide 2026: Dump & Clean Like a Pro
Standing at a dump station for the first time can make any new owner feel like they're one wrong move away from a disaster. A lot of Utah campers have this moment at places like Jordanelle, Bear Lake, or on the way back from a weekend in the Wasatch. The panel says the tank is full, somebody's waiting behind you, and suddenly the RV waste tank system feels a lot more intimidating than towing, leveling, or backing into camp.
The system is simple once you know what each tank does and why the dumping order matters. The process resembles sorting household waste. One tank handles toilet waste, another handles sink and shower water, and some RVs split kitchen sink water into its own tank. Once you understand that logic, the rest gets easier and cleaner.
Motor Sportsland has spent over 55 years helping Utah families learn the systems that make RV travel comfortable, practical, and far less stressful. This guide walks through the essentials with the kind of advice that prevents the messy mistakes we see most often. You'll learn what the tanks are, how to dump them properly, how to avoid clogs and odors, and how Utah winter and mountain camping change the way you should care for your setup.
Introduction
The RV waste tank system has a reputation for being gross and complicated. Most of that reputation comes from bad habits, not bad design. If you use enough water, keep the valves in the right position, and dump in the right order, the system works well.
The three names that matter are black tank, gray tank, and sometimes galley tank. The black tank takes waste from the toilet. The gray tank collects water from the bathroom sink and shower. A galley tank, when an RV has one, usually handles kitchen sink water separately.
That separation matters for cleanliness and for dumping. Bathroom and kitchen wastewater is still dirty, but it's cleaner than toilet waste. That's why gray water is so useful after a black-tank dump. It helps rinse the hose before you disconnect.
Black Gray and Galley Understanding Your RV Waste Tanks
Most RV owners learn faster when they recognize the plumbing system's separate functions. A helpful comparison is sorting bins at home. You don't throw recycling, kitchen scraps, and trash into the same container if you want cleanup to stay manageable. Your RV works the same way.
A black water tank is dedicated to the toilet. A gray water tank handles sink and shower runoff. A galley tank, on some floorplans, handles kitchen sink water on its own. Kitchen water often carries grease, food residue, and stronger odors than bathroom sink water, so some manufacturers keep it separate.
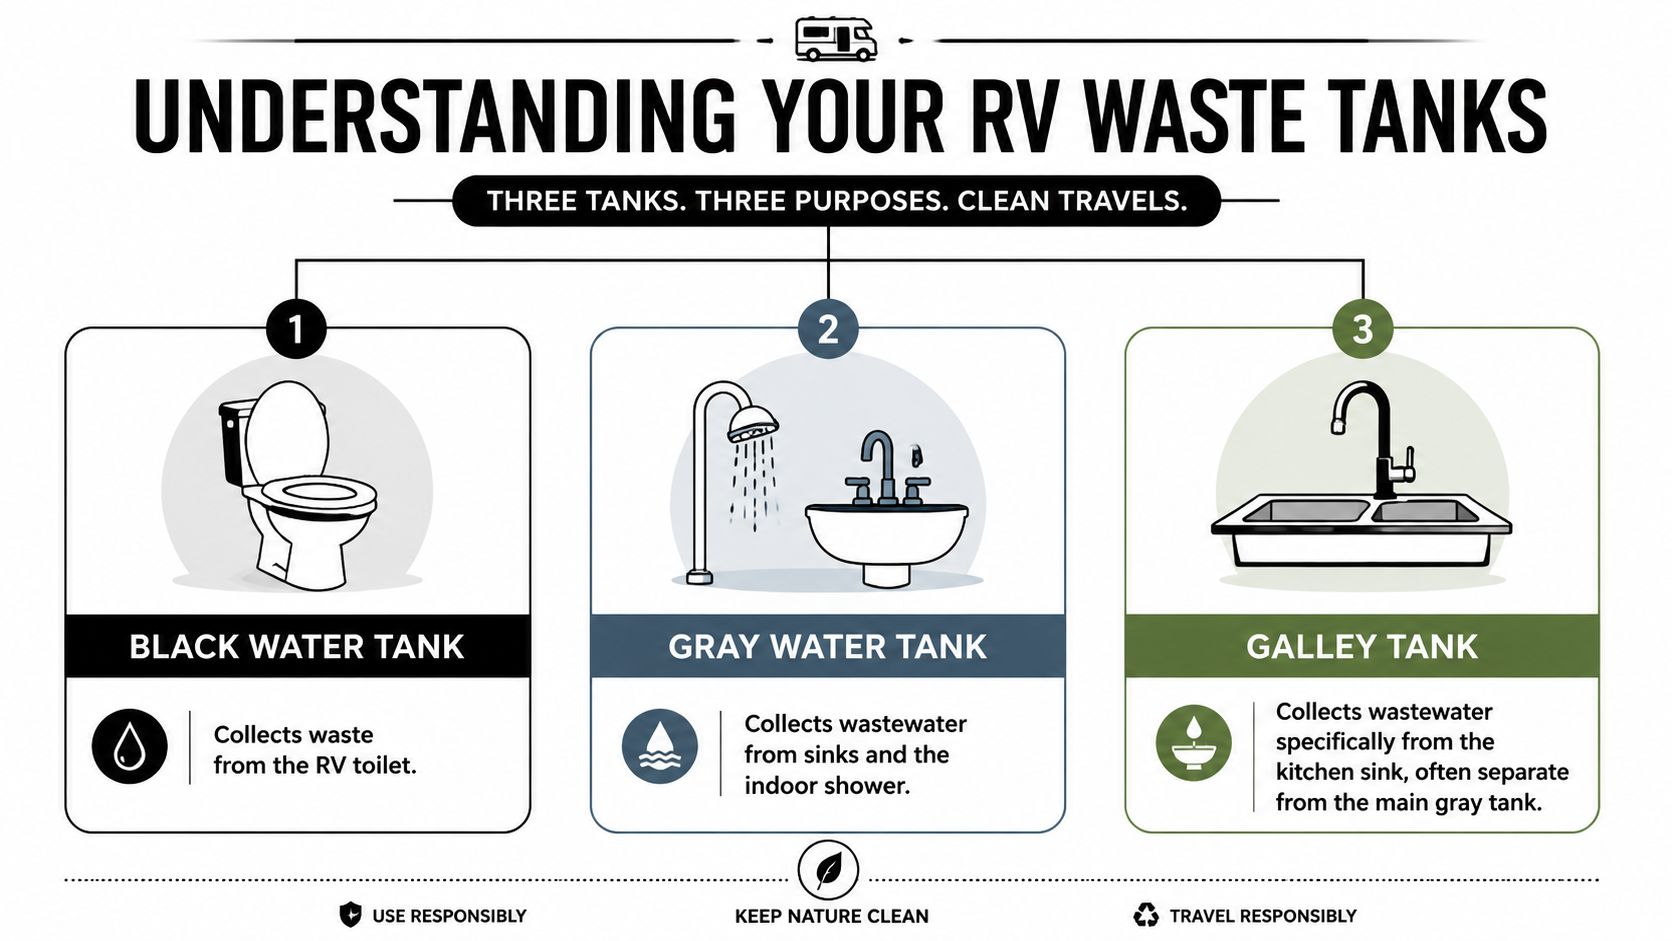
What goes where
Here's the simple version:
- Black tank: Toilet waste only.
- Gray tank: Bathroom sink water and indoor shower water.
- Galley tank: Kitchen sink water, if your RV has a separate kitchen drain tank.
If you remember nothing else, remember this. Your toilet tank needs liquid to move solids. Your sink and shower tanks fill faster than many first-time owners expect, especially after a few showers or dishwashing sessions.
Why tank size changes your camping rhythm
Tank capacity has a direct effect on how long you can stay off-grid before finding a dump station. Small trailers don't give you the same margin for error as larger fifth wheels or motorhomes. Small travel trailers like the Casita often have a black water tank capacity of only about 15 gallons and a gray water tank of 32 gallons, while larger RVs can hold significantly more, which is why tank size has such a big effect on boondocking time and dump frequency, as noted in this RV holding tank guide.
That's one reason two families can camp in the same area and have completely different tank experiences. Floorplan, tank size, and habits matter as much as trip length.
Simple rule: Treat your RV plumbing like a managed system, not a household sewer. What you put in, and how quickly you fill each tank, determines how easy your cleanup will be.
If you want a broader primer on how water moves through an RV from the fresh tank to the drains, our RV plumbing system basics guide is a helpful next read.
Inside the System Key RV Waste Tank Components
An RV waste tank setup looks crude from the outside, but it's built around a few important parts doing very specific jobs. If you know those parts, troubleshooting gets much easier.
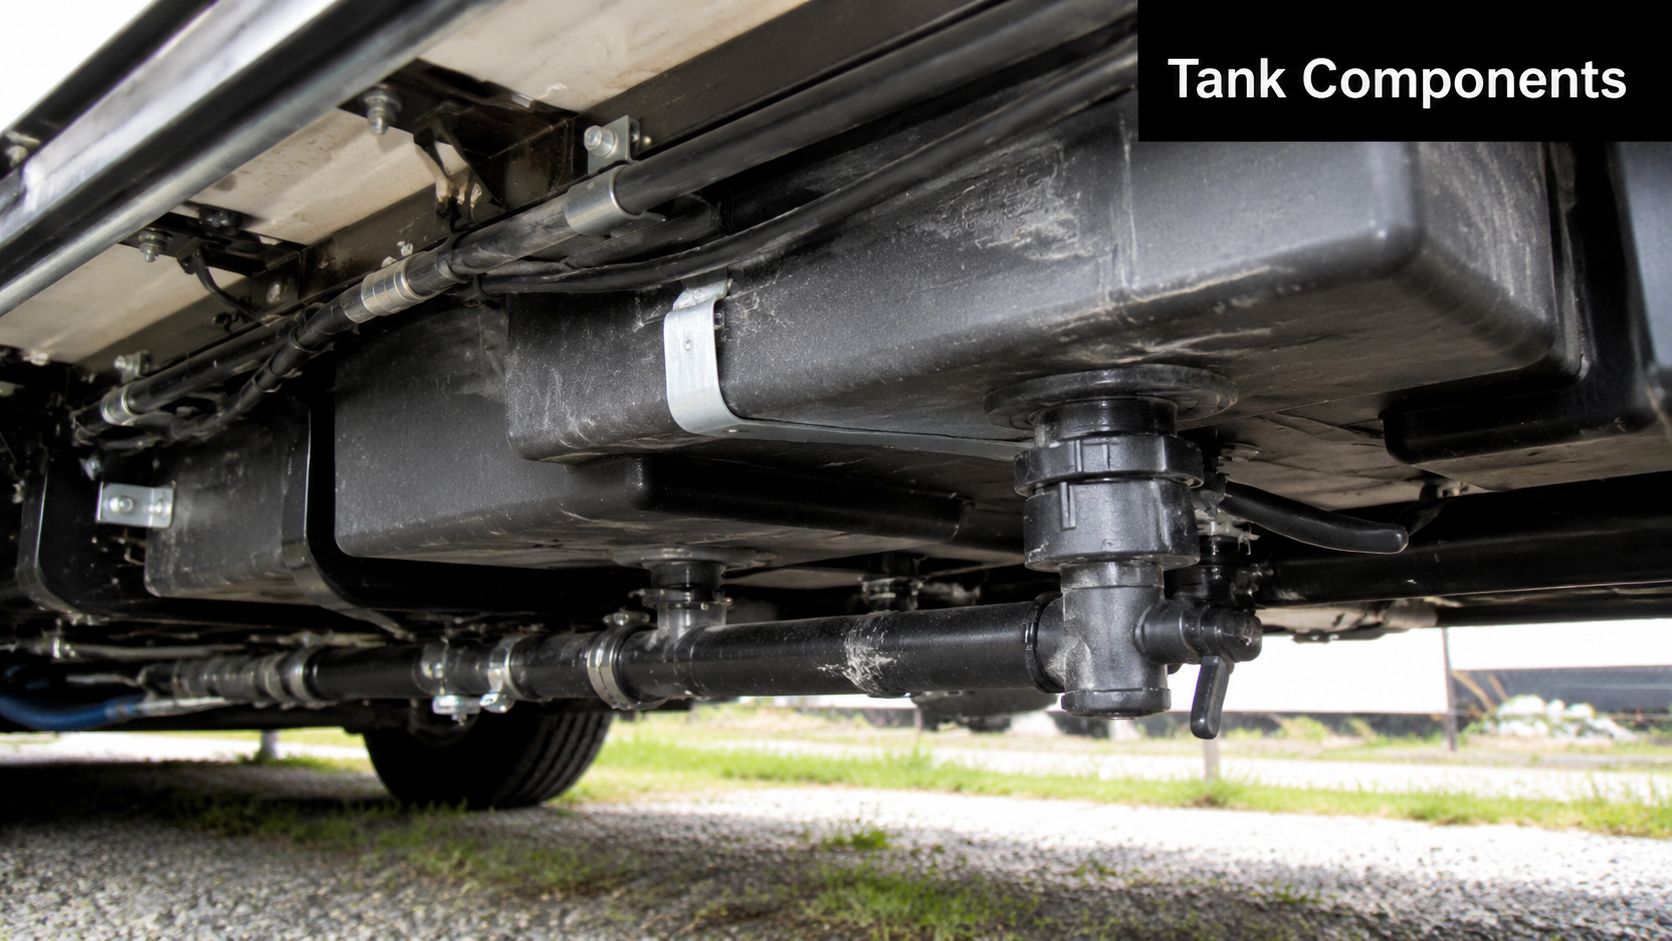
The tank body, outlet, and valves
Most holding tanks are made from durable polyethylene. They're shaped to fit the RV's underbelly, axle placement, and frame rails, which is why they rarely look like neat rectangles in person.
The black tank sits low in the plumbing layout so gravity can do the work. RV black water tanks typically operate within a 40 to 60 gallon capacity range for standard motorhomes. A full 60-gallon tank adds about 500 pounds of weight, and the tank is positioned as the lowest point in the plumbing to ensure complete gravity-driven drainage, according to RecPro's black tank overview.
The parts you handle most are the gate valves, usually T-handles. Pull the handle and the tank opens to the sewer connection. Push it back in and the tank is sealed.
Sensors and vents
Tank sensors are useful, but they're also one of the least trustworthy parts of the system. Debris on the sensor probes can make a tank read partly full even after a dump. That doesn't always mean the tank is full. It often means residue is stuck where it shouldn't be.
The vent stack matters just as much. It routes gas upward and out through the roof so odor doesn't push back into the coach. If that vent gets blocked, owners often blame the tank treatment first when the underlying issue is airflow.
What to look at before you assume the worst
Use this quick diagnostic checklist before booking service:
- Check the valve pull. If it feels stiff, don't force it.
- Look under the RV for sagging or impact damage.
- Watch the monitor panel with some skepticism. False readings are common.
- Notice where the smell appears. Bathroom, kitchen, or exterior odor points to different problems.
- Confirm the roof vent isn't obstructed.
A lot of RV tank problems are really flow problems. The system depends on gravity, water volume, and a sealed path from fixture to tank to outlet. Once one of those three gets interrupted, the symptoms start.
The Essential Dumping Process A Step-by-Step Guide
Good habits save you from almost every ugly surprise. Dumping an RV waste tank shouldn't feel rushed, and it shouldn't feel improvised. Follow the same routine every time and it becomes second nature.
Start with the visual checklist below.
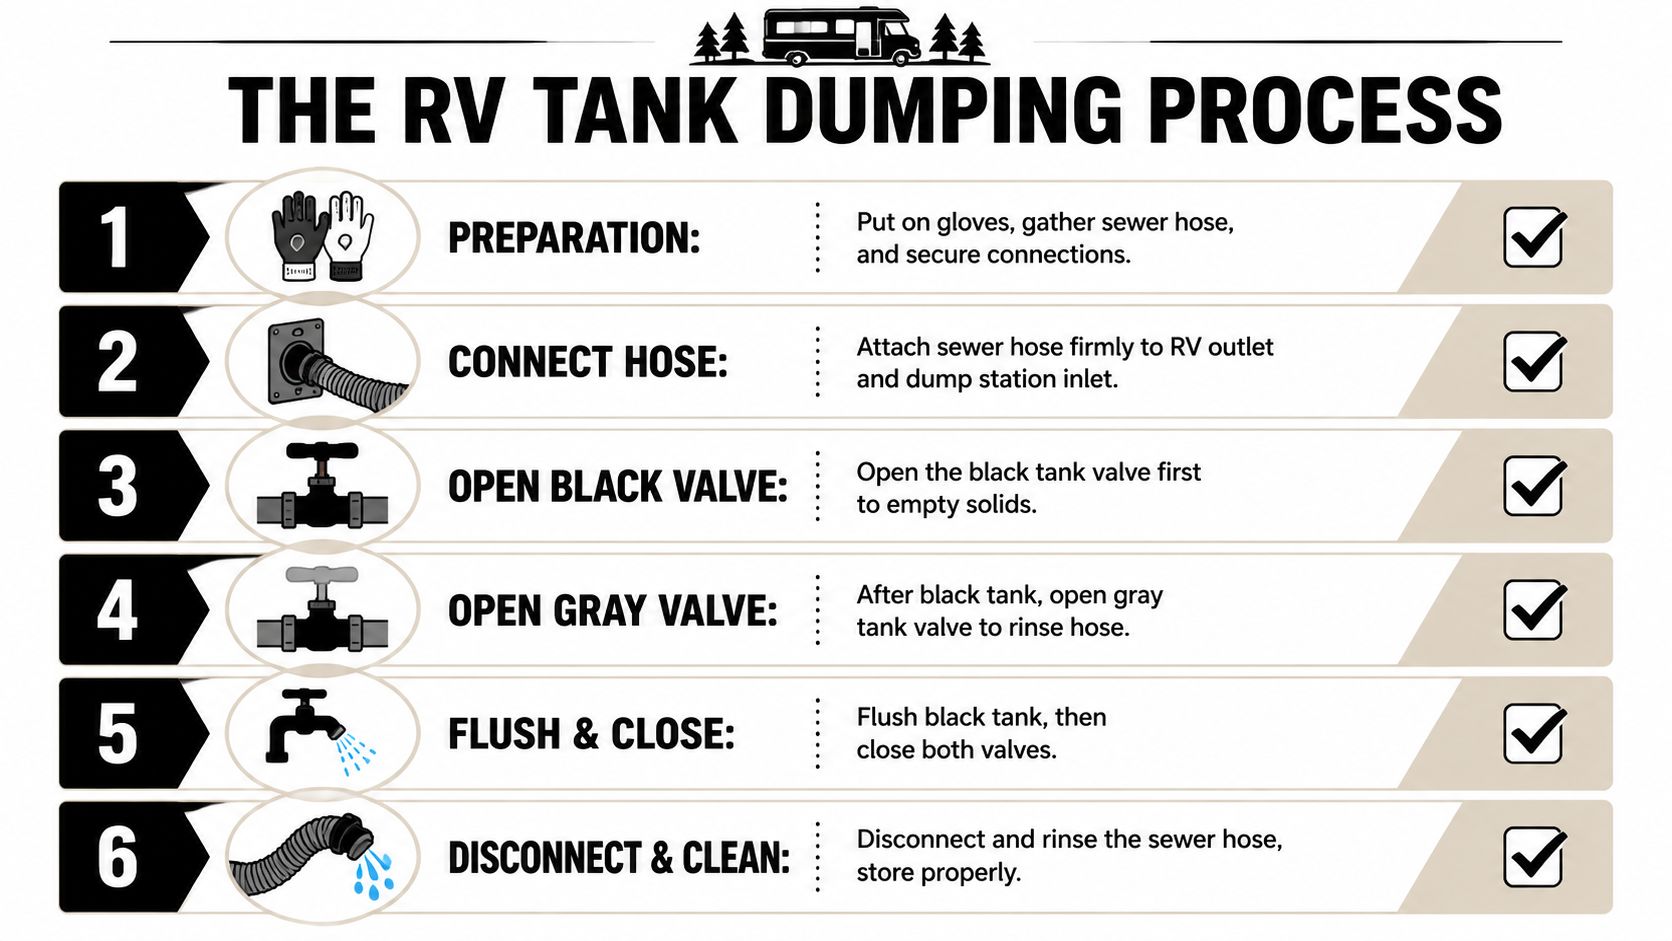
The dump station routine that works
Put on gloves and stage your gear.
Have your sewer hose, clear elbow if you use one, and rinse hose ready before you open anything.Connect the sewer hose securely at both ends.
Make sure the RV fitting is locked in and the dump station end is seated firmly. A loose connection is the fastest way to create a problem nobody forgets.Dump the black tank first.
This is the heavy waste. It needs the cleanest hose path possible.Dump the gray tank second.
The soapy sink and shower water helps rinse residue from the hose.Flush if your RV has a built-in black tank flush.
If it doesn't, add fresh water back through the toilet after the dump.Close valves, rinse equipment, and store everything clean.
A lot of owners learn best by watching the process once before doing it themselves. This walkthrough is a good visual reference:
The timing mistake that causes most clogs
The black tank should not be dumped too early. RV black water tanks should be dumped when two-thirds to three-quarters full because that creates enough liquid volume for a strong whoosh that carries solids out. Dumping too early can leave solids behind and lead to clogs, as explained in this RV tank dumping guide.
That “whoosh” matters more than people realize. Solids don't slide out neatly on their own. They need water volume behind them.
Dumping a half-empty black tank is like trying to wash mud off a driveway with a spray bottle. You need flow, not hope.
Fixing the three fears most owners have
A lot of anxiety around the RV waste tank comes down to three things:
| Problem | Usually caused by | What helps |
|---|---|---|
| Clogs | Too little water, dumping too early, leaving the black valve open | Wait for proper fill level, use more water, keep the valve closed between dumps |
| Odors | Dry traps, vent issues, tank residue | Add water after dumping, keep vents clear, use an appropriate treatment |
| False readings | Debris stuck on sensors | Thorough rinsing and repeat cleaning cycles |
If you're comparing methods, a macerator pump for RV use can make sense in certain site layouts, but it doesn't replace proper tank habits. It changes how waste is moved. It doesn't change what prevents buildup.
Solving Common RV Tank Nightmares Clogs Odors and False Readings
The three most common complaints are clogs, smells, and monitor panels that cry wolf. All three usually come from habits, not defective equipment. That's good news, because habits are easier to fix than hardware.
The pyramid plug problem
The nastiest clog in RV ownership is the pyramid plug. It happens when liquid drains away and solids stay behind, usually because someone leaves the black valve open at a full-hookup site. Waste builds into a mound near the outlet, and then nothing moves the way it should.
The “pyramid plug” is a common clog where solids build up because the liquid has drained away. To prevent this, never leave your black tank valve open. After dumping, add 3 to 5 gallons of fresh water and flush again to rinse the discharge pipe itself, which helps prevent hidden clogs, based on this expert video breakdown of pyramid plug prevention.
That last step matters. A lot of owners think they're cleaning the tank when the actual residue is sitting in the discharge pipe.
What actually helps with odors
Odor control products get marketed like magic. They aren't. First identify the source.
Common odor causes include:
- Dry P-traps: A sink or shower trap that dried out can let tank smell drift back inside.
- Vent blockage: A roof vent that isn't moving air properly can force smells indoors.
- Tank residue: Buildup on tank walls, valves, or the discharge line can keep odors hanging around.
- Kitchen waste in the galley line: Food residue smells different from black-tank odor, but it's still unpleasant.
If you want the plain truth, products help most when they support a clean system. They don't rescue a neglected one.
Shop-floor advice: If the odor is sudden and strong, stop buying more chemicals and start checking airflow, valve position, and whether there's standing residue in the line.
For owners who want a household-drain comparison to understand why residue and line buildup matter, this explanation of Drain cleaning in Boerne, Texas is useful because it shows the same basic principle. Flow problems often start in the pipe, not just in the main holding area.
Why your panel says full when it isn't
False sensor readings are common because waste paper and residue cling to the probes. The fix usually isn't replacing the panel right away. Start with a thorough rinse cycle, plenty of water use, and a proper treatment routine. If the reading stays wrong after repeated cleaning and normal operation, then it's time to inspect the sensor or wiring.
Enzymes or chemicals
Our practical recommendation is simple. Use enzyme-based treatments for regular maintenance when you want waste and paper to break down more naturally. Use odor-control chemicals more selectively when heat, storage conditions, or a neglected tank demand stronger smell control.
What doesn't work well is relying on heavy fragrance to cover up an airflow or clog problem. That just gives you perfume over sewage.
Keeping It Fresh Chemicals Treatments and Toilet Paper
The tank treatment aisle confuses a lot of owners because every bottle promises a clean, odor-free miracle. A better way to choose is by matching the product to the problem.
Picking the right treatment for the job
Two categories dominate the conversation:
- Enzyme or probiotic treatments: These help break down waste and toilet paper. They're a strong fit for routine use and for owners trying to keep the system flowing well over longer trips.
- Chemical odor-control treatments: These target smell fast. They can be useful in hot weather, after neglected maintenance, or when a tank has been sitting longer than it should.
If your system is healthy, enzyme-based products are usually the better long-game choice. If your main complaint is smell during a short trip in summer heat, a stronger deodorizing product can help. The key is not expecting one product type to solve every issue.
For a closer look at what different formulas do, our RV black tank treatment guide breaks down the options in plain English.
Toilet paper matters more than branding
Use RV-safe, fast-dissolving toilet paper. That's not marketing fluff. Slow-dissolving household paper can hang up in the tank and contribute to buildup, especially when owners are already being stingy with water.
The same rule applies to wipes, paper towels, hygiene products, and “flushable” products. If it isn't waste or RV-safe toilet paper, keep it out of the toilet.
The Mountain West gray-to-black workaround
A growing group of full-time RVers in the Mountain West moves gray water into the black tank to cut down on dump station trips. That can make practical sense in places where dump access is limited. But it changes the tank chemistry and the cleanup routine. A growing trend among full-time RVers in the Mountain West is to move gray water into the black tank to reduce dump station visits. While efficient, this increases sludge density and requires specialized enzymatic treatments, as standard deodorants often can't keep up, according to this discussion of full-timer dumping habits.
That's especially relevant in Utah, where some trips put you a long way from convenient dumping. If you use this strategy, you need to be more deliberate about treatment, rinsing, and water volume during flushing. It can work. It just isn't a shortcut.
RV Tank Care in Utah Winterizing and High-Altitude Camping
Utah is beautiful RV country, but it's hard on plumbing. Cold nights, shoulder-season camping, and mountain elevation all change how an RV waste tank behaves.
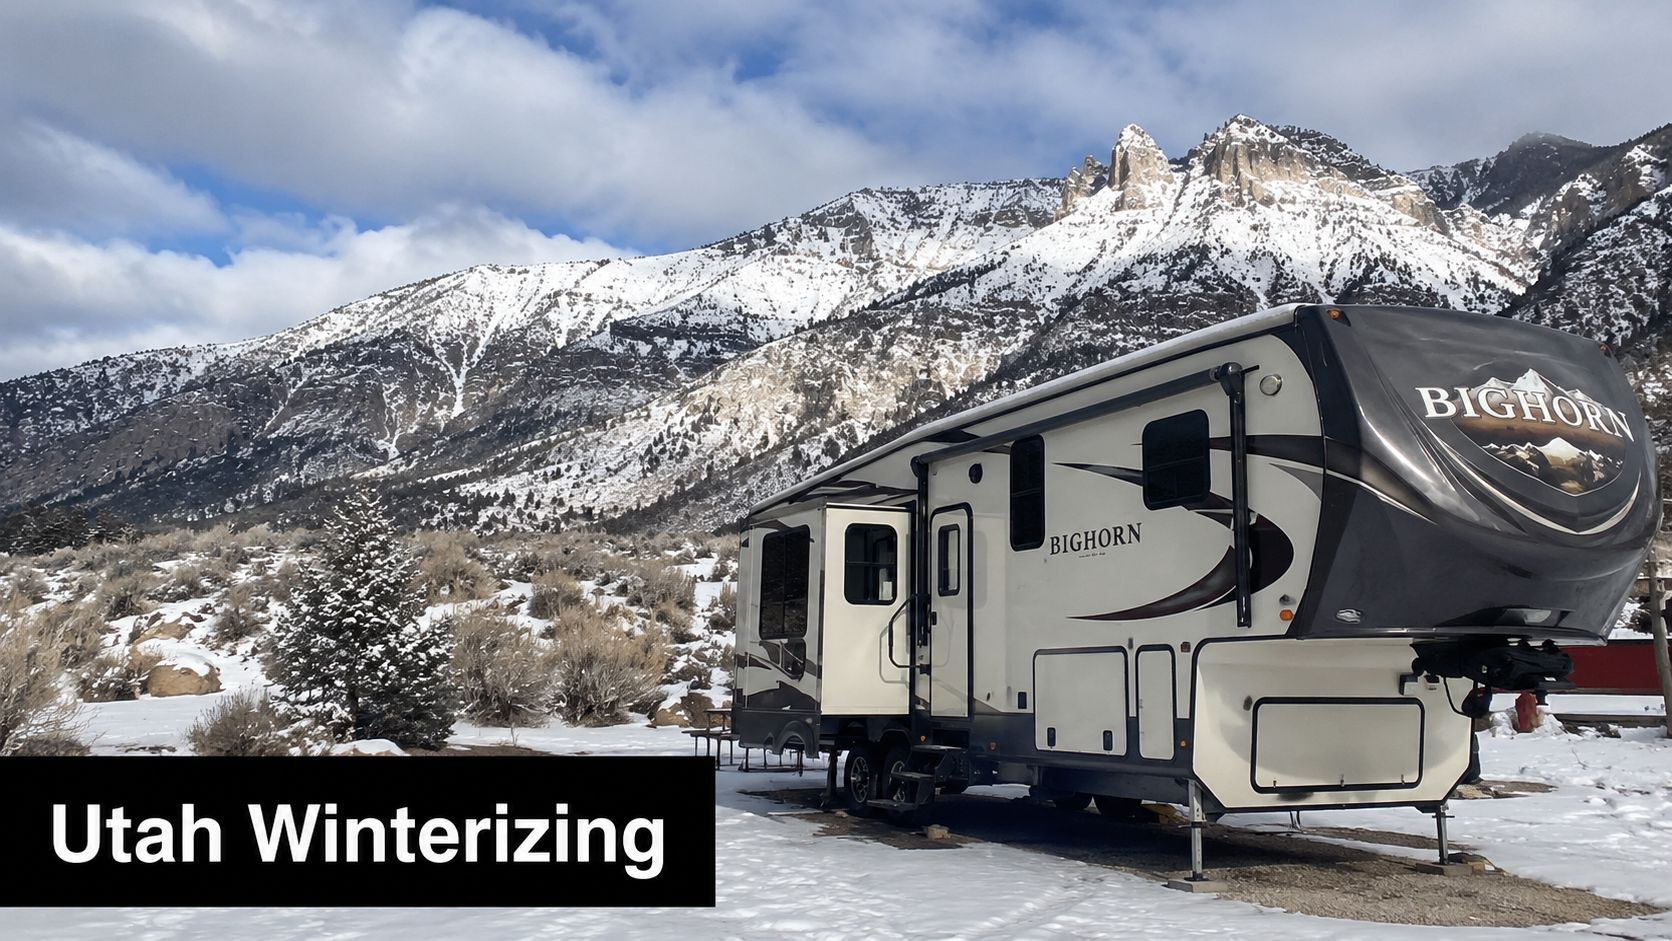
Winterizing the waste side the right way
If your RV will sit through a Utah freeze, don't cut corners. Drain the tanks completely, empty the lines, and make sure the dump valves aren't left holding trapped liquid. Frozen waste plumbing can turn a simple maintenance task into a repair job.
A practical winter routine looks like this:
- Drain thoroughly: Empty black, gray, and galley tanks at an approved station.
- Rinse before storage: Don't store a dirty system and hope spring will be kind.
- Blow out supply lines if you're winterizing the whole coach: Compressed air helps remove trapped water.
- Use non-toxic RV antifreeze where required by your plumbing setup: Don't substitute automotive products.
- Check valve operation before parking it long-term: A sticky valve in October can become a frozen headache later.
For owners in the Wasatch Front, the biggest mistake is assuming one warm day means the freeze risk is over. It isn't.
High-altitude camping changes the feel of the system
Camping higher up in the Wasatch or Uintas can make toilets and vents behave a little differently. You may notice burping, slower flushing feel, or odors appearing at odd times if venting isn't working well.
A few habits help:
- Keep roof vents clear: Debris and nests create real airflow problems.
- Use enough water in the bowl: Altitude doesn't eliminate the need for liquid.
- Don't wait until the last minute to dump: Remote mountain areas can mean fewer nearby dump stations.
- Watch valve condition in cold mornings: Frozen or stiff hardware shouldn't be forced.
In Utah, weather and elevation punish lazy tank habits faster than flatland camping does. Good process matters more when nights are cold and dump access is limited.
Some owners can handle this care themselves. Others should schedule service before winter storage or before a long high-country trip. That isn't a failure. It's cheaper than replacing cracked plumbing or dealing with a stuck valve in freezing weather.
When DIY Isnt Enough Professional RV Waste Tank Service
Some RV waste tank issues are reasonable do-it-yourself jobs. Others stop being worth the gamble once you've tried the basic fixes and the symptoms keep coming back.
Call for service when you're dealing with problems like these:
- A clog that won't clear with normal rinsing and water use
- A gate valve that won't open or won't seal properly
- Persistent odor after trap, vent, and cleaning checks
- Visible tank damage, sagging, or leakage underneath
- Sensor issues that continue after multiple cleanout cycles
- Tank replacement or plumbing repair access that requires underbelly disassembly
The reason to bring in a technician isn't just convenience. It's preventing secondary damage. Forcing a stuck valve can break hardware. Ignoring a leak can damage flooring or underbelly materials. Repeatedly attacking a hard clog the wrong way can compact it further.
Motor Sportsland's service team works with owners from both Millcreek and Spanish Fork who'd rather solve the problem once than fight the same smell or blockage for the next three trips. If your system has moved past routine maintenance, scheduling professional service is usually the fastest path back to stress-free camping.
Conclusion
An RV waste tank system feels intimidating right up until you understand the logic behind it. Keep waste streams separated, use enough water, dump in the right order, and don't leave the black valve open. Those habits prevent most of the expensive and unpleasant problems owners run into.
For Utah RVers, a little extra attention goes a long way. Winter storage, cold-weather valve issues, mountain camping, and limited dump station access all make smart tank care more important. The upside is simple. Once you learn the routine, tank maintenance becomes just another part of traveling well.
If you're building out your full RV ownership checklist, insurance belongs on that list too. Owners outside Utah who need to find the right RV insurance in NY may find that resource useful as a starting point for understanding coverage questions.
If you want help with service, want to compare tank-friendly floorplans, or are ready to look at your next RV, visit Motor Sportsland in Salt Lake City, browse inventory online, or reach out to the team for practical advice before your next trip.
RV Waste Tank FAQs
How often should I dump my black tank
Dump based on fill level, not on a rigid calendar. The key target is when the black tank is roughly two-thirds to three-quarters full so there's enough liquid to carry solids out properly. If you dump too early, you increase the chance of residue staying behind.
Can I leave my black tank valve open at a full-hookup campsite
No. Keep it closed until it's time to dump. Leaving it open lets liquids drain away while solids stay behind, which is how severe clogs start.
Why does my tank sensor still read full after dumping
Usually because residue or toilet paper is stuck on the sensor area. That doesn't always mean the tank is full. Start with a thorough rinse, proper water use, and a normal treatment cycle before assuming the sensor is broken.
What should I put back into the black tank after dumping
Add fresh water back into the tank after dumping so the bottom isn't left dry. That helps the next round of waste move and reduces the chance of buildup. If you use a treatment product, add it with water, not into a dry tank.
Do I really need RV toilet paper
Use RV-safe toilet paper or another fast-dissolving paper that behaves the same way in holding tanks. The goal is quick breakdown and less chance of clumping. Regular household paper is one of the easiest ways to make your RV waste tank harder to manage.
Why does my RV smell even when the tank isn't full
A full tank isn't the only cause of odor. Dry sink or shower traps, venting problems, residue in the discharge line, or kitchen waste in a galley tank can all create smells. Track where the odor is strongest before you assume the black tank is the culprit.
Is a portable waste tank worth it
It can be, especially if you camp where dump stations aren't close to your site. Portable RV waste tanks commonly range from 15 to 28 gallons, and a full 28-gallon unit can weigh over 200 pounds because water weighs more than 8 pounds per gallon, as discussed in this portable RV waste tank overview. The convenience is real, but so is the handling challenge. Choose one based on how far you'll need to move it and who will be pulling it.
If you'd like help choosing an RV with a practical tank setup, need service for a stubborn waste-system problem, or want to browse new and used inventory for Utah camping, contact Motor Sportsland. Our team can help you compare floorplans, schedule service, and get road-ready for your next trip.
