
Your Guide to an RV Lithium Battery Upgrade in Utah

A lot of Utah RV owners start thinking about an RV lithium battery upgrade after the same kind of trip. You pull into a quiet spot near Moab, the Uintas, or out past the Wasatch backcountry, run lights, fans, maybe the fridge overnight, and by morning your lead-acid battery bank feels done. Now you're managing power instead of enjoying camp.
That frustration is real. So is the appeal of lithium. Better usable power, faster charging, less weight, and less babysitting. But a good RV lithium battery upgrade isn't just swapping one battery for another. You need to know whether it fits your camping style, whether your charging equipment can support it, and how to install it safely in Utah's mix of steep grades, hot desert travel, and freezing shoulder-season nights.
We've seen plenty of owners get excited about lithium for the right reasons, and we've also seen people spend money they didn't need to spend. The smart move is to treat this as a decision, not a trend. If you camp off-grid often, lithium can be one of the best upgrades you make. If you mostly stay at hookup parks a few weekends a year, the answer may be different.
Introduction
Lead-acid batteries usually fail you at the worst time. It's rarely in your driveway. It's when you're settled into camp, the furnace fan has run more than expected, the lights stay on a little longer, and the battery monitor drops faster than it should.
That's why so many Utah RV owners start looking into an RV lithium battery upgrade. Lithium can change how your coach feels to use. You get more practical power, quicker recovery from charging, and less weight dragging around mountain roads. But the upgrade only works well when the whole system is planned correctly.
A solid lithium conversion starts with honest questions. Do you really need it? How much battery capacity matches your actual use? Can your converter, solar controller, inverter, and alternator work with it? And if you install it yourself, do you know the wiring and safety steps that matter?
This guide walks through real-world trade-offs. It's built for Utah RVers dealing with cold mornings, altitude, long towing days, and a mix of campground stays and boondocking weekends. If you're trying to decide whether lithium is worth it, or you're ready to do the job correctly, this is the practical path.
Is a Lithium Upgrade Right for Your Utah RV Adventures
You leave the Wasatch Front on a Friday, climb into cooler air, and reach camp after dark. The furnace runs harder than it did at home. The next morning is below freezing, the solar harvest is weak, and the battery decision you made months ago starts to matter.
That is the Utah test for an RV battery system. A lithium upgrade can make life much easier in the right rig, but it is not the automatic answer for every owner.
When lithium makes sense
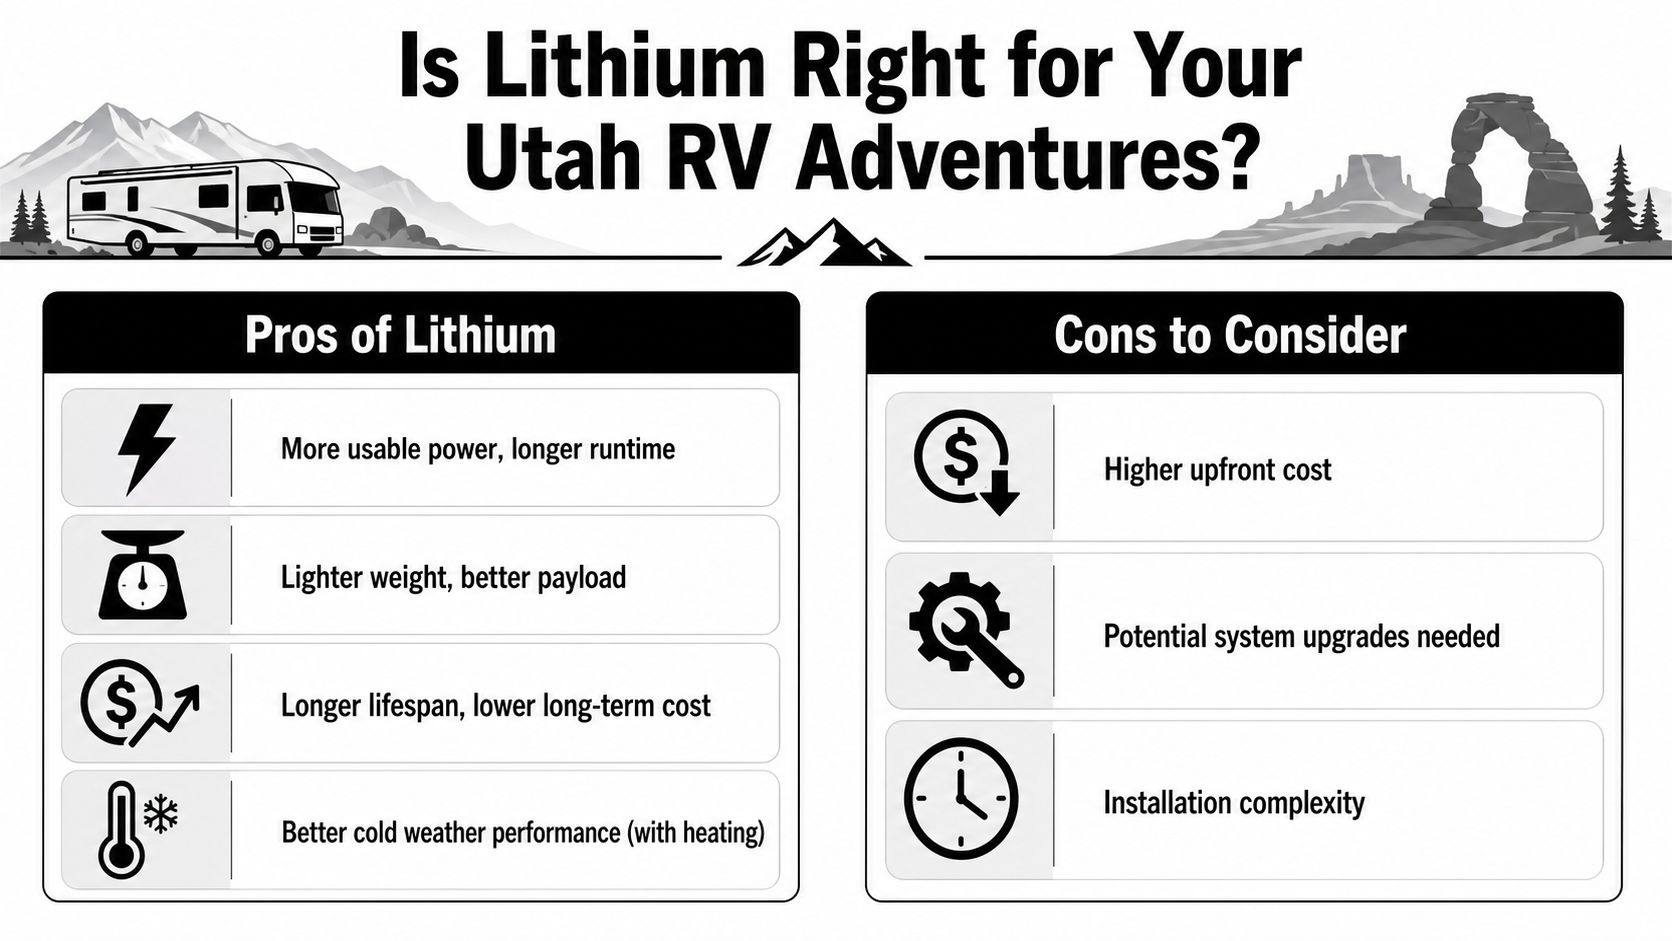
Lithium is a strong fit for RVers who dry camp often, run an inverter, depend on solar, or get tired of watching battery voltage sag by morning. In day-to-day use, the biggest advantages are usable capacity, lower weight, and faster charging acceptance. Battle Born explains the practical weight difference between lithium and lead-acid in RV applications, which matters in trailers and motorhomes already working with tight cargo limits and steep grades around Utah, Idaho, and western Colorado, in its guide to RV lithium batteries.
Charging behavior is another reason owners switch. Progressive Dynamics notes that lithium batteries can accept higher charge current longer in the cycle than lead-acid batteries, which shortens generator run time and helps solar recover faster during limited sun windows, in its article on lithium battery charging for RVs.
In the shop, I usually recommend lithium to customers who camp in dispersed sites near Moab, spend several nights without hookups in the Uintas, or want the furnace, lights, and device charging to feel normal instead of rationed.
When lead-acid or AGM is still the smarter buy
Lithium is expensive up front, and the battery itself is only part of the bill. Some RVs also need converter changes, charger adjustments, or alternator protection. If your camping is mostly summer weekends with hookups, that extra cost may never come back to you in a meaningful way.
That is why I do not push lithium on every customer. A family that camps a handful of times a year at Bear Lake, Jordanelle, or full-hookup parks may be better served by a fresh AGM setup and good maintenance habits. The battery bank gets less abuse, charging access is easier, and the system stays simpler.
That trade-off is easy to miss online because a lot of upgrade articles assume every owner wants longer off-grid runtime.
Utah-specific caution: cold weather changes the answer
Cold weather is the part many buyers underestimate. Lithium performs well in use, but charging below freezing can damage cells unless the battery has low-temperature charge protection or internal heating. That matters in Utah because a trailer can sit in 20 degree weather overnight in the mountains, then start charging from solar, shore power, or the tow vehicle first thing in the morning.
For shoulder-season campers, this is one of the biggest decision points. If you camp around Bryce, Fish Lake, the Uintas, or high desert areas in spring and fall, lithium can still be the right call. The system just needs the right battery and charging setup. If you do not want to think about battery temperature at all, AGM may fit your style better.
A quick self-check
Ask these before spending the money:
- Do you camp off-grid often enough to use the extra usable capacity?
- Are you trying to reduce generator time or make solar work better?
- Is your current battery bank already frustrating you on cold nights?
- Will your RV see freezing mornings where charging protection matters?
- Are you okay paying more now for better daily performance and longer service life?
If you are planning longer boondocking trips, our guide to camping off the grid helps match your battery choice to your actual camping style.
A useful outside comparison is choosing the right solar battery for homeowners. It is written for home energy storage, but the sizing logic is a good reminder that battery upgrades should start with real usage, not marketing claims.
Lead-acid vs LiFePO4 lithium at a glance
| Metric | Traditional Lead-Acid/AGM | LiFePO4 Lithium |
|---|---|---|
| Usable capacity | Lower practical capacity before voltage drop becomes a problem | More of the rated capacity is usable in normal RV service |
| Weight | Heavier for the same general storage class | Lighter, which helps payload planning |
| Charging behavior | Slower acceptance as the battery fills | Faster charge acceptance under the right charging profile |
| Fit for occasional campground use | Often a sensible, lower-cost choice | Often more battery than the owner needs |
| Cold-weather charging risk | More tolerant of charging in cold conditions | Must be protected from charging below freezing unless designed for it |
| System compatibility demands | Usually simpler in older rigs | Requires a careful check of charging equipment and wiring |
For many Utah RV owners, the honest answer is simple. Lithium is excellent for frequent dry camping and mountain travel with real battery loads. For occasional campground use, it can be money better spent somewhere else.
Sizing Your System and Choosing the Right Battery
Sizing mistakes usually show up on the first trip. The owner who bought too little battery starts rationing lights and fan use by the second night. The owner who bought too much paid for capacity that never gets used and may have added cost without solving the actual bottleneck, which is often charging equipment or inverter demand.
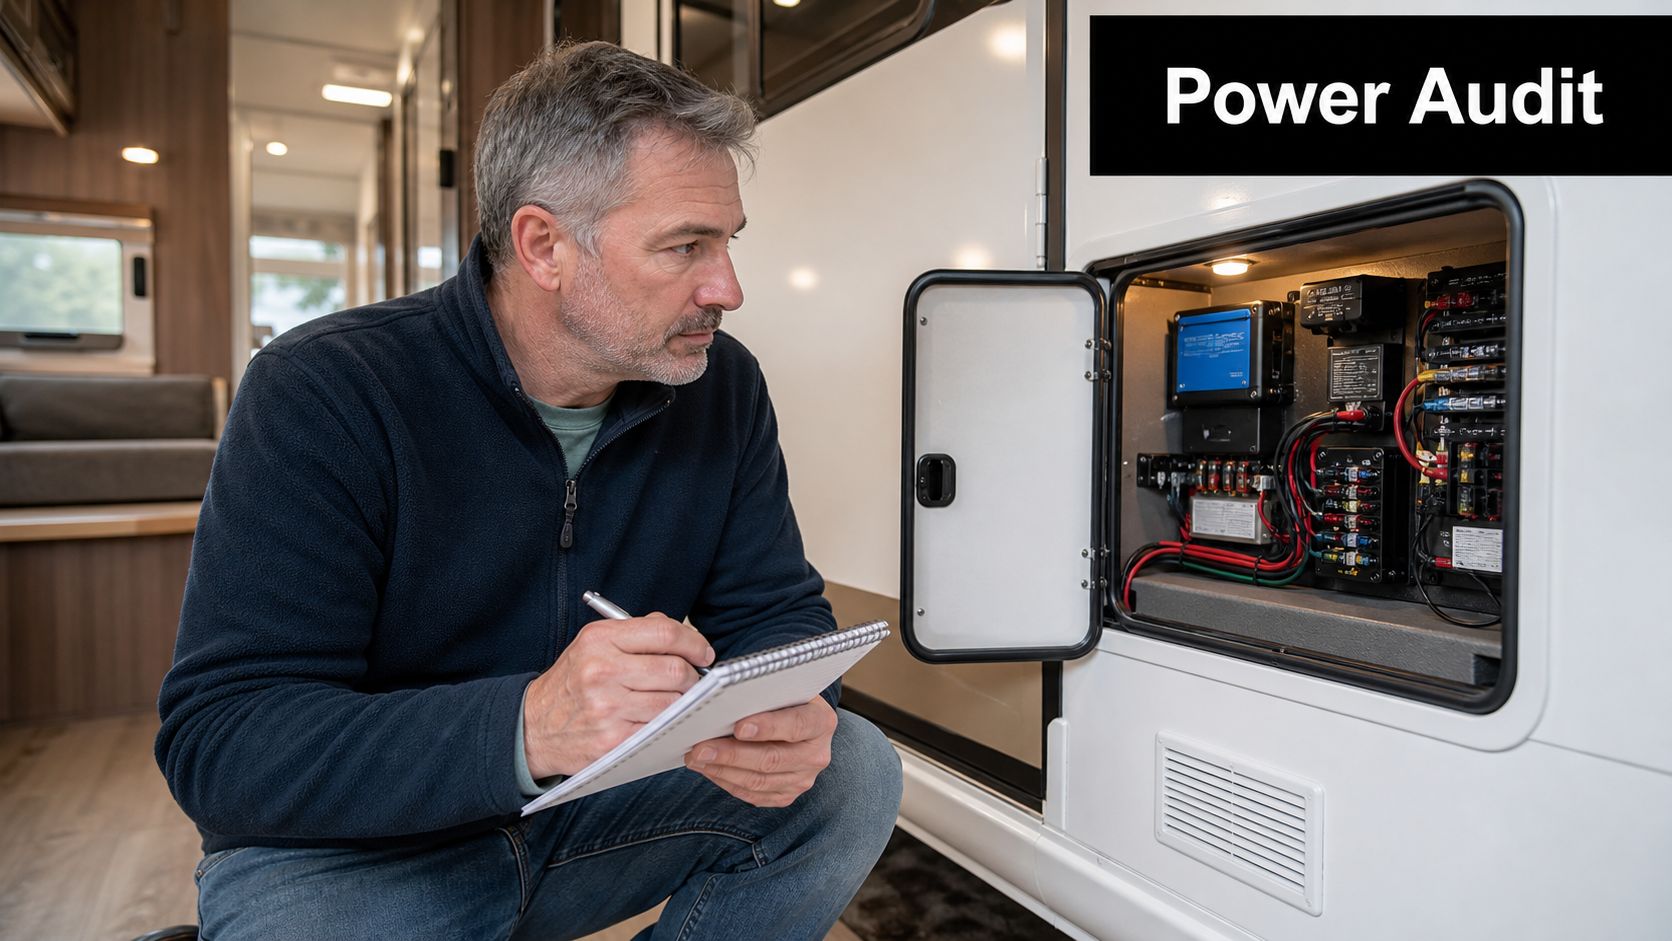
Start with one normal day of camping and write down what runs. That gives you a battery target you can trust.
Build a real daily amp-hour estimate
A simple amp-hour audit beats shopping by label every time. List the loads you use in a typical 24-hour period, then estimate how long each one runs.
- Lights: LED fixtures draw modest power, but several hours each night still adds up.
- Fans: Roof fans matter a lot in Utah summer camping, especially in Moab, St. George, and exposed desert sites.
- Fridge controls and board loads: Propane fridges still need 12-volt power to operate.
- Water pump: Short run times, but part of the daily total.
- Phones, tablets, and hotspots: Small individually, steady as a group.
- TV, coffee maker, microwave, or other inverter loads: These often decide whether a small battery bank works or fails.
I tell customers to size for the trip they take most often. A couple in a small trailer doing one-night stops around Utah state parks needs a different setup than a family boondocking near Fish Lake or spending several days in the Uintas.
Choose chemistry with your use case in mind
For most RV lithium upgrades, LiFePO4 is the battery chemistry worth considering first. It gives flatter voltage under load, faster charging under the right profile, and more usable capacity than lead-acid or AGM. It also cuts battery weight, which matters if your trailer is already carrying water, generators, bikes, or side-by-sides.
That said, lighter and stronger on paper does not always mean better for every owner. If the RV spends most of its life in full-hookup parks and only sees a few weekend trips a year, a lithium bank can be hard to justify. In that case, a smaller investment in maintenance, charging hardware, or replacing tired lead-acid batteries may make more sense.
Utah owners should also think about cold weather before picking a battery. A lithium battery that charges fine in the valley can run into charging restrictions during shoulder-season camping in the mountains. If you camp around Bryce, Flaming Gorge, or high-elevation forest roads in spring and fall, look closely at low-temperature charge protection and where the battery will be mounted.
A practical way to size the bank
Use your audit to place yourself into a realistic usage tier.
Light-use RVers
This group usually runs lights, the water pump, fridge controls, device charging, and a fan overnight. A modest battery bank often covers this well, especially for weekend camping.
Moderate-use RVers
These owners stay off-grid longer, depend on fans more heavily, or want reserve for cloudy days and inconsistent charging. This is a common fit for Utah dry campers who move between dispersed sites and developed campgrounds.
Heavy-use RVers
These setups support regular inverter use and more residential habits. If you want to run kitchen appliances, entertainment gear, work equipment, or extended 120-volt loads, battery size climbs quickly and the rest of the system has to keep up.
The same sizing logic used in choosing the right solar battery for homeowners applies here. Start with real consumption, then match storage to that number instead of buying the biggest battery your tray can hold.
One more point from the service side. Battery size and charging hardware need to agree with each other. Before you lock in a bank size, review your RV battery charger and charging equipment options so the new battery can be charged properly on the road, on shore power, and through any solar you already have.
The Critical Electrical System Compatibility Check
A lot of lithium upgrades go sideways in the same way. The battery is fine, but the RV still has a lead-acid charging setup, so the owner ends up with slow charging, odd fault codes, or a battery that never performs the way it should.
That problem shows up often here in Utah. An RV can leave the Wasatch Front in mild weather, climb into the mountains, and put the charging system under very different conditions by the same evening. Before buying batteries, check whether the rest of the coach can support them.
The converter question matters most
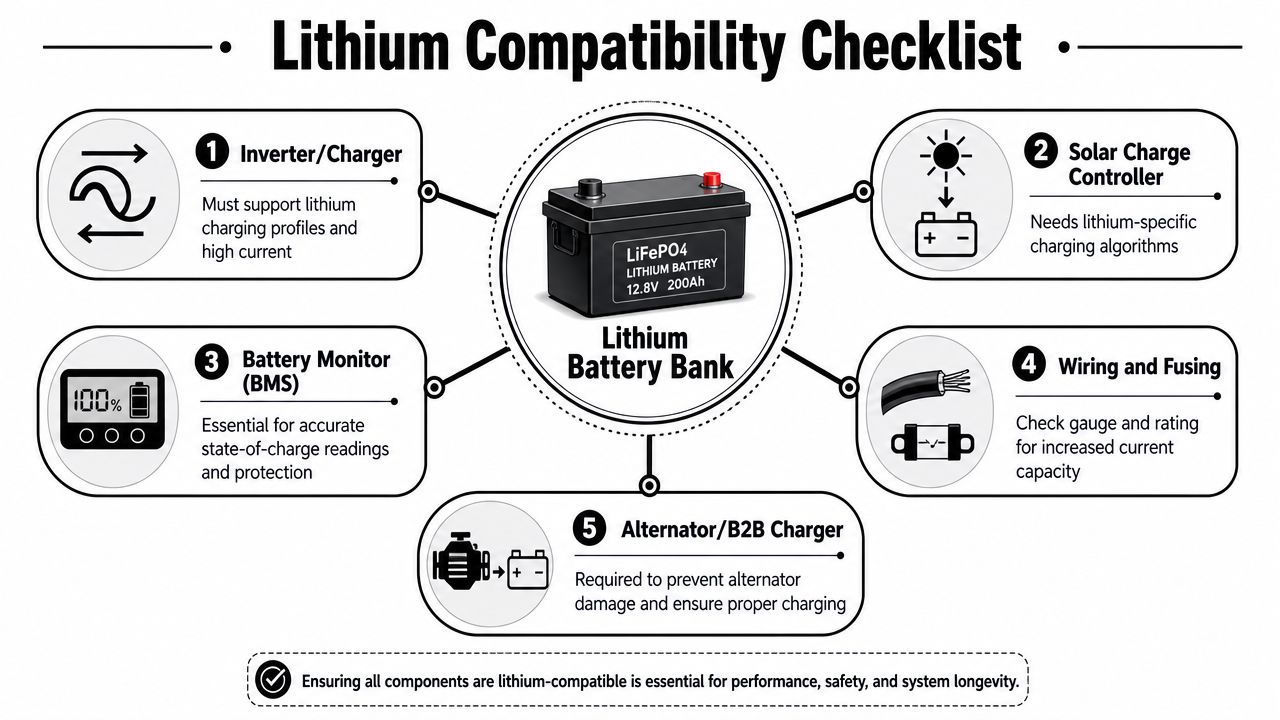
Start with the converter/charger. In the service bay, this is the first thing I check because it decides how the battery gets charged on shore power and often during generator use.
Many older converters will still put power into a lithium battery, but they usually do not follow a lithium charging profile. Progressive Dynamics explains that a lithium-compatible converter is designed to charge lithium batteries to full voltage, while a typical lead-acid converter may leave them undercharged over time in RV use, as outlined in its lithium converter overview. That does not always make the old converter unusable. It does mean owners should go in with realistic expectations.
For some occasional campers, partial charging is acceptable for a season if the trips are short, loads are light, and the budget is tight. I give that advice carefully. If you camp a few weekends each summer, stay in hookups often, and just want better battery life than flooded lead-acid, a staged upgrade can make sense. If you dry camp for several days, rely on solar, or expect every amp-hour you paid for, the converter should be updated right away.
Solar, inverter, alternator, and monitoring
The converter is only one part of the system. The rest of the charging and power hardware needs the same review.
Solar charge controller
The controller needs either a lithium setting or manually adjustable charging voltages. If it is still set for lead-acid, solar harvest can be weak and the battery management system may disconnect at times that confuse the owner.
Inverter or inverter-charger
Lithium batteries can support higher sustained current, which exposes weak cabling and outdated settings fast. Check whether the inverter-charger has a proper lithium profile and confirm that charge limits, low-voltage cutoffs, and wire size all match the new bank.
Alternator charging
This one gets missed all the time. A lithium bank can pull current much harder than a lead-acid bank, and that can overwork an alternator if the RV or tow vehicle was not designed for it. Battle Born Batteries covers this issue well in its explanation of why many RVs need a DC-to-DC charger for alternator charging. For Utah travelers doing long drives between Moab, Bryce, Zion, or mountain boondocking spots, this matters because alternator charging often carries a big part of the load between camps.
Battery monitoring
Voltage alone is a poor fuel gauge for lithium. A shunt-based battery monitor gives a much clearer state of charge reading and makes troubleshooting far easier.
For a broader look at how these parts connect, review this guide to the RV electrical system components and charging flow before ordering parts.
Utah cold changes the conversation
Cold-weather charging is where I tell customers to slow down and be honest about how they camp. Lithium is a great fit for many Utah RV owners, but winter and shoulder-season trips change the math.
The U.S. Department of Energy's National Renewable Energy Laboratory notes in its cold weather lithium-ion battery research that low temperatures reduce charging performance and can damage lithium-ion cells if charging is not properly controlled. In plain RV terms, charging a cold battery in mountain weather can shorten battery life or trigger battery protection shutdowns when you least want them.
That is why heated batteries, internal low-temperature charge protection, or a charging strategy that waits until the battery warms up are worth discussing before installation. If your RV spends most of its life on summer trips to southern Utah, lithium is often an easy recommendation. If you ski, hunt, or camp at elevation in spring and fall, cold-weather protection needs to be part of the plan from the start.
A compatibility checklist before you buy
- Check the converter model. Confirm whether it has a lithium profile or whether you are accepting a temporary partial-charge setup.
- Review solar settings. Verify the controller supports lithium charging values.
- Confirm inverter compatibility. Pay close attention if you run larger 120-volt loads.
- Plan for alternator charging. Many rigs benefit from a DC-to-DC charger instead of a direct alternator connection.
- Decide how you will handle cold charging. Heated batteries or low-temp charge protection matter in Utah mountain conditions.
A balanced recommendation is the right one here. Some RV owners will get clear value from a full lithium conversion. Others are better served by keeping a simpler lead-acid setup until their camping style justifies the added cost and cold-weather planning.
Best Practices for a Safe and Successful Installation
A lot of battery problems start on install day, then show up later on I-15, in a windy campsite near Bryce, or on a cold morning in the Uintas. The battery gets blamed, but the actual cause is usually a loose lug, bad fuse placement, poor cable sizing, or charging equipment that was never set up for lithium.
A safe RV lithium battery upgrade is a careful electrical job. The battery swap itself is the easy part.
Removal and physical install
Start by shuting down 12-volt loads, disconnecting shore power, and disabling solar input before you touch the battery cables. For battery removal, disconnect the negative cable first, then the positive. That sequence reduces the chance of an accidental short to chassis ground, which is standard battery service practice noted by Interstate Batteries in its battery replacement guidance: https://www.interstatebatteries.com/blog/how-to-change-a-car-battery
Once the old batteries are out, inspect the tray, hold-downs, and cable ends before the new battery goes in. Clean corrosion off terminals, replace damaged lugs, and make sure the compartment is dry and solid. Lithium batteries weigh less than comparable lead-acid batteries, but they still need to be restrained well enough to handle braking, washboard roads, and Utah canyon routes with plenty of vibration.
Follow the battery maker's installation instructions for orientation, terminal hardware, and torque values. Battle Born Batteries notes that loose terminal connections can create resistance and heat, which is one of the more common causes of intermittent 12-volt complaints after a battery swap: https://battlebornbatteries.com/rv-with-lithium-batteries/
I see that one often. The coach works fine at home, then the owner loses power to part of the rig after a few hours on rough road because one connection was never tightened correctly.
Charging component setup
Set up charging equipment before the RV goes back into service. If the converter, inverter charger, or solar controller is left on a lead-acid profile, the battery may undercharge, stop short at an incorrect voltage, or get hit with settings lithium batteries do not want.
For solar, disable equalization and use charging values approved by the battery manufacturer and controller manufacturer. Victron's lithium battery guidance is a good reference point here because it explains the need for the correct charge voltages and the importance of preventing charging below freezing conditions unless the battery system allows it: https://www.victronenergy.com/media/pg/Lithium_Battery_Smart/en/operation.html
That cold-weather piece matters in Utah. If the RV will see shoulder-season camping in mountain areas, confirm the battery has internal low-temperature charge protection or a heating system, then verify that every charging source respects that protection. A summer-only trailer in St. George has a different setup than a fifth wheel used for fall hunting trips above 8,000 feet.
Wiring and fuse protection
This part deserves extra attention because mistakes here create heat and failure points.
Install overcurrent protection on the positive conductor as close to the battery as practical and size it for the circuit, not by guesswork. The American Boat and Yacht Council standards are often used as a best-practice reference for low-voltage DC fuse placement and conductor protection in mobile applications: https://www.bluesea.com/resources/1437
Cable size should match real current draw, cable length, and allowable voltage drop. Blue Sea Systems provides a widely used DC wire sizing reference that helps calculate proper conductor size instead of relying on generic charts or what happened to be in the parts bin: https://www.bluesea.com/resources/1430
For RV owners running a larger inverter, installations are prone to quickly going sideways. A cable that looks heavy enough can still be undersized once you account for inverter wattage and the full round-trip cable run.
Pay close attention to these items
- Fuse location: Place battery-side overcurrent protection close to the positive terminal.
- Cable sizing: Size wire for the actual current and cable length, especially on inverter circuits.
- Terminal torque: Tighten connections to the battery manufacturer's spec.
- Battery restraint: Secure the battery so it cannot shift on rough roads or hard stops.
- Cable routing: Protect cables from sharp edges, pinch points, and exhaust heat.
Final testing should include every charging source
Do not stop at "the lights came on."
Test shore power charging, solar charging, and alternator charging one by one. Put the RV under a meaningful load. Run the inverter if the rig has one. Check for voltage drop, charging behavior, error codes, and any warmth at lugs, fuse holders, breakers, and major cable runs. The RV Industry Association's owner safety guidance is a good reminder that routine inspection of electrical systems and connections is part of safe RV operation, not an extra step: https://www.rvia.org/rv-ownership/rv-basics/rv-electricity-safety
If something is getting hot, charging inconsistently, or dropping out under load, stop there and fix it before the next trip. That is even more important if the rig is headed into colder Utah weather, where a marginal charging setup can turn into a no-power complaint much faster.
DIY vs Professional Installation at Motor Sportsland
DIY can make sense if you're comfortable around RV electrical systems, know how to identify charging components, and can verify the whole installation after the battery is in place.
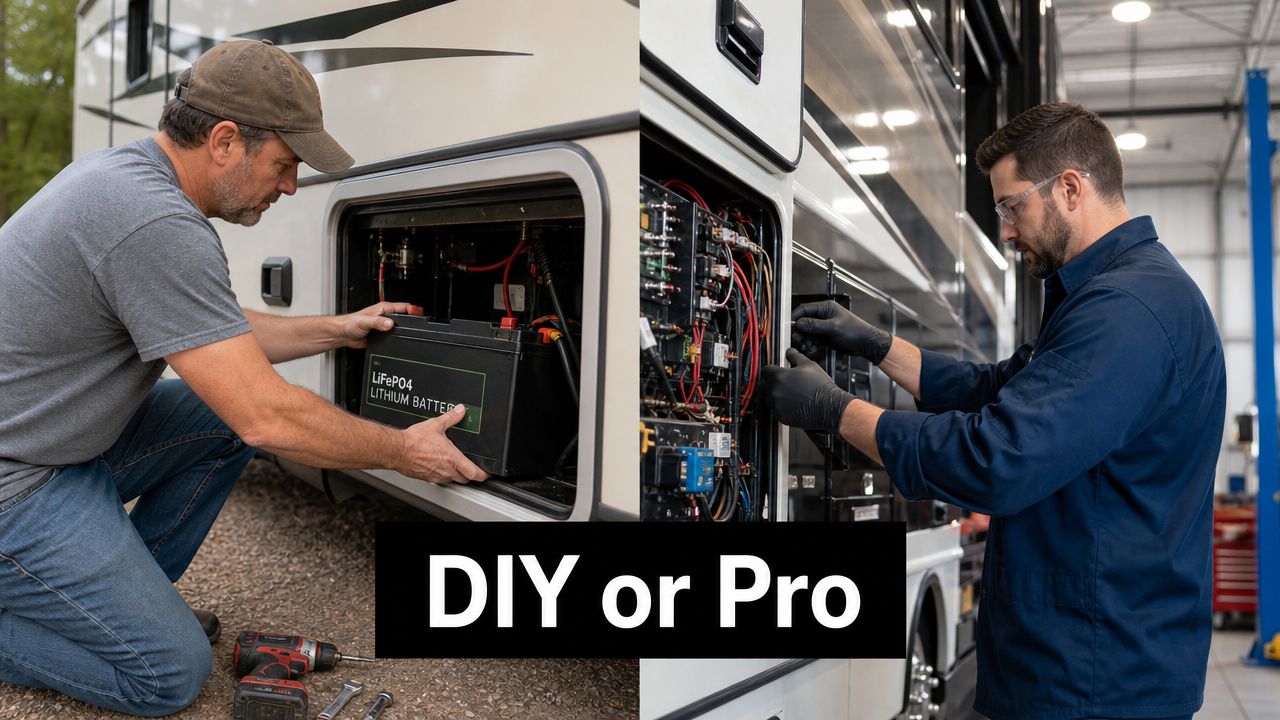
For the right owner, doing your own RV lithium battery upgrade can save labor cost and help you understand your rig better. It also gives you direct control over battery placement, cable routing, and system choices. If you already work on your own converter, solar controller, or inverter wiring, the project may be well within your skill set.
The downside is that the mistakes are expensive. A bad charging profile, loose lug, undersized cable, poor fuse placement, or missed cold-weather charging issue can turn a battery upgrade into a repair project. Electrical problems also have a habit of showing up on the road, not in the driveway.
A balanced way to choose
DIY is usually a better fit when:
- You already troubleshoot 12V systems
- You can identify your charging equipment with confidence
- You own the right crimping, torque, and test tools
- You're willing to verify every charging source after the install
Professional installation is usually the better choice when:
- Your RV has solar, inverter, and converter interactions
- You camp in cold-weather conditions
- You want the charging system reviewed as a whole
- You'd rather avoid warranty or safety guesswork
A good walkthrough of lithium upgrade thinking can help before you decide how involved you want to get:
Our team at Motor Sportsland has seen both outcomes. DIY installs can be excellent when the owner is methodical. But for many RVers, professional installation is the calmer option because the charging system, wiring, and testing all get checked together instead of piece by piece.
Your Power Upgrade and Final FAQ
You finish a fall weekend above Heber, wake up to a hard freeze, and expect the battery bank to carry the furnace, lights, and coffee maker start-up without drama. That is the kind of trip where a well-matched lithium upgrade earns its keep. You get faster recovery when the sun comes up, steadier voltage for appliances, and less worry about running the battery too far down.
I also tell customers the part that sales brochures skip. Lithium is not the automatic winner for every RV in Utah. If your trailer spends most nights plugged into shore power at KOAs, state parks with hookups, or a driveway outlet at home, the extra cost can take a long time to pay back. For frequent boondockers, ski-season campers, and anyone spending time on forest roads or BLM ground, the advantages show up much faster.
A few final practical reminders
- Match the battery to the way you camp: Lithium makes the most sense for owners who regularly camp without hookups, run an inverter, or want shorter recharge times between stops.
- Judge the system, not just the battery: A good upgrade depends on the charger, converter, solar controller, alternator charging setup, inverter, cable size, fuse protection, and battery mounting all working together.
- Treat cold weather seriously: Utah mountain camping adds a real charging risk in freezing conditions. A battery with low-temperature charge protection or a heated case is often the safer choice.
- Recycle the old bank properly: If you are pulling out worn lead-acid batteries, Reworx Recycling's battery recycling solutions are worth reviewing so the old batteries are handled responsibly.
The best upgrade is the one that works on your actual trips, from summer heat in Moab to freezing mornings in the Uintas.
FAQ
Is an RV lithium battery upgrade worth it for weekend campers in Utah
Sometimes, but not always. For occasional campers who stay at full-hookup parks most of the time, AGM or lead-acid can still be the better value. Lithium starts to make financial and practical sense when you dry camp often, want more usable capacity, or need the battery to recover quickly between travel days.
Can I use my old converter with a lithium battery
Sometimes. Some older converters will charge a lithium battery partway, but not fully or not with the profile the battery was designed for, as noted earlier in the article. That can work as a temporary setup, but it leaves performance on the table and can create charging problems that are harder to spot until you are out on the road.
What's the biggest mistake in a lithium conversion
Treating it like a simple battery swap. The trouble usually starts with skipped charger checks, incorrect charging settings, loose lugs, missing or poorly placed fuses, and cable that is too small for the load.
Are lithium batteries better for mountain driving
They can be. Lithium batteries usually reduce weight compared with a similar usable lead-acid setup, which can help with payload planning in smaller trailers and vans. I would call that a secondary benefit, though. The bigger gain for most Utah travelers is usable power and quicker recovery after a cold night off-grid.
Can I charge a lithium RV battery in freezing weather
You need to be careful. Charging a lithium battery below freezing can damage the cells unless the battery includes protection that blocks charging or warms the pack first. That matters in Utah because an RV parked at 7,000 to 9,000 feet can be below freezing long after the valley warms up.
What should be installed for safety during the upgrade
Start with proper overcurrent protection close to the battery, correctly sized cable, secure hold-downs, and charging equipment that matches the battery profile. A battery monitor is also a good idea because lithium voltage stays flatter than lead-acid, so voltage alone does not tell you much about state of charge.
If you're ready to talk through an RV lithium battery upgrade with people who work on Utah RVs every day, contact Motor Sportsland, browse inventory on the site, or visit our Salt Lake City showroom in Millcreek or our Spanish Fork location. Whether you need help deciding if lithium is worth it, want service scheduled, or want to compare RVs built for more off-grid use, our team can help you make the next move with confidence.
