
Pop Up Camper Roof Repair Guide for Utah Owners

You're packing for a weekend near Jordanelle when you notice a brown ceiling mark inside the folded camper. Outside, the roof looks tired but intact, and the old bead of caulk seems like an easy Saturday fix. In Utah, that assumption can turn expensive quickly. Freeze and thaw cycles in the Wasatch Mountains, intense sun, winter storage, and uneven lifting can damage more than the visible seam.
Proper pop up camper roof repair starts with diagnosis, not a caulking gun. You need to determine whether water has reached the framing, whether an ABS lid is cracked, whether the canvas attachment is failing, and whether the lift system is raising the roof squarely. The cost may stay manageable when you catch one failed seal early. It can become a major rebuild when water and mechanical strain have been working together.
Understanding Pop Up Camper Roof Repair Costs and Scope
A brown ceiling mark over the dinette may have started several feet away. Water can travel along a roof seam, framing member, or vent opening before it appears inside. A quote based only on the stain can therefore miss wet framing, failed canvas attachments, or damage around the lift supports.
A 2026 cost guide places most pop-up camper roof repairs between $600 and $2,500, with a reported average near $1,600. A complete dealer overhaul can reach $4,500, depending on the roof material, canvas, framing, seals, and lift hardware. This Utah RV roof leak repair cost guide explains how inspection findings affect the estimate.
What a full repair can include
The work depends on which part of the roof assembly has failed:
- Canvas work: Replacing one bunk-end canvas section typically costs $600 to $800 in materials. Full recanvasing commonly runs $900 to $1,700 before labor, according to the pop-up camper roof replacement cost guide.
- ABS lid damage: A hard ABS roof crack may be a $300 to $500 DIY project when the surrounding structure is dry and sound. The repair still requires compatible materials, careful surface preparation, and enough patience to avoid creating another leak.
- Lift-system work: An RV shop overhaul can reach $900 or more when cables, pulleys, alignment, or roof support components need attention. An uneven roof is a mechanical warning, not a cosmetic detail.
- Structural rebuilding: Rotten wood, damaged foam, or compromised sidewalls require demolition, drying, replacement, and resealing. An pop-up camper service estimate lists roof repair, resealing, and full replacement from $500 to $14,000, with labor ranging from 3 to 70 hours. That range shows why an inspection must separate surface sealing from reconstruction.
In Utah service bays, mountain storage and freeze-thaw exposure often turn a small failed seal into a larger repair. Sun-baked ABS can crack, while water trapped in framing stays hidden until the roof begins to flex or lift out of square.
The category matters more than the first symptom. A clean ABS crack with a square lift system is a different job from a leaking roof with soft framing and cables pulling unevenly.
Practical rule: If the roof does not open evenly, stop treating the problem as cosmetic. Continued cranking can bend supports, stress the frame, and turn a seal repair into a dealer overhaul.
Repair shops in this region handle structural pop-up work routinely, so a lift-system or framing inspection is a normal service request. This RV roof repair industry overview also explains why a professional seal and broader inspection can matter beyond a quick exterior patch.
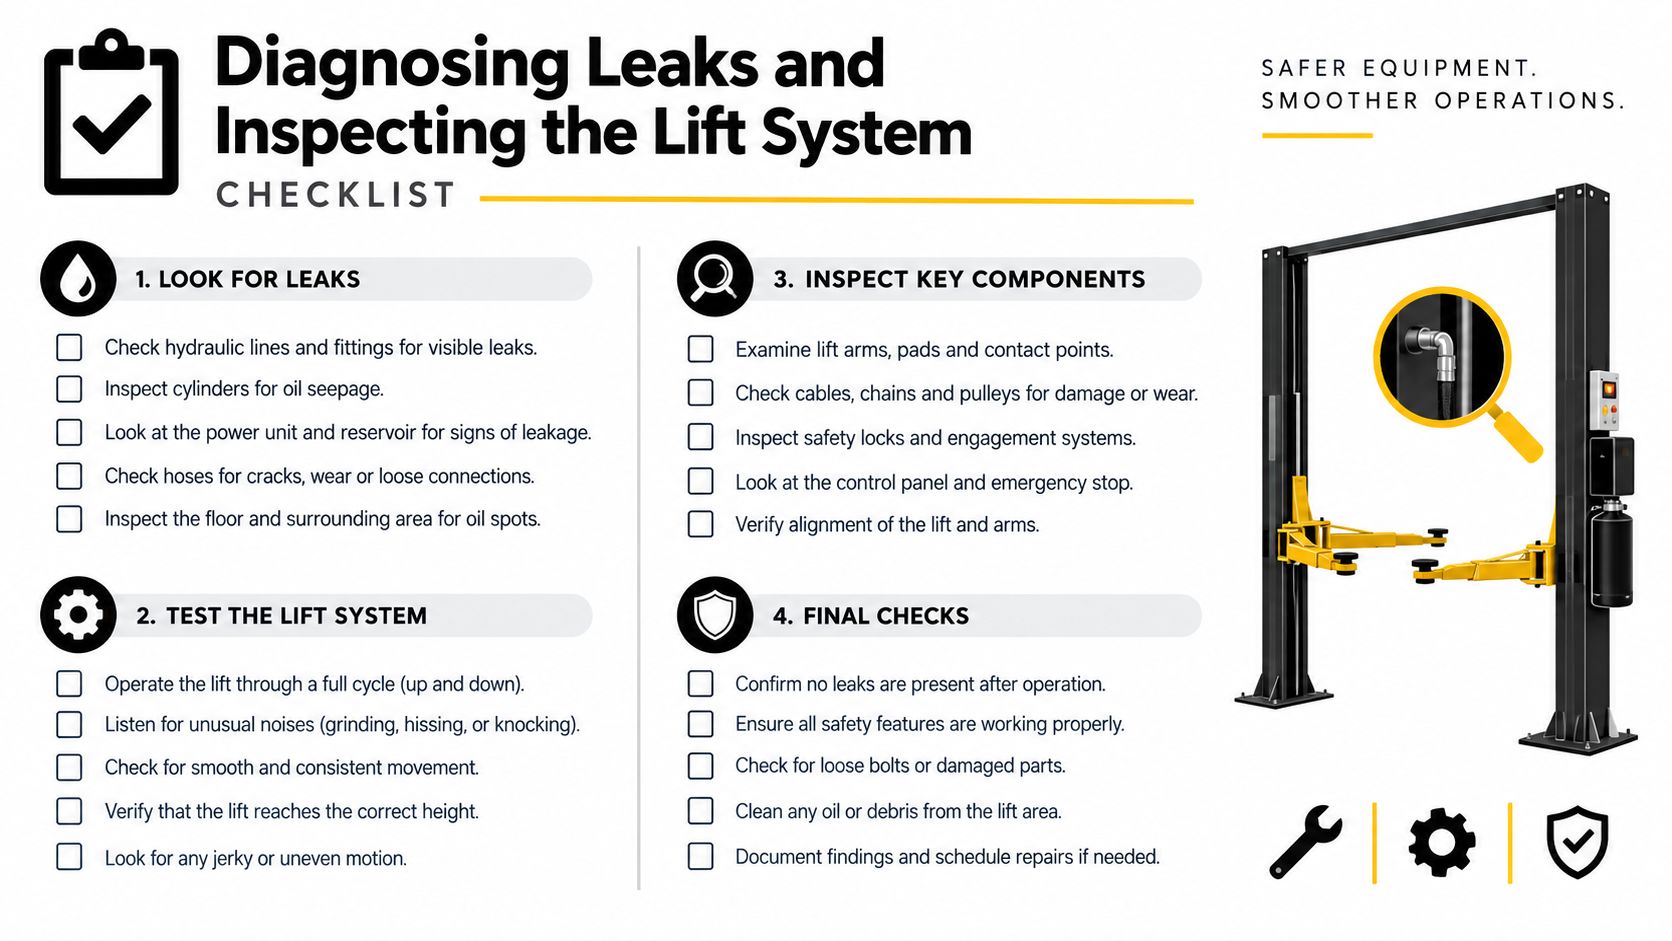
Diagnosing Leaks and Inspecting the Lift System
Start with the camper level, dry, and fully raised. Use a flashlight, a blunt probe, clean rags, a screwdriver set, and a camera or phone to document what you find. Don't climb onto a roof that isn't designed for foot traffic, and don't place your hands near moving lift components while someone operates the crank.
Inspect from the inside out
Begin indoors, where water patterns often reveal travel rather than entry. Check ceiling panels, corner joints, vent surrounds, canvas tracks, bunk ends, and the upper wall transition. A damp or soft area deserves more attention than a discoloration that has fully dried.
Then move outside:
- Remove the vinyl trim insert carefully. The insert often hides screws and fasteners beneath the exterior trim.
- Expose the trim seam. Look for gaps, lifted metal, brittle sealant, missing screws, and separation at corners.
- Probe suspicious framing. Soft wood, crumbly material, or a musty odor suggests water has moved beyond the surface.
- Inspect vents and openings. Failed sealant around a vent can allow water into the roof core even when the main perimeter appears intact.
- Check canvas attachments. Torn stitching, separated tracks, and wet canvas can point to roof-edge movement or failed seals.
A practical pop-up trailer repairs guide for Utah owners covers related inspection and resealing work, including roof-edge trim and corner seals.
Test the lift before resealing
Raise the roof slowly while watching each corner. The roof should travel evenly and remain square. A corner that lags, a side that twists, or a cable that looks slack indicates a lift-system issue. Don't force the crank to compensate. One independent repair resource warns that a stretched or broken cable can make the roof rise unevenly, and continued cranking can bend the roof frame. Its pop-up camper lift-system guidance explains why a cable-and-pulley problem can become a structural failure.
Use proper supports when working beneath a raised roof. General lift-support safety principles, including replacing supports without relying on the component alone to hold a load, are covered in these safe lift support replacement tips. The hardware differs from a pop-up camper lift system, but the safety lesson applies: support the load mechanically before putting your body or tools in a danger zone.
The sequence matters. Diagnose the lift first, identify rot second, and only then decide whether resealing is appropriate. New caulk won't correct a roof that no longer sits squarely on its seals.
Executing Permanent ABS and Seam Repairs
Once the lift system operates evenly and the framing feels sound, you can address the roof surface. Permanent work begins with preparation. New sealant applied over failing sealant usually bonds to the old failure, not to a clean substrate.
Remove the metal trim and vinyl insert before disturbing the roof edge. Set the screws aside in labeled containers, photograph each corner, and work slowly around brittle trim. Detailed rebuild guidance commonly starts this way because the roof structure must be exposed before repairs to the frame, foam, or sidewalls can be evaluated. The disassembly process is demonstrated in this pop-up camper roof rebuild video.
Strip the failed seam
Use plastic scrapers where possible to avoid gouging the roof material. Remove old caulk from the trim channel, screw heads, roof edge, vent flange, and corner joints. Clean the surface according to the sealant manufacturer's compatibility requirements, then allow it to dry fully.
A sound workflow looks like this:
- Open the seam: Remove trim and fasteners rather than sealing around them.
- Inspect the substrate: Replace rotten wood or damaged backing before closing the roof.
- Reinstall the trim: Use intact fasteners and keep the trim aligned with the original profile.
- Seal the joint: Apply a compatible sealant to a clean, dry surface.
- Test the repair: Use controlled water testing after the material has cured according to its instructions.
Repair a cracked ABS lid
For ABS roofs, a commonly documented method uses stop-holes, MEK, and an ABS slurry. Drill a small stop-hole at each end of the crack to reduce further propagation. Clean the damaged area with MEK in a well-ventilated workspace and use appropriate protective equipment. Fill the crack with an ABS and MEK slurry, allow it to cure, sand the repair smooth, and apply a compatible roof coating.
The cure stage is where impatient repairs fail. One documented repair example notes a 3 to 4 day cure before recoating, so don't seal or coat over a soft repair just because the surface feels dry. The ABS pop-up camper roof repair method provides the source for this process and its curing guidance.
Reseal a roof vent correctly
A vent flange needs more than a bead around its outside edge. Remove the vent as needed, clean the mounting surface, place butyl tape beneath the flange, reinstall and tighten the screws evenly, then finish around the perimeter and screw heads with Dicor lap sealant. This combination allows the butyl tape to form the primary bedding seal while the lap sealant protects the exposed edge.
One RV service listing gives a vent reseal time of 30 to 45 minutes and a price range of $145 to $245. Those figures are documented in this RV vent resealing service description. For product compatibility and application technique, use this Dicor self-leveling sealant guide for Utah RV roofs.
Choosing Between Temporary Patches and Full Rebuilds
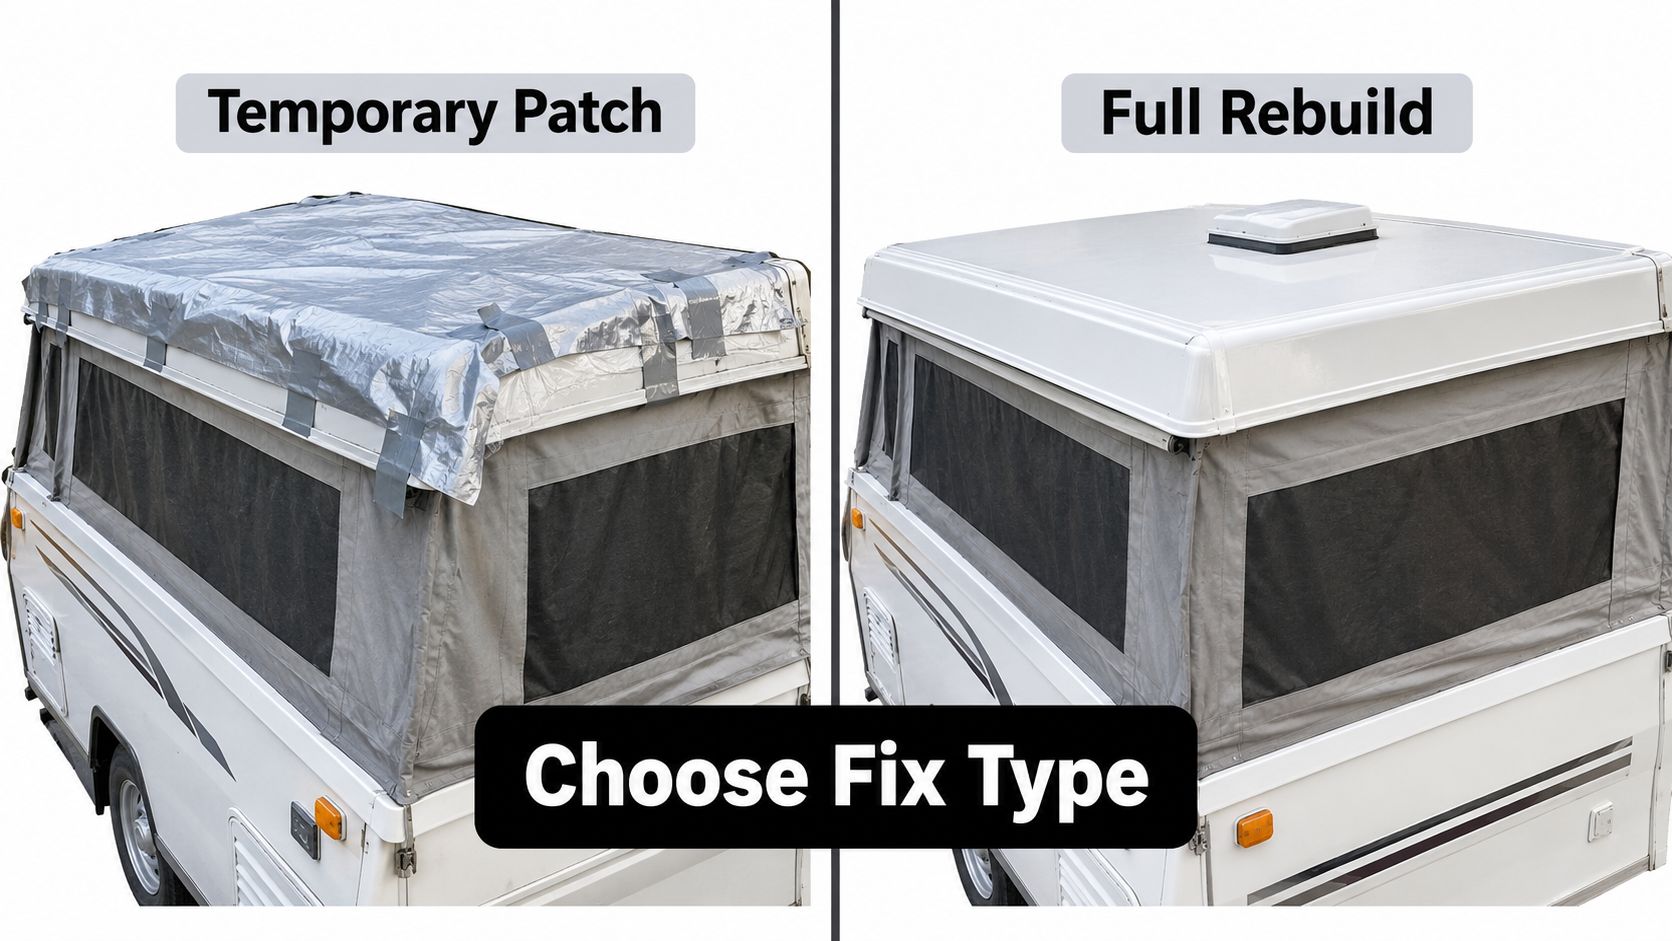
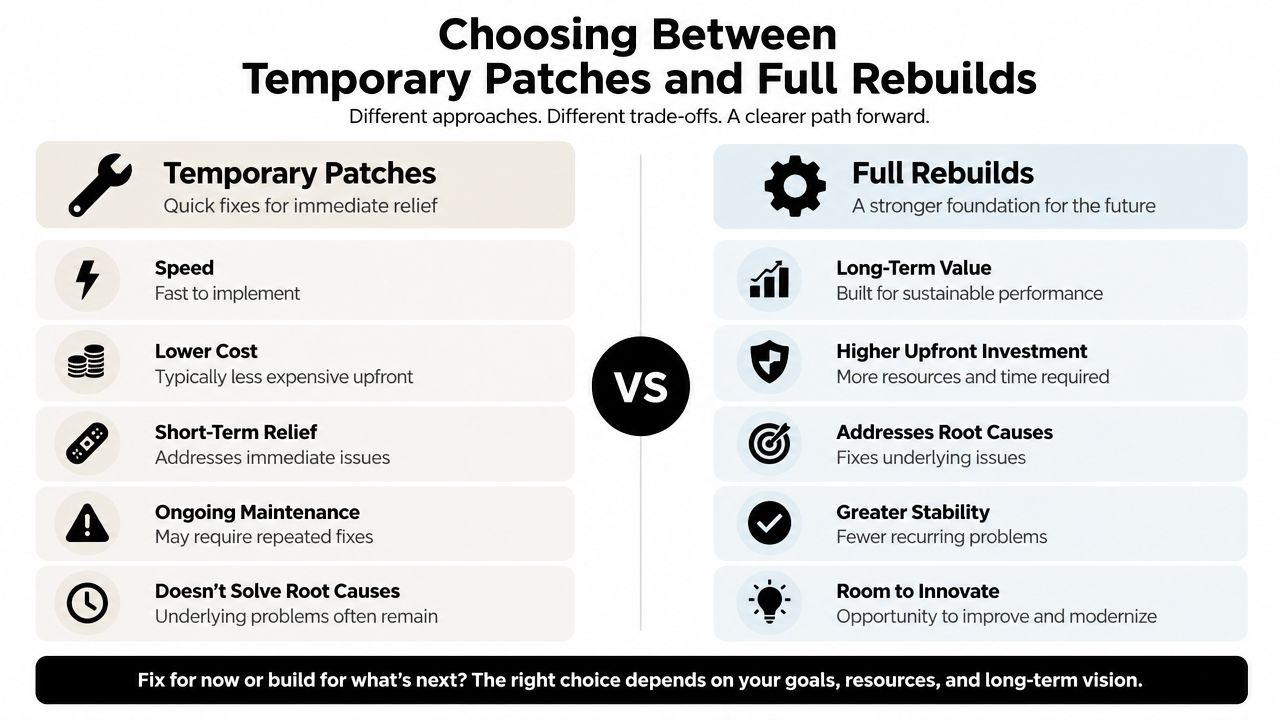
A campground repair has a different purpose from a shop rebuild. If rain is moving across Bear Lake and you need to protect the interior until you can get home, a temporary cover may be sensible. It becomes a problem when the temporary material traps moisture, hides a growing crack, or gives you confidence to operate a compromised lift system.
Use a temporary patch only for containment
A tarp, Eternabond tape, or compatible heavy-duty sealant can keep water away from a limited area while you arrange a proper inspection. Clean and dry the surface as much as conditions allow, keep the patch from interfering with the lift mechanism, and photograph the damage before covering it.
Temporary measures make sense when:
- The roof remains structurally square. All corners rise and lower together.
- The damage is localized. You can identify one crack, seam, or opening.
- You need to protect the interior. The camper is exposed to weather before a permanent appointment.
- You can remove the patch later. The repair won't prevent inspection or contaminate the substrate.
Don't use a patch as permission to continue cranking a roof that binds. Don't cover saturated framing and leave it closed for an extended storage period. And don't use a generic sealant without checking compatibility with ABS, vinyl, canvas, or the existing roof coating.
Commit to rebuilding when the structure is compromised
A full rebuild becomes the responsible choice when the roof edge has softened, framing has rot, the ABS has widespread cracking, or the roof rises unevenly. The visible hole may be small, but the surrounding material can no longer hold fasteners or support the seal.
| Condition | Temporary patch | Permanent repair |
|---|---|---|
| Isolated surface crack | May contain water | Repair the ABS and coat it |
| Failed vent seal | Can protect briefly | Replace bedding and reseal the flange |
| Soft roof edge | Not appropriate | Open the trim and rebuild the substrate |
| Uneven lift travel | Unsafe workaround | Inspect cables, pulleys, alignment, and frame |
| Wet canvas attachment | Limited weather protection | Repair the attachment and investigate the roof edge |
Owners comparing repair and replacement decisions may find this roof repair versus replacement comparison useful as a general decision framework. A folding camper adds lift hardware and flexible canvas, so the final decision still needs to account for those components.
The practical question is not whether a patch looks tidy. It's whether the roof can safely support its seals, lift evenly, and keep water out through Utah's temperature swings.
When to Trust the Motor Sportsland Service Center
DIY sealing is reasonable when you can clearly see the failure, the substrate is solid, and the roof operates normally. The risk changes when the repair involves stored mechanical energy, hidden framing, or a roof that no longer moves in a controlled plane.
A lift-system overhaul isn't just a matter of replacing a visible cable. The system may include pulleys, guides, corner hardware, tension relationships, and attachment points that must work together. If one cable stretches and you compensate by forcing the crank, the roof frame can bend. Once the frame twists, the original leak may become only one part of the repair.
These signs justify professional inspection
- The roof rises unevenly or binds. Stop operating it until the lift system is checked.
- The roof edge feels soft. Water may have damaged the fastener backing or sidewall structure.
- Multiple seams have failed. Repeated caulk work may conceal widespread movement or aging materials.
- Canvas needs full replacement. Recanvasing requires accurate fitting and careful attachment around the roof and body.
- ABS cracking extends beyond one repairable area. A coating or panel strategy may be safer than isolated patches.
- You can't identify the leak path. Water may be entering at a vent, trim seam, or corner and traveling through the roof core.
Our team at Motor Sportsland can evaluate the roof, lift mechanism, seals, and related RV systems through the service operation, while owners can also compare replacement folding campers and other RV types through the Motor Sportsland inventory. The right choice may be repair, partial rebuilding, or replacement, but that choice should follow an inspection rather than a guess.
Professional technicians also bring the right setting for the messy part of the work. Trim removal, old caulk stripping, ABS preparation, moisture-damaged framing, and long cure times are difficult to manage in a driveway. A shop can document hidden damage as it appears, keep the roof supported, and test the completed repair before the camper heads toward mountain roads.
A roof that looks acceptable in the driveway still has to survive vibration, wind, elevation changes, and repeated lifting. Mechanical alignment deserves the same attention as waterproofing.
Pop Up Camper Roof Repair Questions and Utah Maintenance
Utah storage conditions make prevention especially important. A camper may sit through dry summer dust, strong ultraviolet exposure, freezing winter nights, and spring runoff before it sees the road again. Good maintenance doesn't eliminate aging, but it gives you a chance to find a failed seal before the roof core and framing absorb water.
How should I store a pop-up camper through winter?
Close the camper only when the interior, canvas, and roof edges are dry. Remove leaves and debris, inspect the roof perimeter and vent flanges, and avoid trapping moisture beneath a cover that cannot breathe. Store the camper on a stable, level surface, and don't leave the lift system supporting an unevenly loaded roof.
How often should I inspect the seals?
Inspect the roof before the main summer camping season and again after extended storage or severe weather. Pay particular attention to corners, trim fasteners, vent flanges, canvas tracks, and any location that previously received a patch. A new stain, soft spot, or musty smell deserves attention even if the exterior sealant still looks intact.
What should I use on ABS and canvas?
Use a roof coating and repair material specifically compatible with ABS for the hard lid. For canvas, follow the fabric manufacturer's cleaning and water-repellent guidance, and keep harsh solvents away from the material. MEK is used in documented ABS crack repair, but it requires ventilation, protective equipment, and careful handling. It isn't a general-purpose cleaner for every roof component.
Can I keep camping with a repaired roof?
Only after the roof is fully cured, the lift system operates evenly, and controlled water testing shows no entry. A surface that feels dry isn't necessarily ready for coating or travel, especially after an ABS slurry repair. If the roof still binds or the framing remains soft, postpone the trip and arrange a professional inspection.
These habits protect more than the ceiling. They help preserve the canvas, roof trim, lift hardware, interior finish, and your ability to enjoy campgrounds from the Great Salt Lake shoreline to Bear Lake without turning a weekend trip into an emergency repair.
Motor Sportsland offers RV service, parts, maintenance, repairs, and folding camper support for Utah owners who need a careful diagnosis before committing to roof work. Visit Motor Sportsland to connect with our team, review available RVs, or plan service before your next trip into the Wasatch Mountains.
Pop Up Camper Roof Repair FAQ
Can a cracked ABS pop-up camper roof be repaired?
Yes, a localized crack can often be repaired with stop-holes, MEK cleaning, an ABS and MEK slurry, sanding, and a compatible coating. The surrounding roof and lift system must be sound first.
Why shouldn't I caulk over the old roof sealant?
New sealant may bond to brittle, failed material instead of the roof or trim. Proper repair requires removing the failed sealant, exposing fasteners where necessary, checking the substrate, and resealing clean surfaces.
How do I know whether a leak has caused structural damage?
Look for soft roof edges, loose fasteners, rotten framing, musty odors, delaminated surfaces, and uneven roof movement. Any combination of water damage and lift problems calls for a professional assessment.
Is an unevenly lifting roof safe to operate?
No. A stretched or broken cable can raise the roof unevenly, and continued cranking may bend the frame. Stop operating the lift until the cables, pulleys, guides, and frame are inspected.
What is the documented cost range for pop-up camper roof repair?
A 2026 guide reports that most owners pay about $600 to $2,500, with a reported average near $1,600, while a full dealer overhaul can reach $4,500. The final cost depends on canvas, ABS, framing, seals, and lift-system damage, as described in the pop-up camper roof cost guide.
When should I choose a full rebuild instead of a patch?
Choose a rebuild when the roof edge or framing is soft, water damage extends into the structure, ABS cracking is widespread, or the lift system no longer raises the roof squarely. A patch can contain water temporarily, but it won't restore structural support.
