
RV Stove Repair: Troubleshooting Steps for Utah RV Owners

The smell reaches you before the pot boils. You're parked at Jordanelle with dinner half done, the burner has cut out twice, and there's a faint rotten-egg note near the galley. Every instinct says grab a lighter and try again.
That instinct is the one that hurts people. Most stove failures are cheap and annoying. A handful are dangerous. From the dinette the two look nearly identical, so the order you sort them in matters more than how fast you fix them.
What follows works that order: triage for propane emergencies first, then a symptom table that points to the likely cause, recall and installation checks before any part gets ordered, the tools and costs the work takes, how a thermocouple circuit behaves, and the regulator pressures that decide whether anything gets replaced at all. Some of it you can do in a campground with a brush and ten minutes. The rest belongs with a trained technician, and our service teams in Millcreek and Spanish Fork can handle that end of it.
Triage First When Propane Smells or Alarms Go Off
If you smell propane, hear hissing near a fitting, or a propane or carbon monoxide detector is sounding, you stop troubleshooting. No cleaning, no relighting, no quick check of the pilot. Gas inside an enclosed box is a different category of problem from a dirty burner, and it earns a different response.
Here's the sequence, in order.
- Shut everything off. Burner controls, oven, water heater, furnace. Don't flip a light switch, don't unplug a cord, don't start the generator, don't strike a match.
- Ventilate and get out. Open the door and the nearest window, then leave with everyone inside, pets included.
- Close the cylinder from outside. If the valve is reachable and you're not standing in a gas cloud, shut off the propane at the tank.
- Call from a distance. Emergency services for a strong smell, an audible hiss, or anyone feeling dizzy or nauseated. A technician for anything milder.
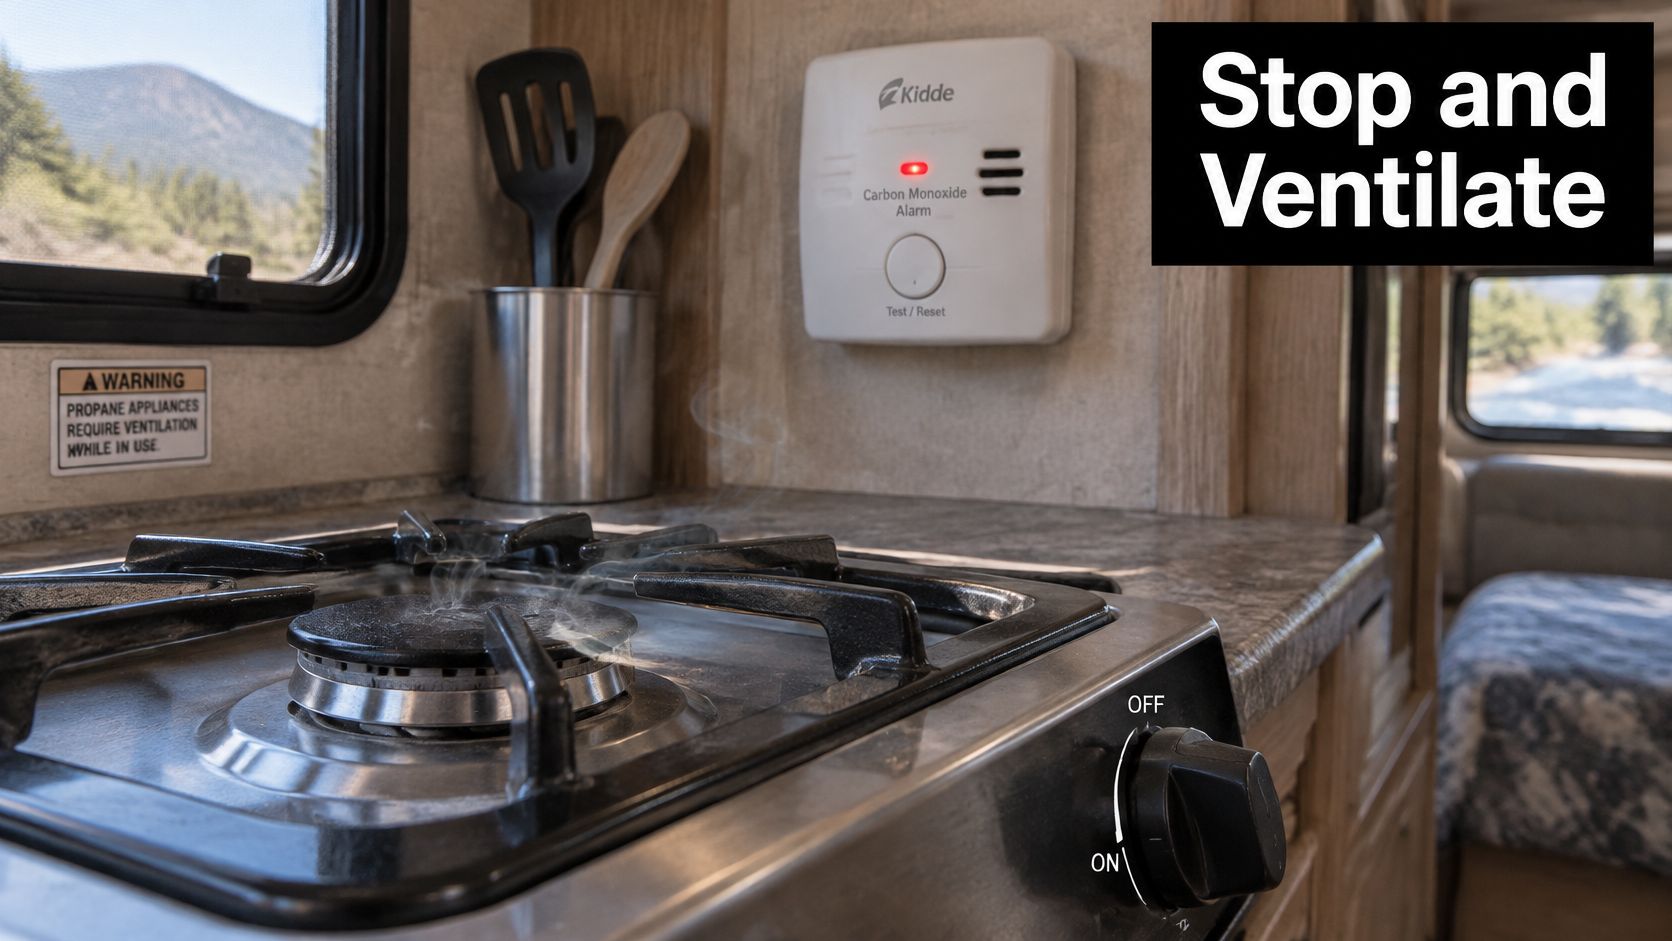
Past that, the key skill is separating emergencies from nuisance symptoms. A weak yellow flame, a burner that keeps extinguishing, or one that won't hold a flame after you release the control usually points to airflow, dirty ports, regulator pressure, or a thermocouple sitting wrong in the flame. Those are morning problems. An empty cylinder, a cold snap in the Wasatch, or a mud-dauber nest blocking the regulator vent can each mimic a leak, which is why you test before you assume.
Why you don't repair propane components yourself
Your nose is a backup sensor, not a measuring instrument. It can't tell you whether the pressure is low, whether a fitting is seeping at a rate that matters, or whether a burner tube has a hairline crack. U-Haul's RV propane safety guide says owners shouldn't attempt to repair propane components themselves, should arrange at least annual inspection by a trained technician, and should have the entire system inspected before restarting appliances after a suspected leak.
Any suspected leak means no repairs inside the RV until a technician confirms the system is sound.
Ventilate before any relight
A flame that dies mid-cook can leave propane flowing through a burner control that's still open, and the National Park Service RV fire safety guidance warns that relighting immediately can let an explosive propane-air mixture accumulate. Shut the stove off, open up, wait several minutes, and check for odor before you try again. Twice in one trip means that burner is out of service. Detector upkeep is part of this same triage, and our walkthrough of RV carbon monoxide detector checks covers the test-button routine and replacement intervals that make the whole approach worth anything.
Diagnose Your Stove Problem by Symptom
Find your row, read the next step, and act on it. Anything involving smell, hissing, or an alarm goes back to the triage sequence above. Everything else starts here.
| Symptom | Likely cause | Next step |
|---|---|---|
| Burner lights, then goes out within seconds | Thermocouple not heated, dirty pilot or weak gas flow | Stop using it; book a technician if it repeats |
| Weak yellow flame or soot | Blocked burner ports or poor combustion air | Stop using it; check the CO detector and have ports inspected |
| All burners weak or slow to ignite | Regulator or low supply pressure | Check cylinder level, then have regulator pressure tested |
| Igniter clicks but no spark | Igniter, wiring or moisture fault | Dry and inspect the wiring; replace with a listed igniter only |
| Burner works only on cold starts | Low cylinder or cold-weather pressure drop | Check the cylinder level and warm it to test; technician if it persists |
Reading a yellow flame correctly
A yellow, lazy, sooting flame isn't a cosmetic quirk you learn to live with. It's a combustion report. Incomplete propane combustion produces carbon monoxide, which is odorless and colorless, and Paradise, California's RV safety guidance treats fuel-burning cooking equipment as a potential CO source while recommending owners check appliances for leaks and keep a working gas-leak detector aboard. A burner that burns yellow after nozzle cleaning needs its combustion air, burner alignment, gas pressure, and ventilation conditions evaluated, not scrubbed harder. Check your CO detector the same day.
The pilot-model thermocouple symptom
On a pilot-model range, a burner that lights and then dies the moment you release the knob is nearly always a flame-proving problem. The Brinkley RV owners manual describes the thermocouple as a safety device that monitors whether the pilot flame is present and shuts gas off to both pilot and main burner when it isn't. A partially blocked pilot opening can imitate a failed thermocouple, so the order is clean, reposition, then test, then replace.
What you can check without tools
Cylinder level. A gauge reading below a quarter on a cold morning explains more weak-burner complaints than any failed part.
Visible debris. Mud daubers, spider webbing, and road grit pack into burner ports and regulator vents across a Utah summer.
The obvious. A supply valve that's only half open starves every burner on the range at once, which points at the system rather than the appliance.
Everything else, meaning regulator pressure, thermocouple signal, and the gas valve, needs instruments and a trained eye. Our RV appliance repair guide for Utah owners covers how the rest of the galley system interacts with the stove.
Verify Recalls and Installation Before Any Repair
A new igniter won't fix a cracked burner tube, and it certainly won't fix a cooktop installed with the wrong clearances. Before you buy parts, prove what you're dealing with. This is the step almost every online guide skips, and it's the one that catches the cases where the stove was never the problem.
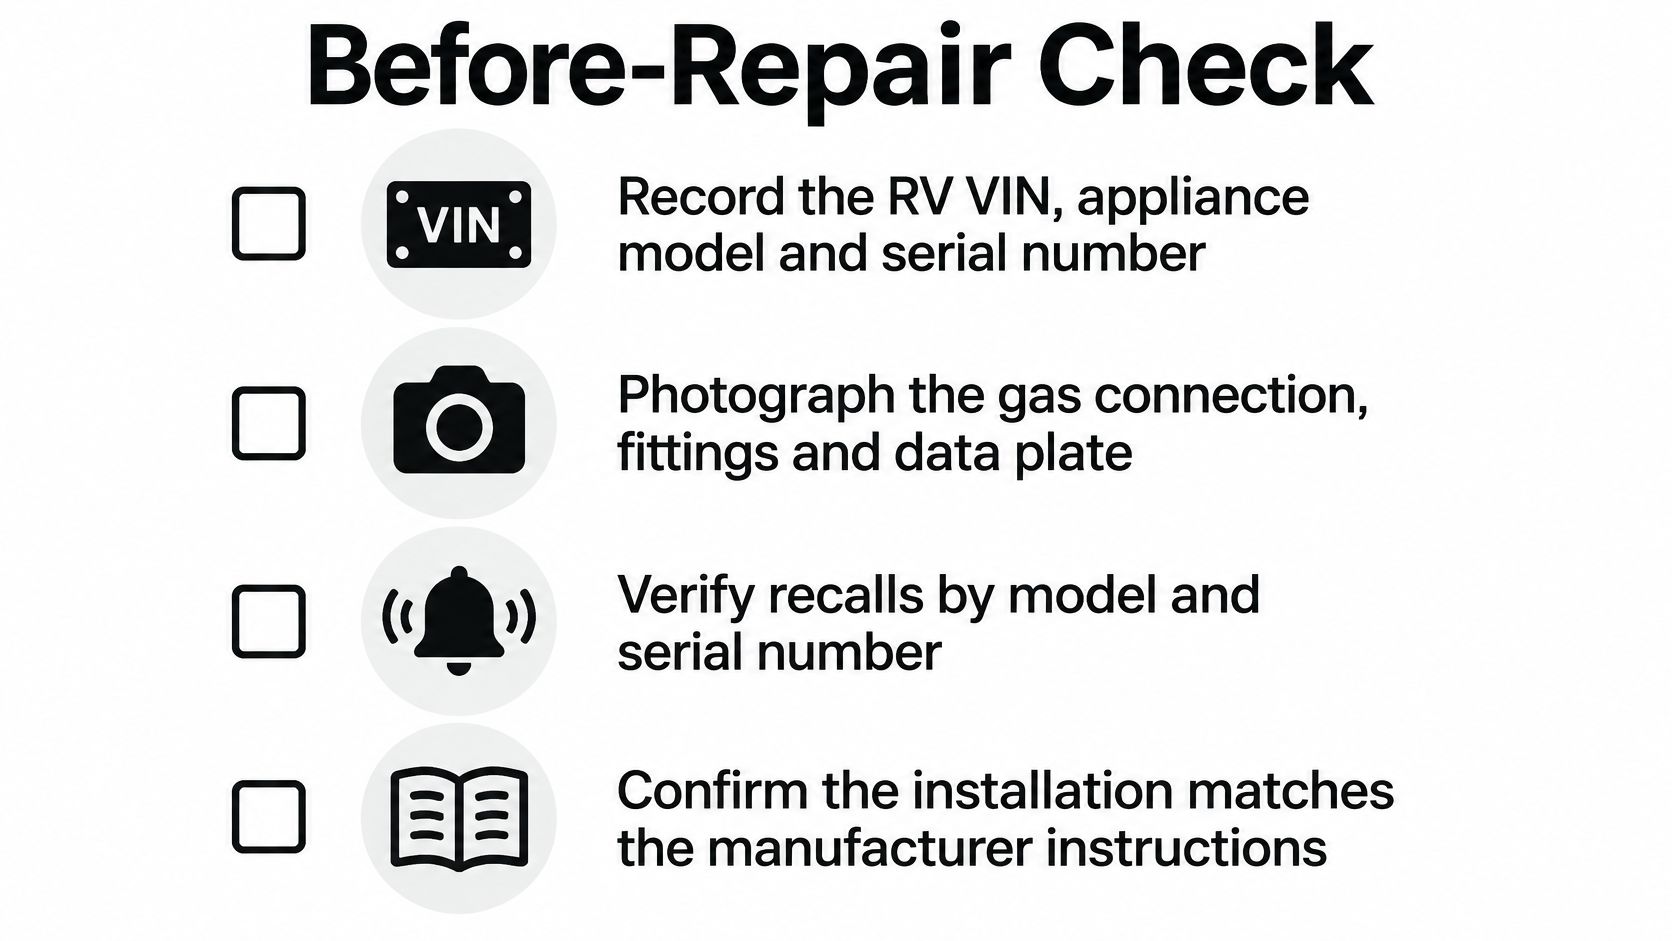
Five minutes with a phone camera saves an hour of guessing.
- Record the identifiers. RV VIN, cooktop or range make, model, and serial number. Photograph the data plate rather than trusting your memory.
- Photograph the connections. Gas line, fittings, shutoff, and the clearances between the cooktop and any combustible surface.
- Check recall records. NHTSA maintains recall lookups by VIN and by equipment manufacturer.
- Confirm coverage before disassembly. If a manufacturer notice applies, a paid repair may duplicate work someone else owes you.
- Document the history. Leak test results, detector status, and any earlier repairs, so the next technician isn't starting from zero.
What the Dometic cooktop recall shows
This isn't hypothetical. RV Business reported NHTSA recall documents covering 145 travel trailers fitted with Dometic PI8022 two-burner LPG cooktops, where aluminum burner tubes could crack and leak gas, and owners were told not to operate the cooktop and to shut off the propane supply. Separate recalls in the same installment involved exterior griddles that could be stowed while still connected to LPG, creating a fire risk, with remedies built around hardware changes.
The pattern to notice: the fix in those campaigns wasn't a better burner. It was identification and hardware correction.
Why this matters most on used rigs
Used-RV buyers, toy-hauler owners, and families picking up an older trailer are the ones most exposed here. A previous owner may have swapped a cooktop, added a quick-connect griddle, or replaced a hose with something that fits but isn't listed. A replacement burner or hose won't correct an installation defect, and it can hide one. A safe diagnosis may need recall verification, leak testing, correct clearances, and manufacturer-approved parts, which is a longer list than "replace the igniter" and a much shorter one than a fire.
Tools, Parts and Repair Costs for Stove Work
If a propane odor or detector alarm put you into triage, the tools stay in the bag until the supply is off and the leak check passes. For cleaning-level work, the owner kit is small.
- A calibrated manometer. The only honest way to read propane pressure. Flame height is not a pressure gauge.
- Leak-detection solution without ammonia or chlorine. Those additives attack brass fittings and can crack them. Buy the approved fluid.
- A soft brush and compressed air. For burner ports and pilot orifices, using the method the manufacturer approves.
- A multimeter. For igniter wiring and continuity checks on electronic ignition models.
- The appliance manual. Open to the troubleshooting page before you touch anything, because ignition timing and clearances are model-specific.
- Skip the wire brush and the drill bit. They enlarge ports, change the flame shape, and cannot be undone.
On parts, the rule is exact replacements only. Use the thermocouple, igniter, burner cap, or gas valve listed for your model, not a universal substitute that “looks close.” The U.S. Fire Administration's technical report on RV fire protection frames this as preserving approved components and system integrity rather than improvising, which is also why a malfunctioning gas appliance deserves real diagnosis instead of a workaround.
What repairs actually cost
| Repair or job | Reference cost | Source |
|---|---|---|
| Oven igniter repair, full service | $523.61 | OCRV Center, updated 2026 |
| Standard propane RV range installation | $854 to $1,349 | Construction Flux, 2024 national average |
Treat those as reference points. OCRV Center's appliance repair page, updated in 2026, lists an oven igniter repair at $523.61 once diagnosis, labor, parts markup, tax, range removal, testing, and leak testing are included. Construction Flux puts a standard propane RV range installation at $854 to $1,349 nationally, based on 87 RV retrofit projects reviewed in 2024.
If a written estimate lands far outside those bands, ask which line item is driving it: removal, leak testing, parts, or labor.
How to Fix a Burner That Lights but Won't Stay Lit
This is the most common stove call we see, and it rewards method. Work the components in order instead of replacing the range.
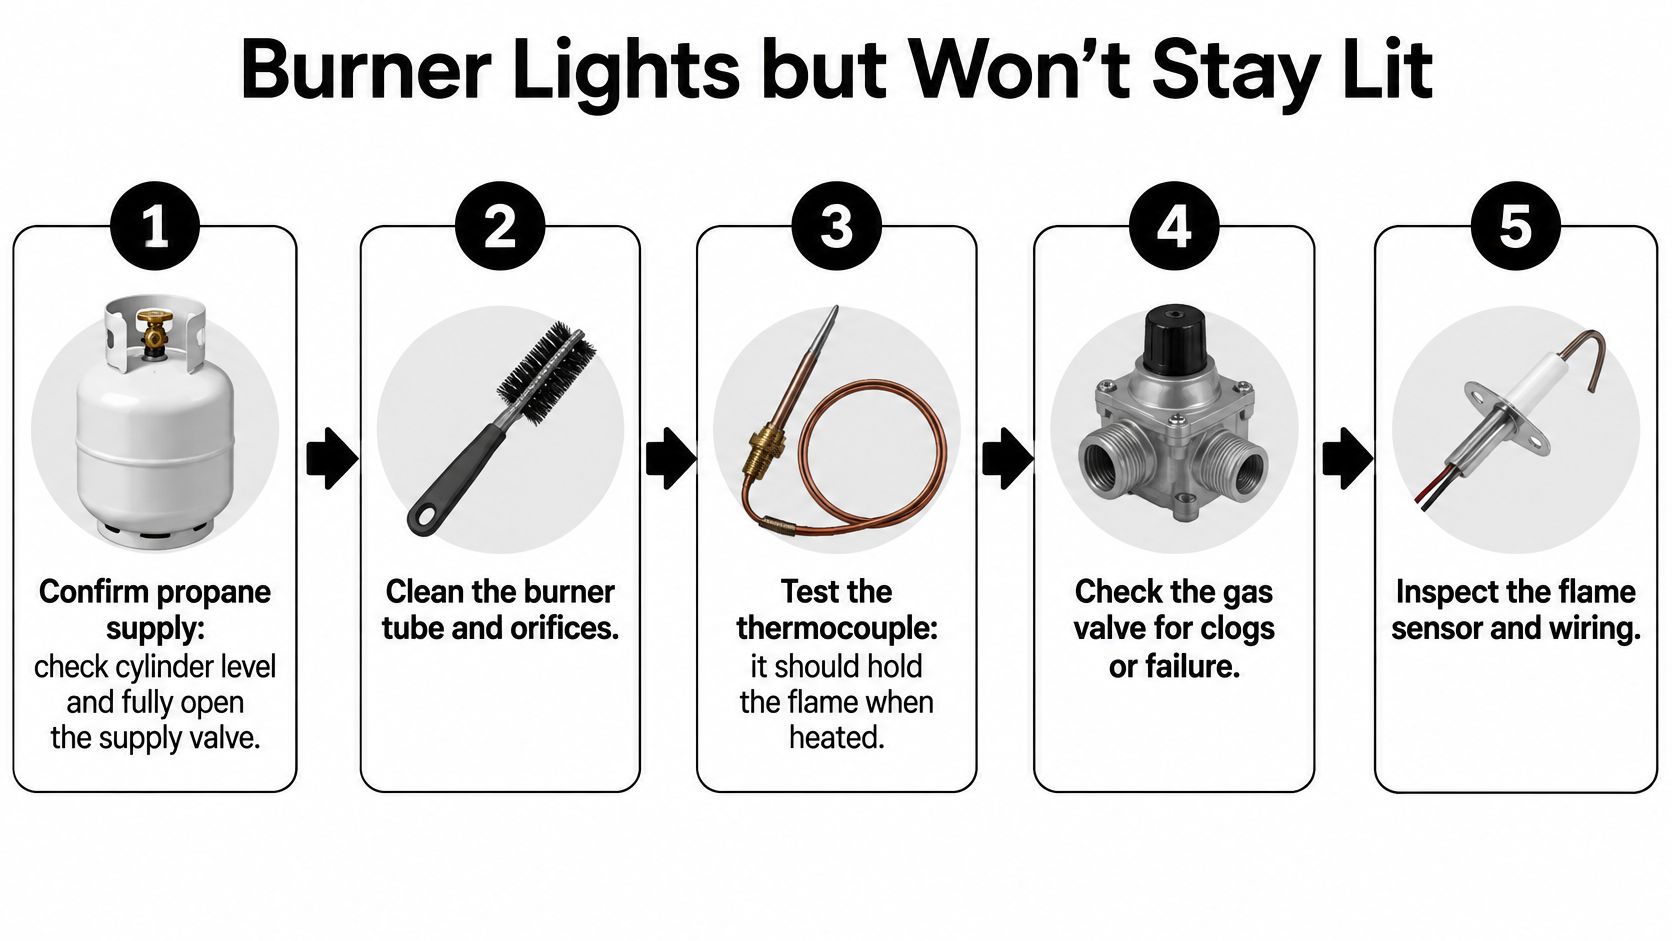
- Confirm propane supply. Check the cylinder level and make sure the supply valve is fully open, not half-turned. A chilling cylinder loses pressure as it empties, which produces this exact symptom.
- Confirm regulator output. A manometer tells you whether the burner is starved or flooded. If you don't own one, this step belongs to a technician.
- Clean the burner ports and pilot orifice. Soft brush, compressed air, the method the manufacturer approves. Never a wire or drill bit, because enlarged ports alter the flame and can't be restored.
- Watch where the flame sits. It should envelop the thermocouple or flame-sensing element. If it's licking past one side, reposition the thermocouple or clean its tip rather than bending the burner.
- Hold and release the control. Hold it in the ignition position for the interval your manual specifies, release, and watch for immediate gas-valve closure. Closure means the safety circuit isn't proving flame.
- Check the remaining components if the pilot stays strong but the main burner drops. That means thermocouple alignment, contamination, wiring where applicable, and the gas valve.
- Replace failed parts with the exact listed component. Universal substitutes are one of the top reasons a stove repair comes back a second time.
A thermocouple is a safety sensor, not a flame detector for your convenience. When its pilot flame disappears or its signal is too weak, the gas valve shuts off flow to both the pilot and the main burner. The Furrion gas oven operating instructions lay out this component-by-component approach for exactly that reason and warn against replacing the whole range to solve a proving problem.
The shortcut that isn't one: bypassing the safety device to get the burner running for the weekend. It can let unburned propane accumulate in the cabin.
The manual for that same appliance adds a detail worth remembering: gas leaks may not be detectable by odor, and it recommends a UL- or CSA-listed gas detector on board. Here's a short walkthrough of the ignition side of the same diagnosis.
The post-repair test that ends the job
Nothing goes back into service until four checks pass: a leak test on every fitting you touched, an ignition test on every burner, a flame-stability check at full and low settings, and a carbon monoxide detector check. Skip any one of those and you've repaired a symptom without confirming the system.
Check Regulator Pressure Before You Replace Parts
Multiple burners that are weak, slow to light, or unstable usually aren't a range problem at all. They're a supply problem, and the regulator sits upstream of everything you'd otherwise replace. Test it first.
| Check point | Reference value | What it tells you |
|---|---|---|
| Second-stage regulator target | 11.0 in. water column | Whether regulator output matches the appliance |
| Static range | 10.5 to 11.5 in. water column | Whether pressure holds steady at rest |
| First-stage outlet | 10 to 15 PSIG, varies by model | Whether the first stage is within its label range |
| Leak test pressure | 8 to 14 in. water column, held 3 minutes | Any drop means a leak to find and repair |
How to read those numbers
The second-stage target of 11.0 inches of water column, with a stated static range of 10.5 to 11.5, comes from Coast to Coast RV Repair's LP regulator service page, which also recommends checking dynamic pressure with appliances running at full demand and describes first-stage outlet pressure as typically 10 to 15 PSIG depending on the regulator model. Static first, dynamic second, because a regulator can hold fine at rest and fall on its face the moment the furnace and stove both call for gas.
The leak test figures come from NFPA 1192 amendment documentation, which describes pressurizing the system to 8 to 14 inches of water column and monitoring for at least three minutes with no pressure drop. A drop means you locate the leak, repair it, and repeat the test from the start. That same framework requires flame-failure protection on fuel-burning range burners and pilots, which is the standard behind the thermocouple circuit in the previous section.
The vent check most owners never do
Spider webs, mud-dauber nests, and dust block the regulator vent and cause erratic pressure that mimics a failing regulator. Blow it clear, look inside, and confirm it's unobstructed before you conclude the regulator is bad.
Use only approved leak-detection solution, never ammonia or chlorine based cleaners, and never a flame.
When a regulator needs replacing, not adjusting
Replacement territory looks like visible corrosion on the body, a vent that won't clear, oil or debris in the line, pressure that won't hold static or sags hard under load, or a regulator that's older than the rest of the system. Adjustment territory is narrow and belongs to someone with a manometer and the label in front of them. Because specifications vary by model, treat every number above as a diagnostic reference point, not a set of do-it-yourself adjustment instructions, and confirm the appliance and regulator manufacturer specs before anything gets turned or swapped.
Book Your Stove Check at Motor Sportsland
Here's the decision rule. Smell, hiss, alarm, or a burner that's gone out twice: stop and book service now. Regulator pressure, thermocouple signal, gas valve, or a recall question on your VIN: that's service team work. Cleaning ports, checking cylinder level, and testing detectors: do those yourself with care.
Fire data explains why the annual visit is worth the calendar slot. The U.S. Fire Administration's snapshot of RV fires estimated an average of 4,200 RV fires reported to U.S. fire departments each year from 2018 to 2020, with cooking areas accounting for 7.7% of RV fire origins, and it advises checking propane supply lines for kinks or damage, testing fitting connections with a gas-leak detection device, and having a trained technician inspect an RV at least annually.
Booking takes a couple of minutes. You describe the RV, pick repair, installation, or maintenance, choose a time, and the service team confirms the appointment. Our service center works on RV owners' rigs from Salt Lake City, Millcreek, Spanish Fork, and across Utah, and handles maintenance checks, repairs, installations, plumbing, and electrical work, including the detector and wiring side of a stove diagnosis. Spanish Fork service hours are Monday to Saturday, 9:00 AM to 6:00 PM, closed Sunday, and Millcreek runs the same schedule.
What to bring to the appointment
Bring the VIN, the appliance model and serial number, and the photos from the pre-repair check. That turns a diagnostic hour into a diagnostic twenty minutes, especially on a used trailer where nobody knows what the last owner changed.
A Utah maintenance calendar that works
Spring: clean burner ports and pilot orifices, test the CO and propane detectors, inspect the supply line for chafing.
Before every trip: check cylinder level, sniff-test fittings with approved solution, confirm detector batteries.
Once a year: full technician inspection. Cold Salt Lake City winters cut cylinder output, so check the level before any winter run. Higher elevation camping in the Wasatch and Uinta ranges changes combustion, so a yellow flame after a mountain move earns a detector check before you cook again.
Owners shopping for a different rig can browse the current inventory or ask about financing while they're here. Book a stove check before the next trip rather than after the next scare.
Frequently Asked Questions About RV Stove Repair
Can I use the stove if I smell propane?
No. Shut off the appliances, open windows and vents, get everyone out of the RV, and call a technician or emergency services from a safe distance. Don't relight anything until the source of the smell has been found.
Why does my burner light and then go out within seconds?
Usually the thermocouple isn't being heated enough, the pilot opening is partly blocked, or gas flow is weak. Stop using that burner and book a check if it happens more than once.
Is a yellow flame just cosmetic?
No. A yellow flame is a combustion warning that points to blocked ports or poor combustion air. Check the CO detector and have the burner ports and combustion air inspected before the next trip.
Can I bypass the thermocouple to keep the burner running?
No. Bypassing the flame-safety device lets unburned propane escape whenever the flame goes out, which is precisely the scenario the device exists to prevent.
How often should a technician inspect my RV?
At least once a year, and before the season starts if you camp at mountain elevations or run an older trailer.
Should I check recalls before repairing my stove?
Yes. Record the VIN and appliance model and check NHTSA records before you take anything apart, because a recall remedy may already cover the fault.
A propane stove problem in a Utah trailer usually comes down to one of a handful of causes, and the service team at Motor Sportsland can sort which one you're facing without guesswork, from a thermocouple that won't prove flame to a regulator that sags under load. The service center handles maintenance checks, repairs, installations, plumbing, and electrical work at both Millcreek and Spanish Fork. Call the Spanish Fork service line at (801) 798-7448 or the Millcreek service line at (801) 262-2924, or send a request through the contact form, and get the stove inspection on the calendar before your next trip, whether that's a weekend at Jordanelle or a longer run to Bear Lake.
