
RV Water Filter Installation: Steps, Tools and Utah Tips

Clear water runs out of the campground spigot, so you thread on the filter, hook up the white hose, and open the tap. Ten minutes later the kitchen faucet is sputtering, the housing has a drip running down onto the stabilizer jack, and the first cup of coffee tastes like a hotel pool.
None of that means the filter was junk. It usually means the parts went together in the wrong order, a washer slipped out of its seat, or a basic carbon cartridge was asked to do a job that only a certified purifier can do. RV water filter installation is a fifteen-minute job with a dozen small failure points, and nearly all of them are cheap to avoid once you know where they sit.
Walk through a service bay in spring and the same handful of complaints comes back. What follows is the order to work in: source first, certification second, fittings third, cartridge schedule last. A filter is one link in a chain that runs from the spigot to the tank to the faucet, and the rest of the chain has to hold.
Choosing the Right RV Water Filter Type and Certification
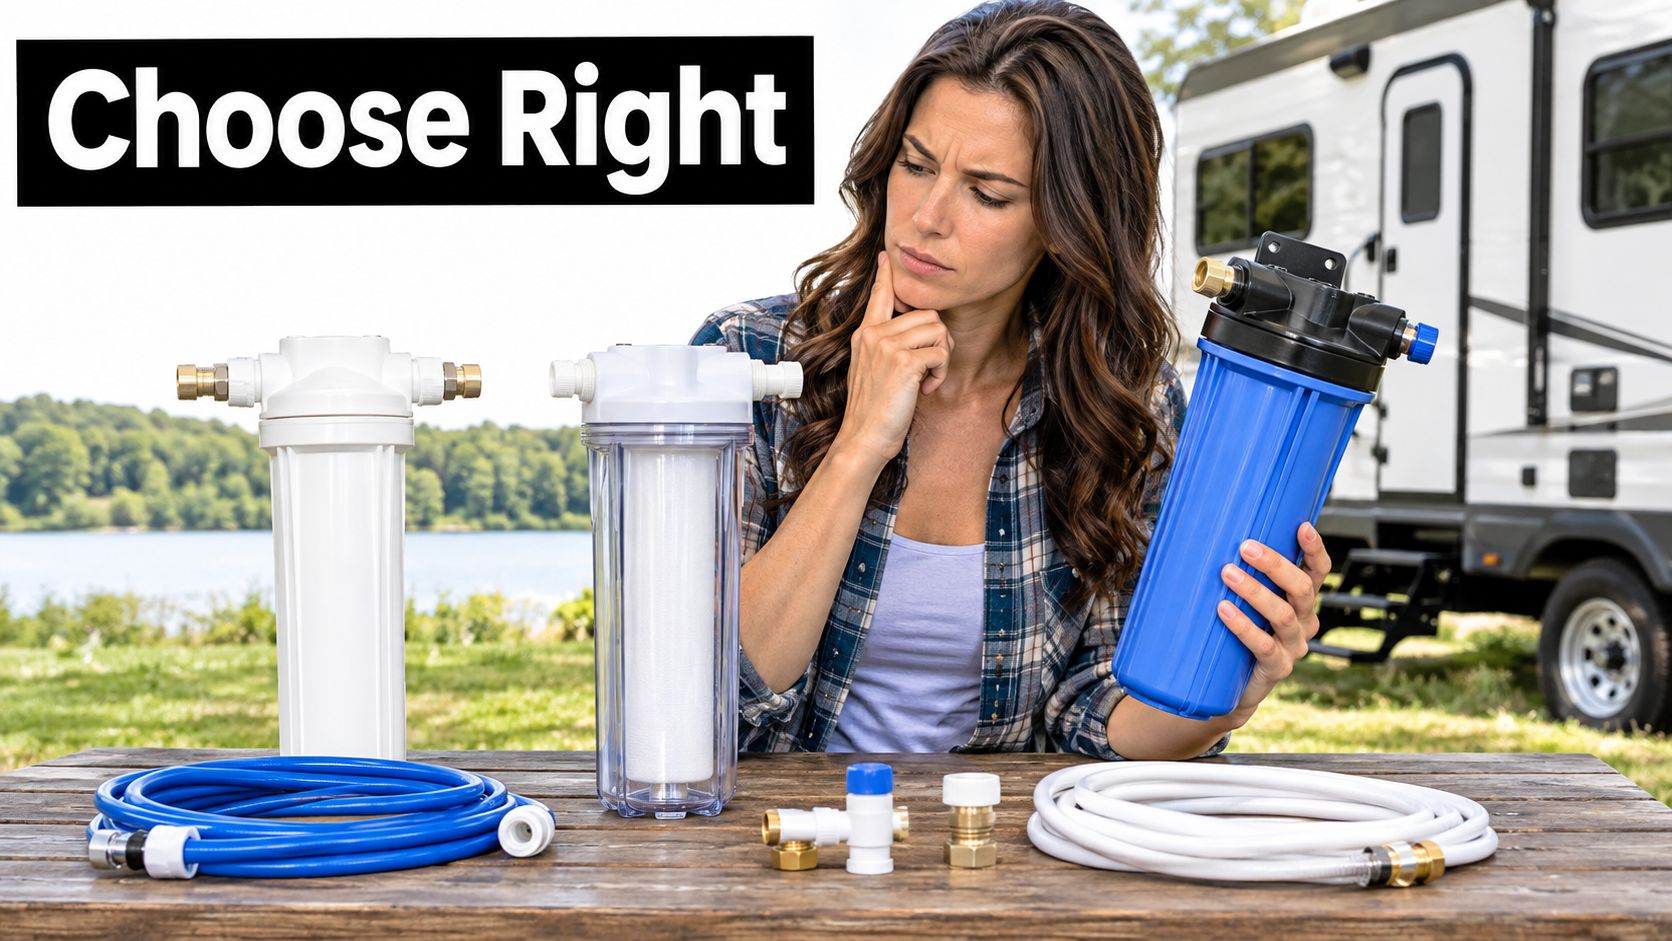
Three hardware families get sold as "an RV water filter," and most buyers pick one before they've asked what's in the water. Flip that order. Read the source, name the contaminant, then find the certification that proves the product handles it.
| Filter type | Where it mounts | Best use | Install effort | Certification to check |
|---|---|---|---|---|
| Inline hose filter | Between campground spigot and RV fresh-water hose | Campground hookups, taste and sediment | 15-30 minutes, no plumbing | NSF/ANSI 42 for taste, 53 for health claims |
| Under-sink filter | Dedicated kitchen faucet or cold supply line | Drinking and cooking water at one tap | 1-3 hours, may need fittings | NSF/ANSI 42 or 53 per cartridge |
| Whole-RV filter | Fresh-water fill line or storage bay | Protecting entire plumbing and pump | 2-4 hours, plumbing skills needed | Verify claim per cartridge and housing |
That table tells you what the hardware looks like in the field.
The frame that governs all three placements comes from the CDC's guidance on safe RV water, which treats filtration as one part of a broader water-safety system rather than a guarantee of potable water. Connect only to a campground or RV-park supply confirmed safe to drink, or fill onboard tanks from a safe drinking-water source. The same guidance separates filters built mainly for taste and odor from those tested for microbial or chemical reduction, and notes that many taste-improvement filters don't remove germs.
Buying rule: a standard number and a named contaminant claim beat the word "filtered" on the package every time.
That's why the certification matters more than the packaging. NSF International's certification directory splits drinking-water treatment by function: NSF/ANSI 42 for aesthetic effects such as taste, odor, and chlorine, NSF/ANSI 53 for health effects, NSF/ANSI 55 for ultraviolet microbiological treatment, NSF/ANSI 58 for reverse osmosis, NSF/ANSI 62 for distillation, NSF/ANSI 401 for emerging contaminants, and NSF P231 for microbiological purifiers. A cheap inline unit may improve taste and catch sediment while offering no certified pathogen protection at all. "Filtered" is not a performance category.
Then there's the gap most RV guides skip. EPA's April 2025 private-well guidance treats PFAS as a separate risk that may require certified treatment or an alternate drinking-water source. Research summarized in that guidance found PFAS in 15% of tested private wells in an area without known sources, with substantially higher detection rates near facilities and contamination sites, and only 49% of participants advised to filter installed filters. If you fill your tank at home, at a farm, or from a rural standpipe, that guidance is your starting point, not the campground faucet.
Utah conditions sharpen the choice. A full-hookup site at Jordanelle or Bear Lake is a municipal-style supply, and an inline filter with a sediment stage plus an NSF/ANSI 42 claim is the sensible buy. Dry camping in the Wasatch foothills is a different problem: no cartridge changes what comes out of a stream. For price context, a two-pack of Kohree RV inline filters was listed at $19.99 by Walmart in 2025, so an entry-level inline setup is cheap. Confirm current pricing before you budget around it.
Before you buy anything, answer three questions: where does the water come from, which contaminant needs reducing, and which NSF/ANSI claim matches that goal. Everything else in the installation follows from those answers.
Tools, Parts and Prep Before You Connect Anything
Sanitation comes before filtration. If the tank has been sitting half full since October, or the rig just came back from a fill station you don't trust, disinfect the system first and talk about cartridges afterward. The CDC's guide to choosing home water filters is blunt about why: microfiltration removes some bacteria while letting others through, and carbon is primarily a taste, odor, and selected-chemical tool. Neither one sterilizes a tank.
One RV filtration specification sets the shock dose at up to 200 ppm chlorine, roughly 2/3 cup of standard household bleach per 10 gallons of tank capacity, followed by full contact time, draining, and flushing. Where the RV manufacturer prints a different procedure, theirs wins.
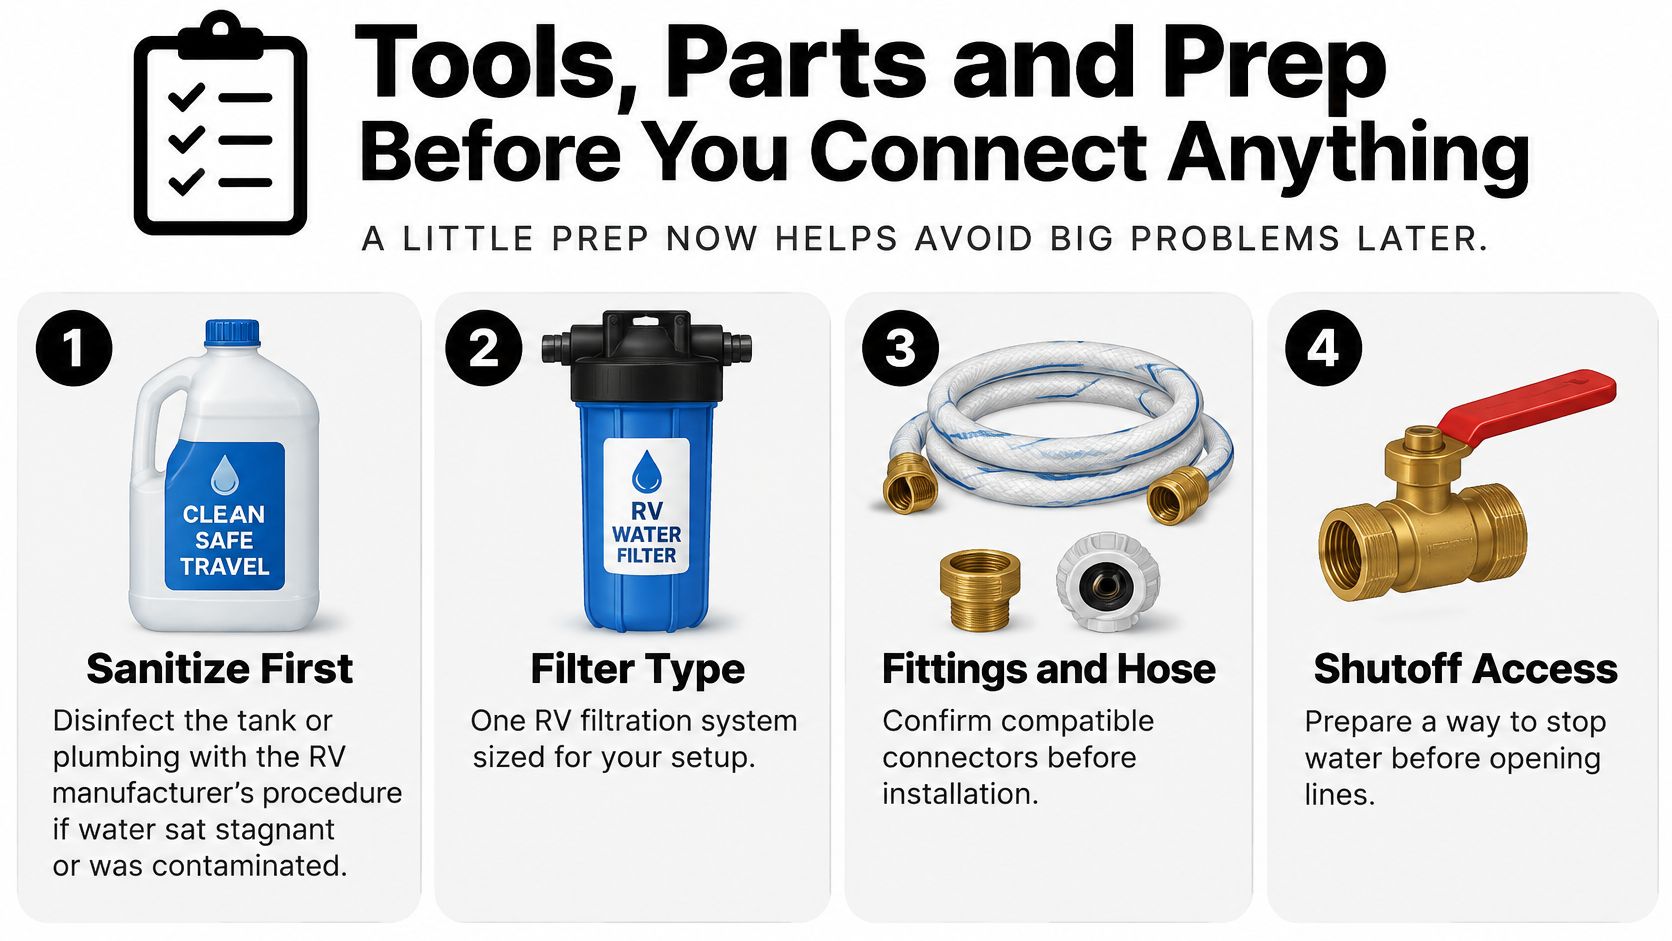
Assemble the parts before you touch a fitting:
- Pliers or the supplied cartridge wrench. Housings are often hand-tight only, and a wrench that doesn't fit rounds the ribs.
- Two spare rubber washers. They cost less than a cup of coffee and they cause more leaks than anything else on the rig.
- A drinking-water-safe hose. White or blue, labeled potable. A garden hose left in the sun will undo the filter's work in one afternoon.
- A pressure regulator. It goes upstream of everything you want to keep.
- A bucket and a towel. New cartridges discharge a slug of dark water, and you want it in the bucket, not in the bay.
- Nitrile gloves. Cartridge changes are a wet, dirty job.
Check thread sizes before you leave the driveway. Standard RV hose connections are usually 3/4-inch garden hose thread, but under-sink units commonly want 3/8-inch compression or 1/4-inch quick-connect, and whole-RV housings often use NPT pipe thread with a mounting bracket. Confirm the filter's connection size, flow capacity, and pressure limit against your rig's potable-water hose and plumbing rather than assuming.
Four pre-install checks take two minutes. Shut off the water pump and depressurize by opening a cold faucet. Read the cartridge label and confirm the certification matches the job. Test the spigot with a pressure gauge if you carry one. Read the filter's own manual for its flow direction and flush requirement, because those vary by model.
Here's the walkthrough we'd give a customer before they start turning wrenches:
One habit pays for itself on the first trip: keep a spare cartridge sealed in a zip bag under the sink. Flow drops on a Sunday in the middle of nowhere, and having the part on board is the difference between a normal shower and a two-hour detour.
How to Install Each Type of RV Water Filter
The inline hose filter is the job most owners do themselves, and the sequence matters as much as the fittings. Here's the flow, with the reason attached to each step.
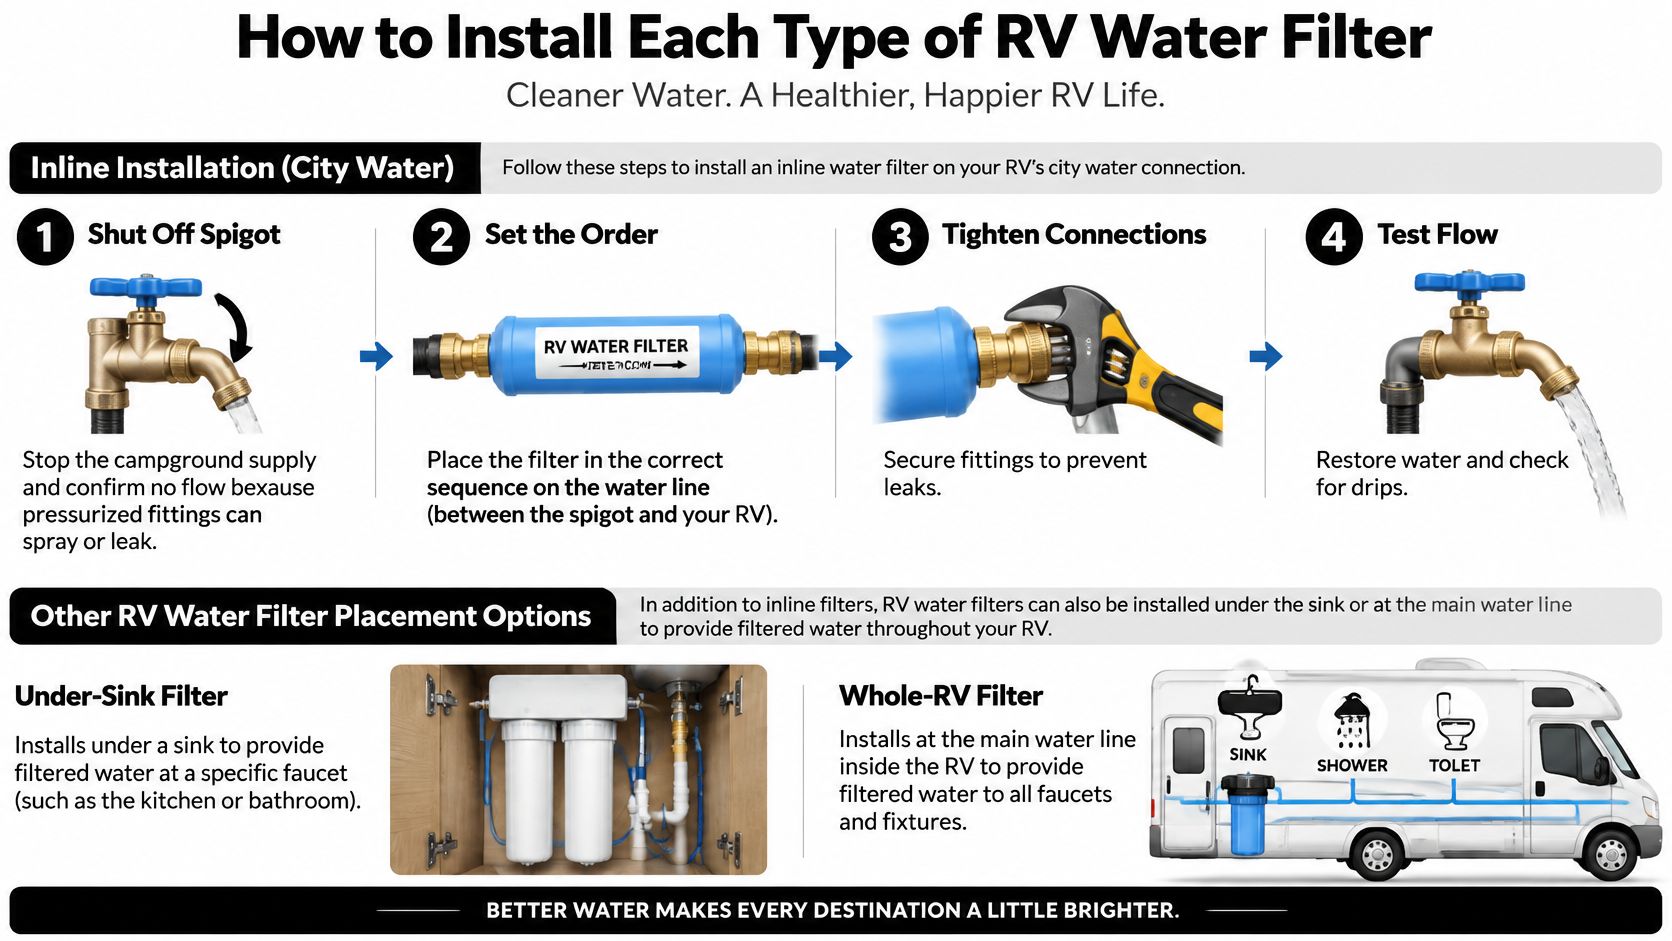
City-water hookup in eight steps
- Shut the spigot and prove it's off. Open a cold tap at the rig afterward. A live line sprays the moment you crack a fitting.
- Build the chain source to rig. Spigot, then pressure regulator, then drinking-water-safe hose, then the filter, then a second hose into the RV inlet. Campground pressure can exceed the plumbing limit molded into your rig, and a regulator only protects what sits downstream of it.
- Point the flow arrow with the water. Cartridges are directional. Reverse one and you drive sediment into the media bed instead of onto it.
- Seat an intact washer at both ends. A displaced washer is the single most common cause of a drip at the housing.
- Support the housing. Hang it from the hose or the pedestal, not from the RV inlet. Plastic inlet fittings crack under a filter full of water.
- Pressurize in quarter turns. Open the spigot slowly, listen, and stop if you hear a hiss at a joint.
- Inspect every connection with a dry paper towel. Drips show up as a dark spot in seconds, and you'll catch a weeping washer before it soaks the bay.
- Flush, then run cold until clear. A new carbon cartridge needs a flush to shed carbon fines, then run a cold tap until flow is steady.
Step 8 has a hard number behind it. A representative RV inline carbon filter carries a rating of approximately 30 to 100 psi and 1 gpm at 60 psi, per the Fresh Water Systems inline filter specification, and new carbon cartridges should be flushed for about 5 minutes to clear fines. Exceed the filter's or the RV manufacturer's pressure limit and you get leakage or damaged components, usually at the weakest plastic thread in the assembly.
Under-sink and whole-RV mounting
Under-sink filters serve one tap and one job: drinking and cooking water. Give the cartridge housing cabinet clearance for removal, because a unit you can't get a hand around is a unit that never gets changed. Tee off the cold supply at the dedicated faucet or a diverter, follow the housing's in/out markings, and pressurize slowly.
Whole-RV units mount on the fresh-water fill line or inside a storage bay on a bracket, which protects the pump and every fixture downstream. These are the installations that call for plumbing skill, and the manufacturer's sequence takes precedence over any generic order. If the instructions specify a different arrangement, follow them.
Where installations fail
The recurring errors are consistent: reversed flow, missing or displaced washers, a filter hanging its own weight, kinked hoses, rapid pressurization, a skipped flush, and trapped water that freezes. Each one is a five-minute fix and a hundred-dollar problem, depending on when you catch it. Freeze damage deserves its own mention because it usually occurs during storage, months after the install.
Replacement Schedule and Routine Maintenance
Cartridges age on two clocks, time and gallons, and the manufacturer's stated limit is whichever comes first. Taste and appearance are not gauges. Some contaminants give you no visible or taste warning at all. One RV filter manual recommends replacing cartridges every 3-4 months to maintain water quality, per the manufacturer's replacement guidance, and the CDC's advice runs the same direction: replace on schedule and follow the supplied instructions.
A rig fed by spring runoff, or one bouncing down washboard forest roads all summer, will exhaust media faster than the calendar suggests. If you want a neutral third-party perspective on tracking housing and cartridge condition between trips, SouthRay Kitchen & Bath keeps a practical rundown of water filtration system upkeep that translates cleanly to RV plumbing.
| Task | Interval | Why it matters |
|---|---|---|
| Replace inline or under-sink cartridge | Every 3-4 months, or sooner if flow drops | Taste and sediment protection fades without a visible warning |
| Check housing washers and fittings | Every trip, before connecting | Catches cracks, drips and loose hoses early |
| Flush cartridge after replacement | Each new cartridge, about 5 minutes | Clears carbon fines that cause grit at the tap |
| Check pressure regulator output | Start of each season | Protects RV plumbing from campground surges |
| Full tank and plumbing sanitation | At least once a year, or after months unused | Follows the manufacturer procedure; a filter cannot replace it |
| Test flow and taste at hookups | Monthly on long trips | Early warning of exhausted cartridge media |
Read the table as a loop, not a list. The cartridge change, the annual tank sanitation, and the regulator check are the same job done on different clocks, and skipping one shifts load onto the others. Our walkthrough of RV water system cleaning for Utah campers handles the tank half of that loop in detail.
Practical tracking beats memory. Write the install date and the printed gallon capacity on the housing with a paint marker. Log the date you changed it in your phone or on a strip of tape inside the wet bay. Keep spares sealed and out of the sun, because a cartridge that's been baking in a storage compartment since last June isn't new.
The signs a cartridge is spent are worth memorizing. Flow drops at every tap, chlorine taste returns to water that used to be neutral, or the element sat wet and exposed after a questionable fill. Any of those and the cartridge comes out, whether or not the calendar agrees.
Troubleshooting Leaks, Low Flow and Off Taste
First move on any leak: shut off the supply and relieve pressure before you touch a fitting. Open a cold faucet, wait for the flow to stop, then work. A pressurized housing that gets a quarter turn too far will soak the bay and teach you nothing.
Then match the symptom to the cause. Most of what comes across the counter fits one of these patterns.
| Symptom | Likely cause | Fix |
|---|---|---|
| Low flow at the tap | Clogged or spent cartridge, or kinked hose | Check hose routing, then replace the cartridge |
| Drip at the housing | Missing or displaced washer | Shut off, reseat washers, hand-tighten plus a small turn |
| Sudden pressure surge | No pressure regulator in line | Install a regulator ahead of the filter |
| Chlorine taste returns | Cartridge exhausted | Replace the cartridge and log the date |
| Black specks or grit | Carbon fines from a new cartridge | Flush the new cartridge for about 5 minutes |
| Air spits from faucet | Air trapped after install | Run the cold tap until flow is steady |
| Odor after storage | Stagnant tank water | Sanitize the tank per the RV manufacturer procedure |
The bypass test settles arguments fast. Disconnect the filter, run the hose straight from the regulator to the RV inlet, and open a cold tap for a minute. If flow and taste recover, the problem is in the cartridge or housing. If nothing changes, the source, the hose, or the plumbing is the culprit, and a new cartridge won't help.
Utah adds a couple of local causes. Hard, mineral-heavy water from mountain-fed systems lays down scale in housings and aerators, so a sediment stage upstream of the carbon pays for itself. A cold night at elevation can crack a housing that held water, and the leak shows up weeks later when you pressurize in the driveway. If a problem survives a fresh cartridge, a reseated washer, and the bypass test, that's the point to have the plumbing looked at rather than keep swapping parts, and our guide to common RV plumbing issues covers the next round of checks.
Winterize Safely and Book Your Next Service Check
A filter housing full of water is a crack waiting for the first hard freeze. Utah storage lots and high-elevation campgrounds deliver that freeze reliably, and the repair is always more expensive than the twenty minutes of prep.
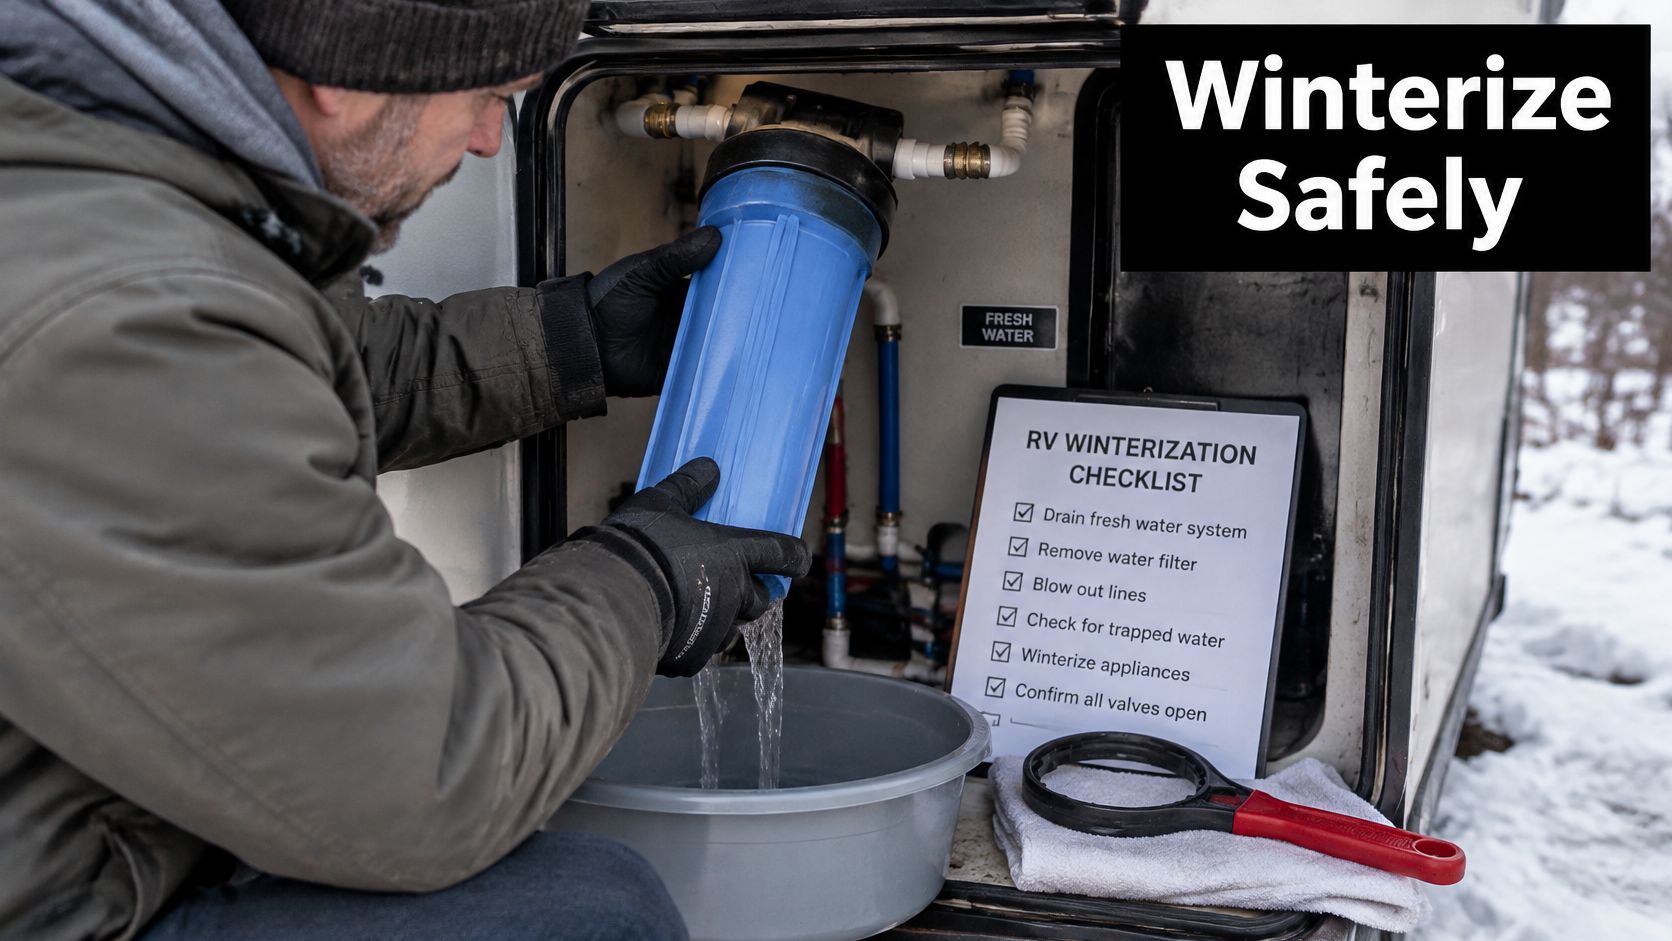
The order below follows one manufacturer's winterization service bulletin, and it's the sequence to use:
- Shut off the water supply.
- Relieve pressure by opening the cold fixtures.
- Remove the filter housing.
- Take out the cartridge and discard it.
- Drain excess water from the housing.
- Reinstall the empty housing.
Don't leave the cartridge in place, and don't pump antifreeze through it. Trapped water freezes and splits the housing, and an installed cartridge drinks a surprising amount of antifreeze before anything reaches the faucets. Our Utah RV winterization guide covers the rest of the plumbing loop.
If you blow lines with compressed air, use your own manual's ceiling. Airstream's winterizing guide tells owners to keep compressed air below 60 psi, while another manufacturer procedure sets a stricter maximum of 30 psi. Different rigs, different limits, no universal number. Pull or bypass the housing before air goes in.
Spring reversal is quick: new cartridge, five-minute flush, slow pressurization, dry paper towel on every joint. If any of that feels like a job you'd rather hand off, booking is simple. You describe your RV, pick the services you need (repair, installation, or maintenance), choose a time, and our service team confirms the appointment. The service department handles maintenance checks, repairs, installations, plumbing work, and electrical work, and it serves RV owners across Salt Lake City, Millcreek, Spanish Fork, and throughout Utah.
Water-system work is one of the jobs our service center handles every week at Motor Sportsland, from filter and regulator installations to tank sanitation and winterization prep, and we've been helping Utah RVers get ready for the season for over 55 years from Millcreek and Spanish Fork. Browse Motor Sportsland to see current inventory and service options, or stop by the Millcreek showroom with your filter, hose, and regulator in hand and we'll confirm what's compatible with your rig before you buy anything. Bring the cartridge box and your tank size, and we'll map out the whole chain with you.
Frequently Asked Questions About RV Water Filter Installation
Can I drink water straight through an inline RV filter?
Only when the water source is already confirmed safe to drink. An inline carbon filter can improve taste, odor, and sediment levels, but it does not disinfect water. For a questionable source, use treatment certified for the specific risk or choose another water supply.
Where does the pressure regulator go, before or after the filter?
Install it on the spigot side, before the filter. It limits pressure reaching the filter housing and the rest of the RV plumbing. Check that the regulator and filter fittings match your hose connections, and tighten them without forcing the threads.
How often should I replace the cartridge?
Follow the manufacturer's time or gallon limit, whichever comes first. Replace it sooner if flow drops or the cartridge may have been exposed to contamination. Track the installation date and usage alongside your tank-cleaning routine.
Do I have to remove the filter to winterize?
Yes. Remove the cartridge, drain the housing, and reinstall it empty. Water left in the housing can freeze and crack it, while antifreeze run through a cartridge is wasted.
Will a filter make well water or lake water safe?
A filter alone cannot guarantee safe water. Have questionable well water tested by a certified laboratory, select treatment rated for the identified contaminant, and avoid filling the RV tank from a source that is not suitable for drinking.
Can I leave the filter connected between trips?
Drain the housing, protect it from freezing, and store cartridges sealed and out of sunlight. A filter left wet and pressurized in a storage bay is a leak waiting for spring.
To have the filter system checked or installed, book a Motor Sportsland Service Center appointment by describing your RV, selecting repair, installation, or maintenance, and choosing a time. The service team will confirm the appointment.
