
Camper Bug Screens: The Complete RV Guide

You're sitting at a Utah campground with the entry door open, trying to catch the evening breeze. Within minutes, mosquitoes are circling the lights, a child is holding the screen halfway open, and the camper feels warmer because the mesh blocks more air than expected. That's the practical problem with camper bug screens. Choosing the tightest weave isn't automatically the right answer.
A good screen must match your destination, the insects you're likely to encounter, the way your RV ventilates, and the abuse it'll receive from pets, children, cargo, dust, and wind. A screen that fits poorly or leaves a gap at the threshold can fail even when its mesh is appropriate. The guidance below reflects the same approach we use when helping Utah RV owners evaluate ventilation, fit, installation, and repair needs at Motor Sportsland.
Choosing the Right Mesh Density and Material
Open the door on a warm evening in Moab or along the Wasatch Front, and mesh choice shows up fast. The screen that feels airy in dry country can leave you swatting at dusk near water, while the tighter weave that blocks tiny pests can make a bunk area feel stuffy by bedtime.
Mesh count is the starting point, not the whole answer. Wire or fiber thickness also affects aperture size, so two screens with a similar count can perform differently for both bug control and airflow. A historical screening test compared 14 × 14, 16 × 16, and 18 × 18 mesh using wire about 0.011 inches in diameter. It found that standard 16 × 16 screening did not exclude many Aedes mosquitoes and some Anopheles species, while 18 × 18 screening excluded both malaria-carrying mosquitoes and smaller insect pests. (American Journal of Public Health screening research)
Lab results also show why material details matter. A 2024 report found that 16 × 16 and 11 × 10.5 steel meshes prevented Aedes aegypti passage at approximately 99% effectiveness, while an 8 × 8 mesh reached 96.33% effectiveness over 72 hours under controlled conditions. Those findings apply to tested steel mesh and one mosquito species, so they are useful for comparison, not a guarantee for every RV door or window screen. (Laboratory mesh testing)
Match the screen to the destination
For a lot of Utah family camping, standard fiberglass mesh is the practical middle ground. It usually gives decent visibility, good air movement, and enough protection for common flying insects around established campgrounds. If you camp near Bear Lake, the Great Salt Lake, marshy pull-offs, or other wet ground where tiny biting insects show up, a finer no-see-um fabric earns its keep.
Published camping guidance describes fine mesh around 150 microns or smaller as suitable for mosquitoes, no-see-ums, and black flies, while medium mesh in the 150 to 200 micron range balances protection and air movement. (Camping mesh comparison)
That balance matters more in an RV than it does in a tent. On a roof vent or entry opening, a fine screen that cuts airflow by roughly 25% to 40% can be the difference between comfortable cross-ventilation and a cabin that holds heat after sunset, especially in summer camps where you rely on open windows instead of running the air conditioner. That airflow trade-off is one reason camper-van screen guidance often favors matching mesh to travel conditions instead of automatically buying the tightest weave. (Camper-van bug-screen guidance)
| Mesh Type | Best For | Airflow Impact |
|---|---|---|
| Standard 16 × 16 fiberglass | General camping and larger flying insects | Usually favorable airflow |
| 18 × 18 metal or fiberglass | Stronger mosquito protection and smaller pests | More restrictive than standard mesh |
| Fine no-see-um fabric | Midges, no-see-ums, and black flies near wet areas | Most restrictive airflow |
A peer-reviewed hygiene study reached a similar conclusion. A 16-mesh gauze with apertures of about 1 to 3 millimeters excluded most mosquitoes, while 18-mesh gauze with apertures of about 1 to 1.5 millimeters excluded all mosquitoes tested. The same research notes that wider gauze generally permits better ventilation, though airflow cannot be judged by mesh count alone. (Peer-reviewed mesh study)
Practical rule: Choose the finest mesh your ventilation system can comfortably support, not the finest mesh on the shelf.
Material affects day-to-day use, too. Fiberglass is light and flexible. Metal mesh stands up better to abrasion. Plastic-coated materials usually handle folding and moisture well. Before trips near standing water, it also helps to review broader Crown Point mosquito control tips. Screens reduce bug entry, but they do not replace repellent or standing-water control.
Measuring Your RV Openings for a Perfect Fit
A screen should be measured against the clear inside opening, not the exterior trim or the overall door size. Exterior trim can overlap the actual frame, and the door may have a threshold, latch side, or sliding track that changes the usable opening. Measure the width and height at several points because an RV frame can be slightly out of square.

Use a sealing-first measurement process
Start with a steel tape measure, a notepad, and a flashlight. Record the clear inside width and height, then check the frame's flat perimeter. You'll want at least 1 inch of flat surface around the opening for adhesive attachment. If the frame has textured trim, rounded corners, exposed screws, or a narrow lip, mark those obstacles before ordering a magnetic curtain or adhesive-mounted panel.
Clean the mounting surface with isopropyl alcohol. Road film, dust, and oxidation can remain invisible while still preventing adhesive from bonding. Let the surface dry completely, and don't apply tape over condensation or freshly cleaned moisture.
For windows, identify whether the screen will sit inside the frame, over the trim, or against a removable insert. Anyone replacing a house-style screen can also learn useful general measuring and fabrication principles from this guide to building replacement window screens, but RV windows often require closer attention to curved corners and removable assemblies.
At the entry door, check the lower threshold transition before selecting the screen length. A magnetic curtain needs to close across the walking path without dragging excessively, while a zipper panel needs enough clearance to operate without catching on the sill. Sliding doors require a separate check for track clearance, since an adhesive strip positioned too far inward can interfere with the moving panel.
Watch the installation sequence before you begin, especially if the product uses a center split, zipper, or magnetic closure.
After installation, close the screen and inspect it from inside the camper at dusk or with a flashlight outside. Look for light around the upper corners, side edges, lower corners, and threshold. If you can see a bright line, insects can often find the same route. For related door and frame concerns, our guide to RV window seal replacement can help distinguish a screen-fit problem from a deteriorated factory seal.
Installing Magnetic and Zipper Screens on Entry Doors
A magnetic screen works only when the magnets meet cleanly and the perimeter stays attached. Most installation failures start with contaminated mounting surfaces or fabric installed under too much tension. The goal isn't to stretch the screen tight like a drum. A small amount of slack lets the center closure settle back into alignment after someone walks through.
Prepare the frame before opening the adhesive
Close the magnetic center seam first and lay the screen flat. This keeps the two halves aligned while you position the fasteners. Clean the upper and side mounting surfaces with isopropyl alcohol, then wait until they're fully dry. Don't rely on a quick wipe with a dusty shop rag, since that can leave a film behind.
Attach the top fasteners first. Confirm that the screen is centered and that the bottom reaches the threshold without bunching. Then attach the side fasteners, pressing the vertical strips from top to bottom. Working downward helps prevent wrinkles and keeps the magnetic center from drifting out of alignment.
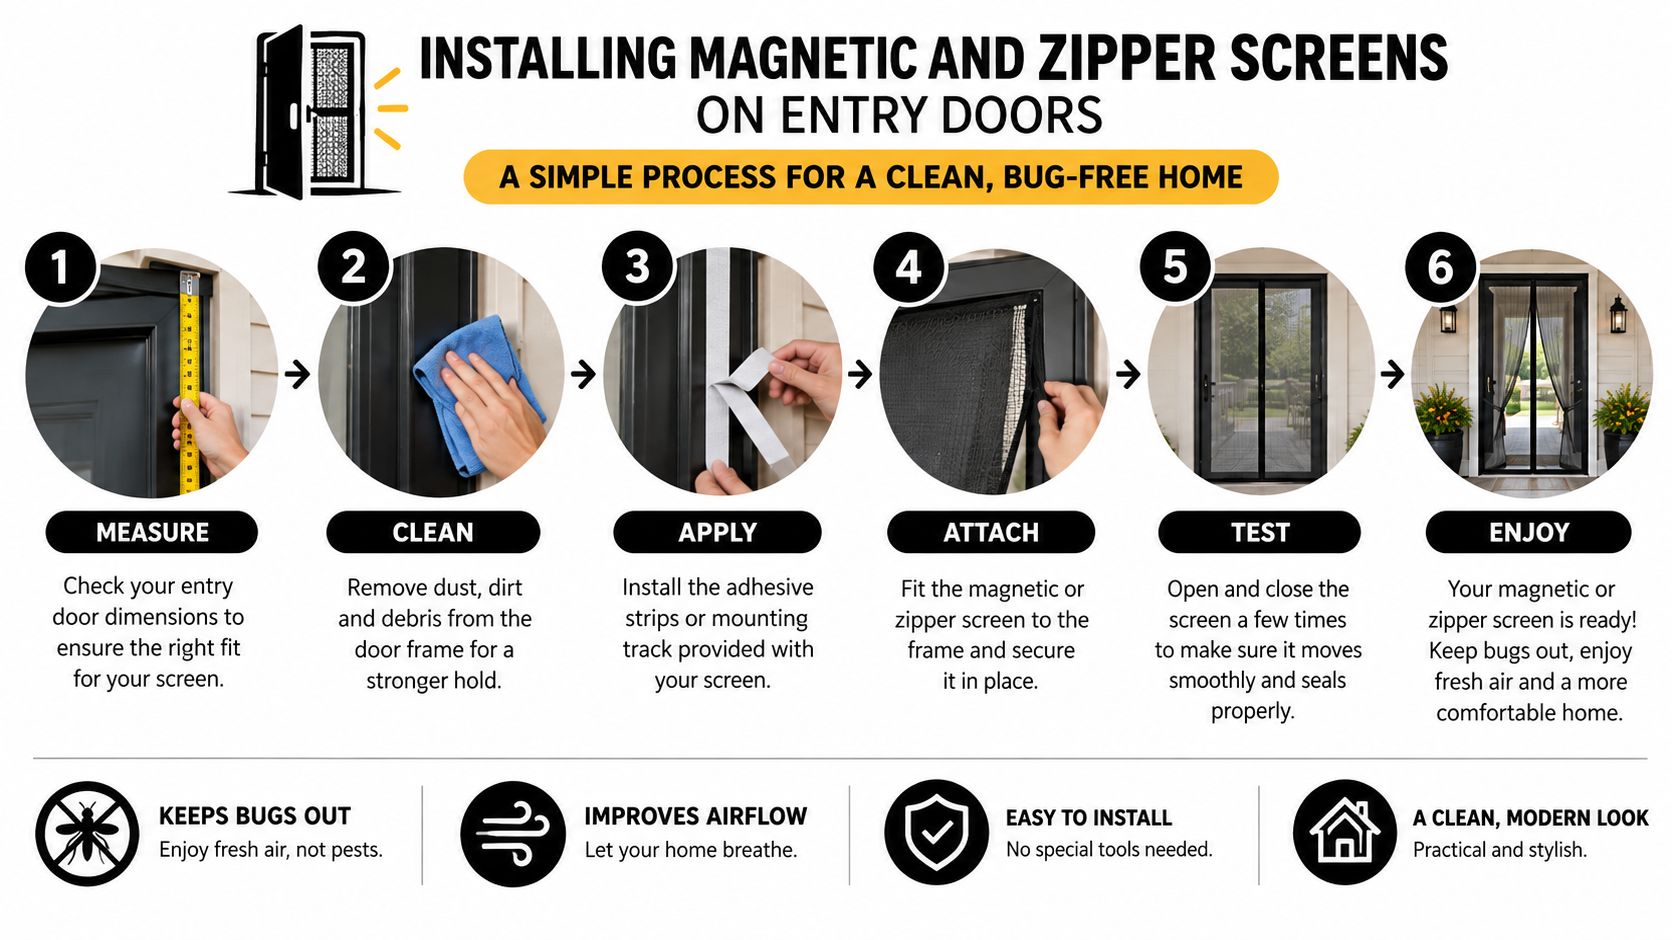
Once the adhesive has been pressed into place, walk through the opening several times. Let the magnets reconnect naturally instead of pulling the panels tight by hand. Check that the lower corners don't flare outward and that the screen doesn't catch on the latch or door sweep.
Installation check: Slight slack is helpful. Excessive tension pulls adhesive away from the frame and makes the center closure less forgiving.
Reinforce the weak points
Hot weather can lift adhesive, particularly when the RV frame is dusty or exposed to direct sun. At a campground such as Jordanelle, a screen that looked secure in the morning can begin peeling during a hot afternoon. Higher-temperature mounting tape or mechanical fasteners can provide more dependable reinforcement than repeatedly re-bonding the same contaminated surface.
Zipper screens need a different inspection. Confirm that the zipper tracks remain parallel and that fabric isn't caught in the slider. Magnetic screens are quicker for children, pets, and frequent entry, but a zipper can provide a more continuous closure when the panels are properly aligned. If the door itself binds or the screen installation reveals a larger alignment problem, use the practical checks in our RV door repair guide for Utah adventures.
Maintaining and Repairing Screens for Utah Camping Seasons
A screen can be perfectly selected and installed yet fail after a few trips through Utah's dust, wind, and brush. Red dust from southern Utah can settle into the mesh, pine sap can make the fabric tacky in the Uintas, and repeated folding can weaken seams or hook-and-loop fasteners. Maintenance is simple, but it needs to happen before the screen becomes a problem at bedtime.
Clean the screen monthly during active use with mild soap, water, and a damp microfiber cloth. Scrubbing aggressively can distort lightweight mesh. Rinse away soap residue and let the fabric dry before rolling or folding it for storage. Dust that remains packed into the openings reduces effective open area and can make the camper feel less ventilated.
Use a pre-trip inspection
Before leaving for a mountain campground, open and close the screen several times. Check:
- Stitched seams: Look for pulled thread, separated corners, and fraying near the center opening.
- Magnets and zippers: Confirm that closures reconnect or slide without snagging.
- Weighted bottoms: Make sure the lower edge stays in place during a breeze.
- Fasteners: Press hook-and-loop sections together and look for adhesive lifting.
- Door clearance: Verify that the screen doesn't catch on the latch, sweep, or threshold.
A dog claw, a child carrying a camp chair, or a branch brushing the doorway can create a small tear that grows during the next windy evening. Screen-repair tape can make a useful temporary fix. Clean and dry the area, place the tape over both sides when possible, and press the edges firmly. Replace the panel when the tear reaches a seam, the closure no longer aligns, or the fabric has become loose across a large area.
Before storing: Never fold a damp screen. Moisture trapped in the fold can encourage odor and weaken adhesive-backed components.
Screens also work best as part of a broader campsite routine. Keeping food covered and using practical outdoor dining advice for reducing flies while camping limits the attraction that brings insects toward the entry. After winter storage, inspect every screen before opening the camper for the season, and use our guide to de-winterizing your RV as part of the same startup checklist.
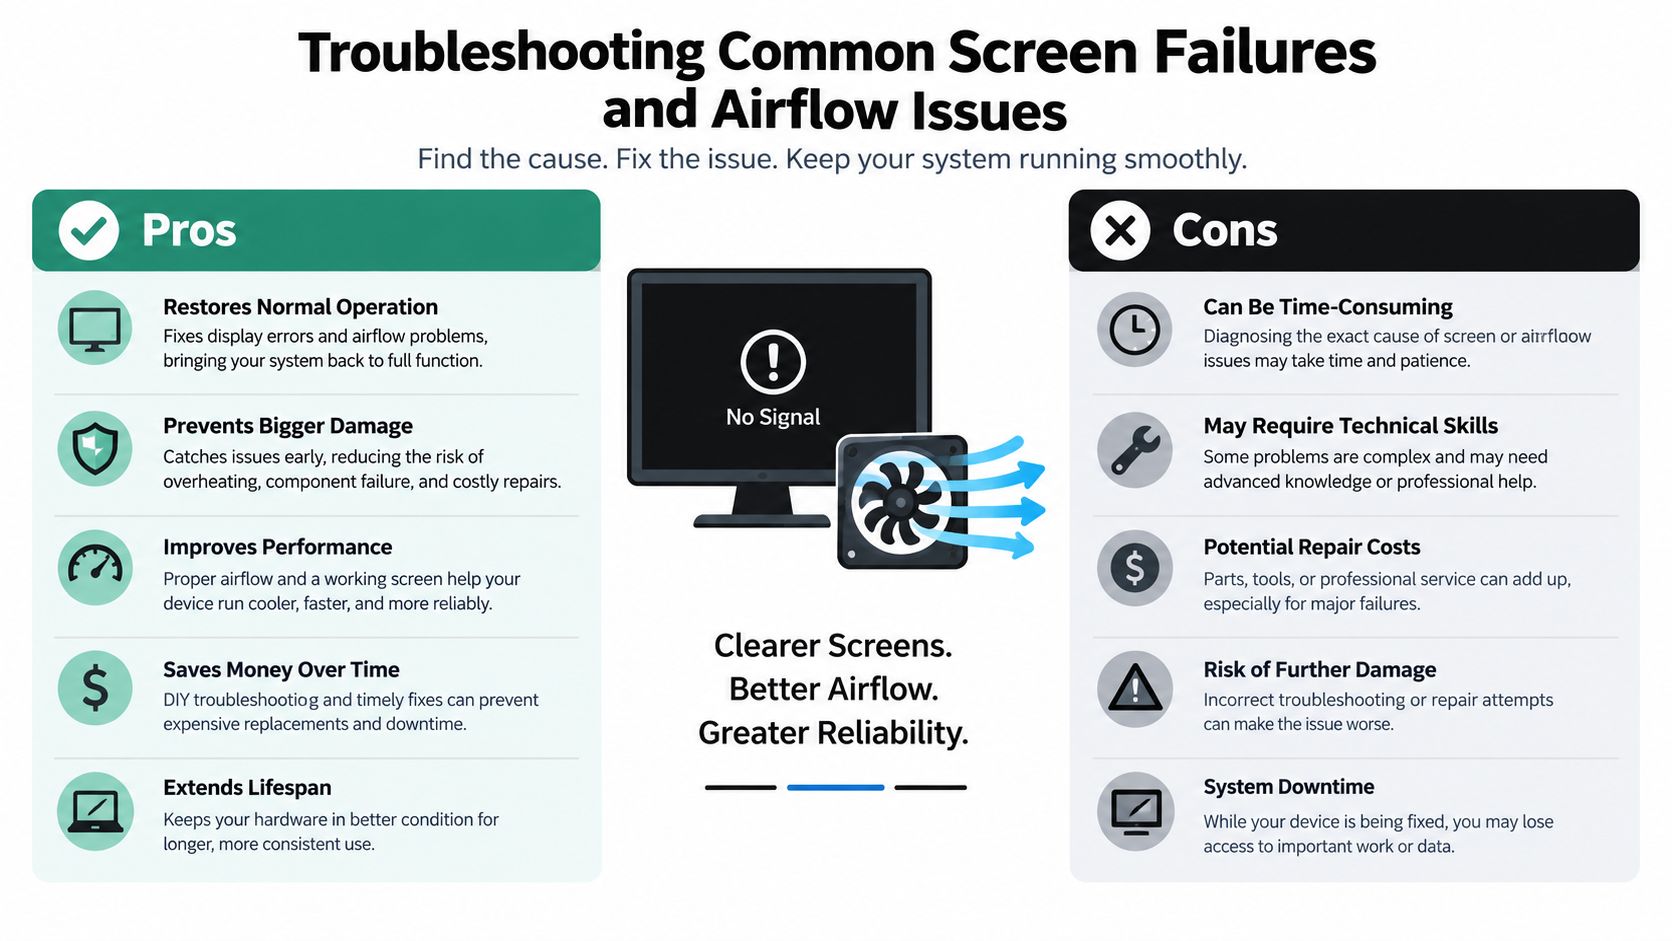
Troubleshooting Common Screen Failures and Airflow Issues
You get back from a trail day, step into the trailer at dusk, and then notice mosquitoes inside ten minutes later. In my experience, that usually points to a gap or closure problem before it points to bad mesh. Start by tracing the actual entry route. The fix is often at the perimeter, the threshold, or the center seam, not in the fabric itself. (18 × 18 screen-door experiment)
Diagnose the route before replacing the mesh
Run a flashlight around the outside edge after dark while someone stands inside. Any line of light at the side, top, or bottom tells you the screen is not sealing against the opening. Then walk through the screen a few times and watch how the center panels settle. If the magnets do not reconnect cleanly, the fabric may be hanging under tension, the strips may be dirty, or the mounting points may have shifted.
Use this quick diagnosis:
- Magnets refuse to close: Relieve tension on the panel, realign the center seam, and clean off grit that keeps the strips from meeting flat.
- Bottom edge lifts in wind: Check weighting, threshold contact, and whether the side attachment is peeling before you add anything to the lower hem.
- Bugs enter at corners: Look for light gaps, lifted adhesive, or a screen cut slightly short for the opening.
- Interior feels stuffy: Check roof vent and window settings first, then decide whether the mesh is the restriction.
- Screen tears in the same spot: Inspect pet traffic, cargo corners, latch hardware, and how people move through that doorway.
Don't solve a ventilation problem with a tighter screen
This is the trade-off Utah campers run into all the time. A tighter mesh helps in buggy spots near water or during certain evenings in the mountains, but it can also choke off the cross-breeze that makes a small camper livable in dry summer heat. As noted earlier, finer mesh can cut airflow noticeably. If your rig feels hotter after the screen goes on, test the setup with the roof vent, windows, and exhaust fan running before blaming the install.
Destination matters here. In a still, buggy campsite, denser mesh may be worth the airflow hit. In a hotter, drier stop where natural ventilation does more of the cooling, a more open screen can be the better choice if insect pressure is manageable.
Screens over roof vents and appliance ventilation openings need extra caution. They should not interfere with required appliance airflow, and they are not a substitute for carbon-monoxide safety equipment or proper ventilation. If airflow drops after adding a vent screen, clean off dust and confirm the screen covers only the opening it was meant to cover.
When to Visit Motor Sportsland for Professional RV Service
Replacing a magnetic curtain, cleaning mesh, or patching a small tear is usually a manageable weekend project. Professional service becomes the sensible choice when the screen is revealing a structural problem rather than a fabric problem. A warped entry frame, bent sliding track, misaligned latch, or damaged threshold can prevent any aftermarket screen from sealing correctly.
Start with service when you notice these conditions:
- The door no longer sits square: A screen may appear crooked because the underlying door or frame has shifted.
- The latch requires force: Don't use the screen as a workaround for a misaligned locking mechanism.
- The sliding track binds: A bent track can damage both the screen and the door panel.
- Collision damage is present: Frame distortion often affects seals, trim, and closure points together.
- An integrated system is needed: Newer Forest River and Keystone models may require model-specific parts or factory-style installation.
- Adhesive repairs keep failing: Repeated peeling can indicate contamination, heat exposure, unsuitable mounting material, or insufficient flat surface.
A technician can separate a replacement-screen need from a door adjustment, seal repair, trim issue, or larger collision repair. That distinction matters because installing a new mesh panel over a damaged frame often produces the same gaps and frustration as the old one.
Motor Sportsland serves Utah RV owners from locations in Millcreek and Spanish Fork, with service support for maintenance, repairs, installations, upgrades, parts, and collision work. The team can also help shoppers compare RV layouts, including models with integrated bug screens and mesh window screens, against the ventilation needs of family camping, toy-hauler use, and high-altitude travel.
For a new RV, inspect every screen during the walk-through. Open the entry door, test the magnets, check the lower corners, operate the windows, and look at roof and appliance vent screens. For an existing camper, bring measurements and photos of the frame when you ask for help. That gives the service department a clearer starting point and helps avoid ordering a screen that doesn't match the opening.
Ready to keep your camper comfortable through Utah's mosquito season? Motor Sportsland can help with RV screen installations, door and seal repairs, parts, and service, while its inventory includes recreational vehicles suited to Mountain West travel. Visit Motor Sportsland to browse current RVs, schedule service, or talk with the team before your next trip.
Camper Bug Screen FAQ
What mesh count is best for an RV door?
A properly fitted 16 × 16 or 18 × 18 screen can provide practical mosquito protection, but the right choice depends on the insects at your destination and how much your camper relies on natural airflow. Finer mesh may be more appropriate for no-see-ums and biting midges, while standard mesh usually provides a better ventilation balance.
Do camper bug screens reduce airflow?
They can. Finer materials restrict more air than standard mesh, and one comparison describes a possible reduction of roughly 25% to 40% with fine mesh. (Camper-van mesh comparison) Test the screen with roof vents and windows open before committing to a permanent upgrade.
Should I measure the RV door trim or opening?
Measure the clear inside width and height of the frame. Confirm that you have at least 1 inch of flat perimeter for adhesive attachment, then account for the threshold, latch, and any sliding track clearance.
Why do mosquitoes enter through a new screen?
Check for light gaps at the corners, threshold, side edges, and magnetic center. A loose installation, damaged mesh, or screen that remains slightly open can create an entry route even when the fabric has a suitable mesh density.
How should I clean an RV screen?
Use mild soap, water, and a damp microfiber cloth. Clean regularly during the camping season, rinse away residue, and let the screen dry completely before folding or storing it.
Can I repair a torn camper screen?
Small tears can receive a temporary patch with screen-repair tape. Replace the screen when the damage reaches a seam, the closure no longer works, or the fabric has become too loose to seal around the opening.
