
RV Window Seal Replacement: Local Utah How-To Guide

You're halfway through a Utah trip when a brown water mark appears below the RV window. Maybe the leak showed up after a storm near Jordanelle, or after winter storage in Salt Lake City. The natural reaction is to search for an RV window seal replacement kit and order the first rubber gasket that looks right.
That can solve the wrong problem.
The leak may come from the visible glass-edge gasket, but it may also come from the larger flange seal that bonds the window frame to the RV sidewall. Those failures require different parts and different repairs. In our experience at Motor Sportsland, identifying the failed seal before buying materials saves time, protects the wall structure, and prevents a cosmetic bead of caulk from hiding a deeper water problem.
This guide explains how to diagnose the leak, select RV-compatible materials, remove and reinstall a window, avoid common sealing mistakes, and decide when a repair belongs in a Salt Lake City service bay rather than on a campsite picnic table.
Recognizing When Your RV Window Seal Has Failed
A Utah RV owner often notices the problem after a familiar sequence. The coach sits through a dry summer, travels mountain roads through the Wasatch Mountains, then spends a wet night near Bear Lake. Inside, a faint stain appears beneath the window. The trim feels cool, the wall develops a soft spot, or the window starts showing moisture that doesn't wipe away from the surface.
The first job isn't buying a seal. It's finding the path the water used.
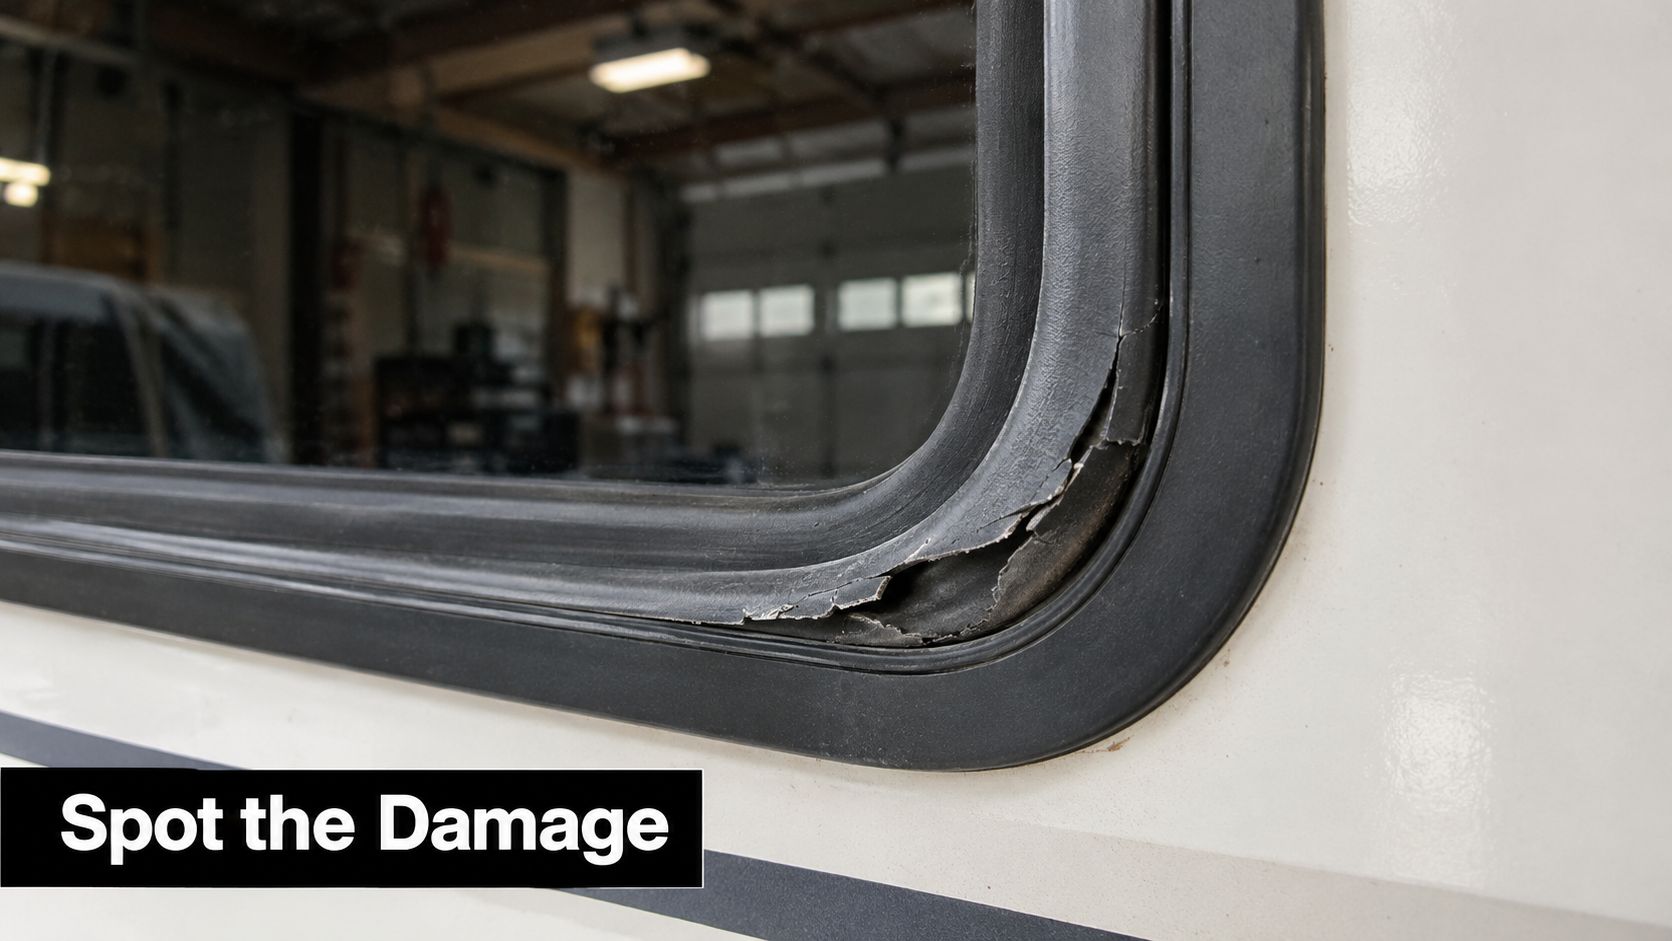
Surface moisture versus wall intrusion
Condensation usually sits on the interior glass and changes with humidity, ventilation, and temperature. Water intrusion leaves a different pattern. Look for staining on the wall or trim, bubbling wallpaper, swollen paneling, a musty odor, soft material around the opening, or water that returns after exterior rain.
Inspect the exterior flange carefully. Cracked, shrunken, peeling, or separated sealant around the frame points toward a perimeter failure. A hardened or visibly damaged rubber gasket at the glass edge may indicate a glass-seal problem, but it doesn't automatically mean the frame-to-wall seal is sound.
Practical rule: If the wall below the window is soft or stained, treat the issue as a water-intrusion diagnosis, not a rubber-gasket replacement.
A major distinction often missed in online guides is whether “window seal replacement” means replacing the visible gasket or the larger flange seal that stops wall leaks. Water intrusion is often traced to failed window-frame sealant rather than the glass-edge seal itself, as discussed in this RV exterior seal maintenance guidance.
What to inspect before ordering parts
Use a flashlight and inspect the entire perimeter, especially the lower corners and the area around the weep holes. Check whether the window opens and closes normally, whether the frame appears warped, and whether fasteners are loose or corroded. A defective frame, damaged glass, or failed drainage path can make a new gasket the wrong purchase.
For another perspective on identifying failed window seals and related warning signs, the Pine Country Window Cleaning blog offers useful general inspection context. RV owners should still account for vibration, sidewall construction, and the separate flange seal used on many RV windows.
If the moisture seems to come from above, don't limit the inspection to the window. Roof edges, awnings, marker lights, and the pop-up roof can send water down a wall and make the window look guilty. Our guide to pop-up camper roof repair covers a related diagnostic issue, where the visible stain isn't always located at the original entry point.
Choosing the Right Sealant and Materials
The material must match the failure point. Before buying parts, confirm whether water is passing behind the window flange or through the glass-edge gasket. A defective frame, damaged glass, or blocked drainage path will not be fixed by replacing flange sealant. For the window-to-wall joint, butyl tape remains a practical choice because it stays pliable, conforms to mating surfaces, and creates an air- and watertight seal. This RV window resealing guide recommends continuous perimeter coverage with one joint at the bottom.
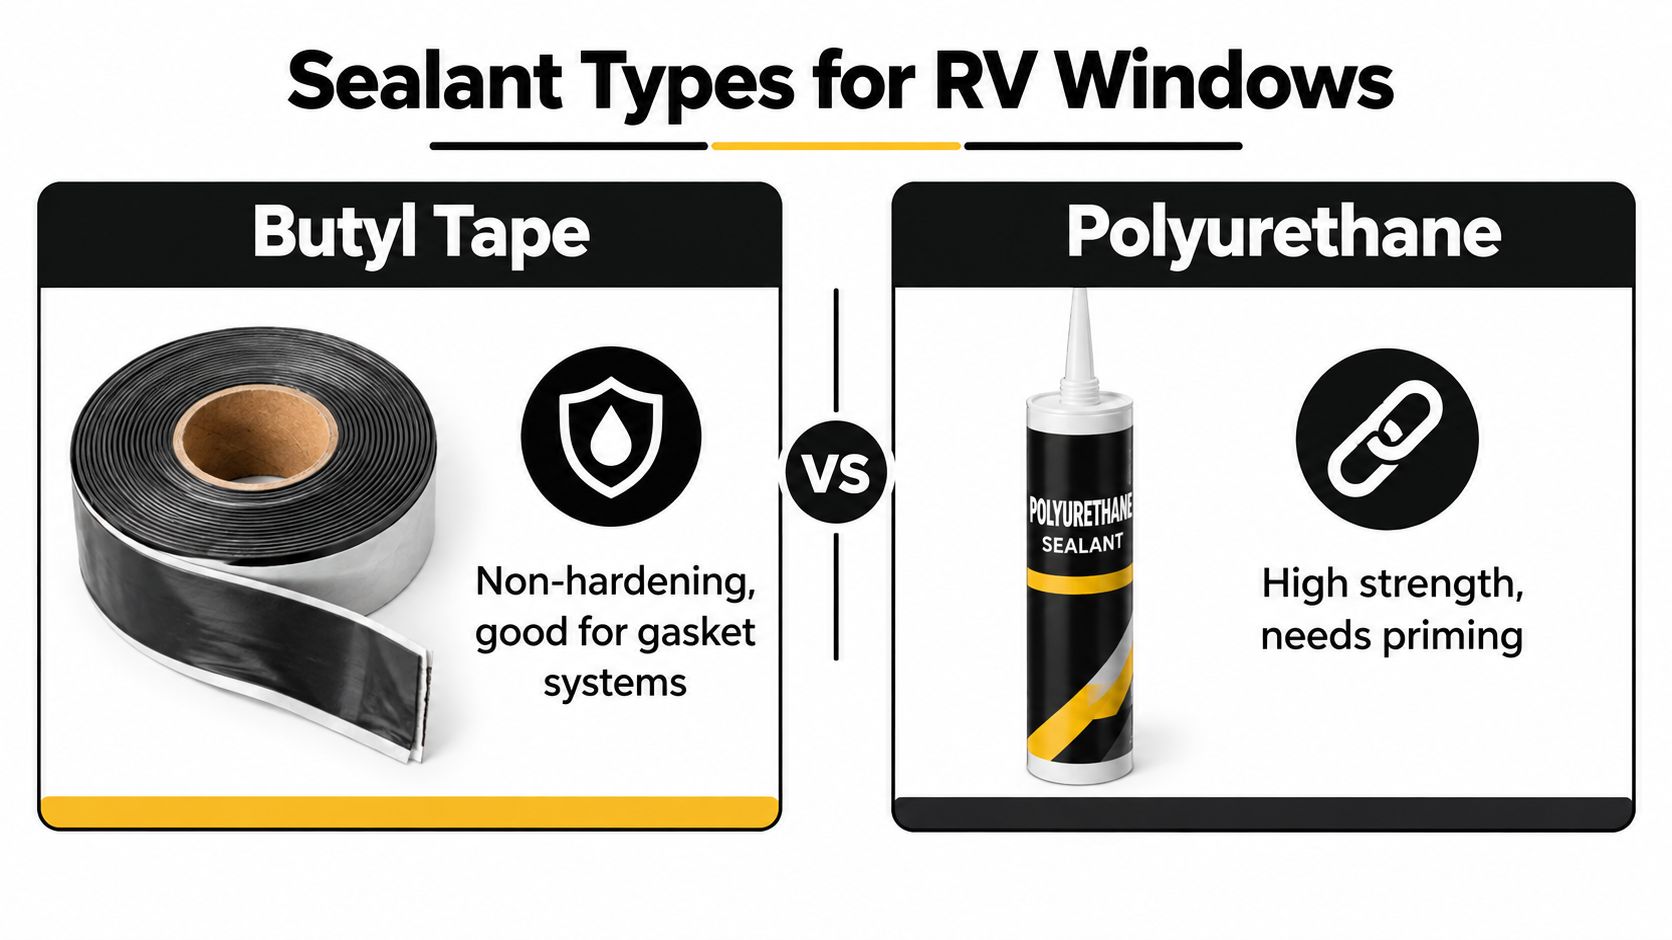
Butyl tape and liquid sealant serve different jobs
Butyl tape belongs beneath the window flange. Its non-hardening character lets it accommodate vibration and small movements in the RV wall, while also allowing later window removal. Apply it continuously. Gaps, thin sections, and poorly joined bottom seams can channel water into the wall.
Non-sag liquid sealant suits vertical trim and exposed perimeter finishing. It cannot restore a failed bond beneath the flange. If inspection shows water entering behind the frame, remove the window, clean away the old material, and install new butyl tape. This RV exterior sealant guide explains why an exterior bead does not replace rebuilding the concealed joint.
| Material | Best use | Main advantage | Important limitation |
|---|---|---|---|
| RV butyl tape | Window flange and sidewall joint | Stays flexible and conforms to surfaces | Requires complete removal of old residue |
| Non-sag RV sealant | Vertical trim and exposed perimeter work | Holds its shape on vertical surfaces | Won't repair a failed seal beneath the flange |
| Self-leveling lap sealant | Suitable horizontal exterior seams | Flows into surface irregularities | Usually inappropriate for a vertical window frame |
| Replacement rubber gasket | Glass-edge or track seal, when that part has failed | Restores the intended glass interface | Doesn't correct water entering behind the frame |
Read the product data, not just the label
Choose sealant based on mobility, vibration resistance, temperature, and cure time. One RV non-sag butyl or putty-type installation kit lists a viscosity of 800,000 to 1,200,000 centipoise, coverage of about 380 lineal feet per gallon, and a recommended cure time of at least 48 hours. The specifications are provided in the RV window installation kit data.
Temperature ratings vary by product. One kit lists approximately -65°F to 250°F, while another lists approximately -70°F to 400°F, along with resistance information for UV, ozone, freeze-thaw cycling, salt, fuel, and airborne chemicals. Application conditions still affect the result. Manufacturer guidance warns that surfaces above 140°F or below 0°F can impair application, and uncured material should not contact water.
For a Utah repair, select an RV-specific product with data covering movement and weather exposure. Household or automotive caulk may look neat initially, yet the window must withstand vibration on I-15, high-desert temperature swings, and repeated expansion and contraction while stored.
Tools Needed and Preparation Steps
Set up the work before removing the first screw. You'll need screwdrivers or a drill-driver, a plastic scraper, a sharp utility knife, a putty knife suitable for exterior trim, alcohol-based cleaner, lint-free cloths, gloves, masking materials, replacement butyl tape, and compatible exterior sealant. Keep a soft blanket or padded support ready for the window once it comes out.
The RV should sit on a level surface with the window accessible and the interior protected from falling debris. Cover nearby cushions, countertops, and flooring. A second person isn't optional for a large or awkward window, because the glass and frame need support while the interior clamp ring is removed.
Weather and surface preparation
Choose warm, dry weather with no rain or snow forecast for 48 hours, a condition recommended in exterior seal maintenance guidance for resealing work. Avoid applying material to a hot sidewall in direct Utah sun, and don't start if moisture is trapped in the joint.
Before removal, photograph the screw pattern, inspect the weep holes, and dry-fit the replacement if you're changing the entire window. Measure the opening and confirm the replacement matches the RV's wall thickness and frame style. A new part that looks similar may still have the wrong flange or clamp-ring fit.
The basic workflow is straightforward: remove the interior clamp ring and screws, loosen the edge caulk, have two people lift the window out, scrape old sealant from both the window trim and RV wall, clean with alcohol, then install butyl tape from the bottom near the weep holes without gaps. One person should hold the window outside while the other reinstalls screws in a cross-pattern before tightening the middle screws.
Step-by-Step Removal and Installation
Precision matters more than speed. A window can look firmly installed while leaving a narrow unsealed corner where water reaches the wall cavity. That hidden moisture can create a much larger repair than the original RV window seal replacement.

Remove the assembly without damaging the opening
Start inside. Remove the clamp ring screws and keep the hardware organized. Once the ring is free, cut or loosen exterior caulk around the flange with a plastic scraper and utility knife. Don't pry aggressively against the sidewall, graphics, or frame. A second person should support the window outside as the seal releases.
If the window remains stuck, work gradually around the flange. Forcing one corner can bend the frame or crack the glass. Set the removed assembly on a padded surface and inspect it before deciding whether the project needs a gasket, new butyl tape, a frame repair, or a complete replacement window.
The cleaning stage is where many repairs are won or lost. Scrape old butyl and caulk from both mating surfaces, then use alcohol to remove residue, dust, and grease. Continue around the corners and near the weep holes until the flange and wall are clean and dry. A thin film of old sealant can prevent the new material from compressing evenly.
Install the new seal continuously
Dry-fit the window before applying tape. Confirm that it sits squarely, that the flange covers the opening properly, and that the weep holes remain positioned to drain. If the fit is wrong before sealing, adding tape won't correct it.
For a stationary glass seal, replacement guidance recommends removing the window, cleaning dust, grime, and adhesive, then pressing the new seal into place from the bottom middle of the frame and working around the perimeter so the seam is hidden at the bottom. The same bottom-first approach helps create a controlled joint when installing perimeter material.
Apply butyl tape around the full flange without stretching it. Start at the bottom near the weep holes and avoid gaps. One installation guide places the tape about 1/8 inch from the window edge and calls for roughly 3/8 inch of overlap at the bottom joint, as detailed in this RV window seal installation walkthrough.
Before final tightening, make sure the window is centered and the tape hasn't folded inward. Have the outside helper hold the assembly steady while the inside installer starts the screws. Tighten in a cross-pattern, beginning with the upper left, then lower right, lower left, and upper right, before working through the middle screws. The goal is even compression, not maximum force. Over-tightening can distort the frame and squeeze out too much material.
This window repair service resource is useful for understanding when a glass or frame specialist may be more appropriate, especially if the window is cracked, warped, or difficult to remove safely.
After the window is secure, trim the compressed excess neatly and apply only the exterior finishing sealant the product instructions call for. Don't block the weep holes. Let the material cure fully before exposing the repair to water, then test gently rather than blasting the frame with a pressure washer.
Common Mistakes That Lead to Leaks
A window can look properly sealed and still leak on the first Utah rainstorm. Before buying a gasket or new window, identify whether water is passing the flange seal or entering through a defective frame, glass unit, or drainage path. That diagnosis prevents an unnecessary replacement and points you toward the repair the opening actually needs.
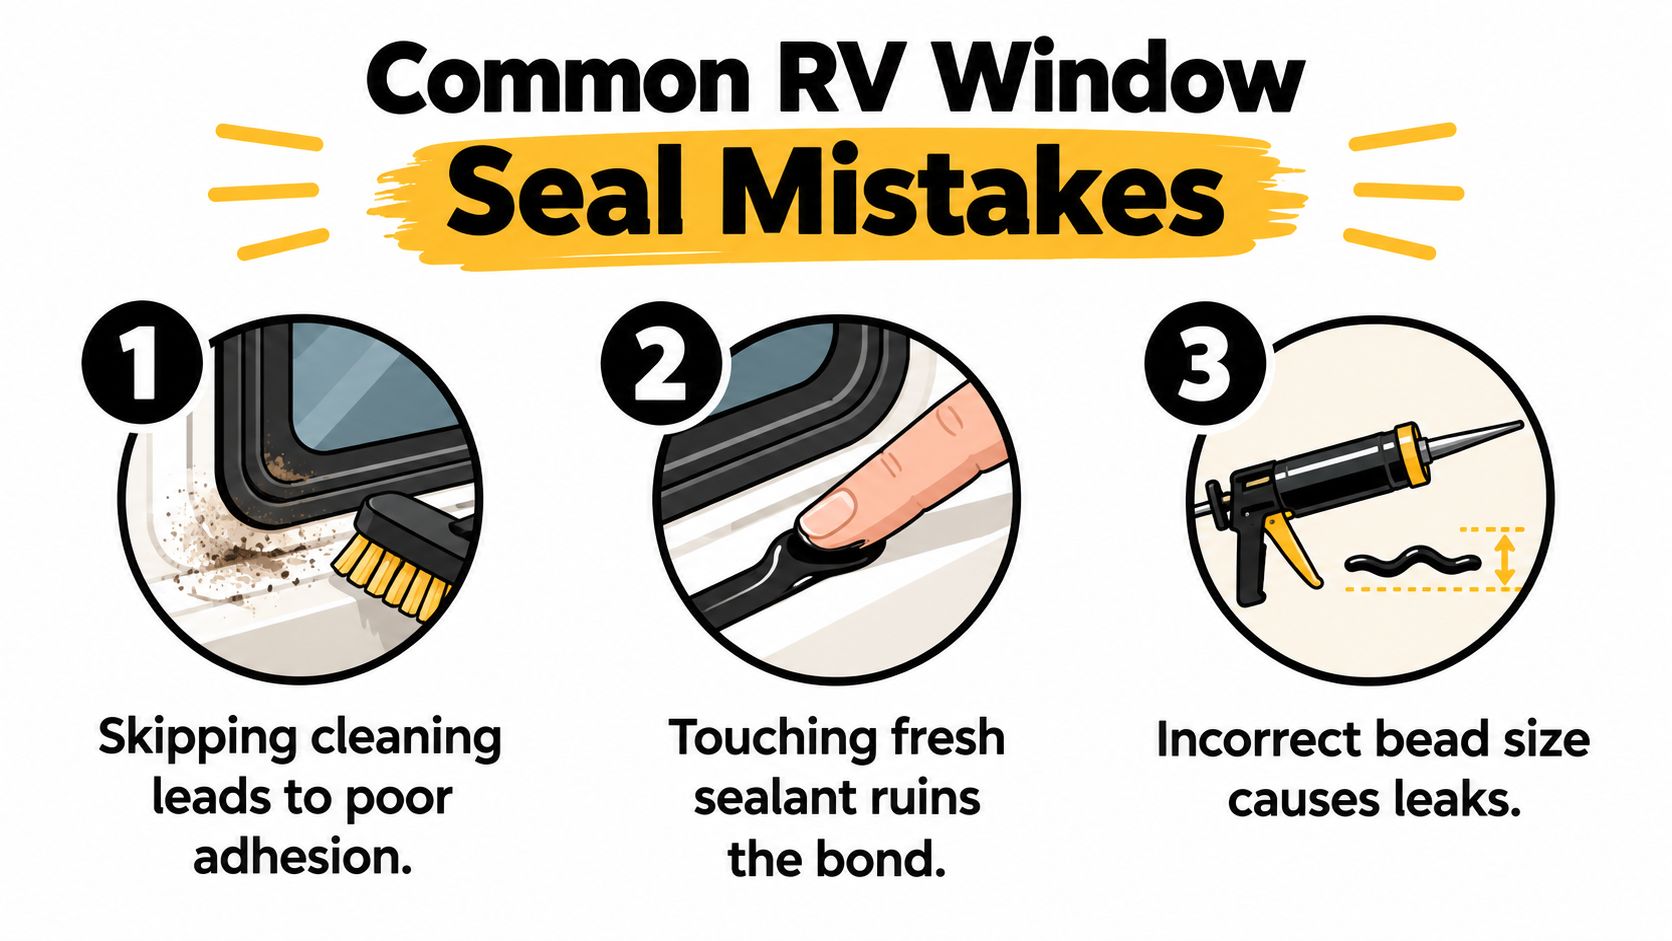
The shortcuts that fail
Skipping the dry fit hides alignment problems until butyl tape has bonded to the flange. Test the window in the opening first, confirm the flange sits evenly, and make sure the weep holes can drain. If the frame rocks, binds, or leaves an inconsistent gap, inspect the window before sealing it.
Cleaning only the visible wall leaves old tape and contamination on the mating surface. Scrape both the wall and window trim, then clean the corners and narrow channels with alcohol. A new seal cannot compensate for residue underneath it.
Leaving a gap at the joint gives water a direct route behind the flange. Start at the bottom and join the tape carefully, without stretching it or leaving a break.
Using the wrong sealant can create a neat bead that fails under vertical movement and RV vibration. Self-leveling products belong only on surfaces designed for them to flow. Use a non-sag product where the application requires the sealant to stay in place.
Applying material in extreme temperatures can make the seal uneven or delay curing. Avoid installation when the surface is above 140°F or below 0°F. If the product requires it, wait at least 48 hours before exposing the repair to water, as noted in the technical product guidance cited in Choosing the Right Sealant and Materials.
Deciding whether DIY makes sense
DIY suits a manageable window with an intact frame, an exact replacement fit, and a reliable helper. Stop and reassess if the wall feels soft, the frame is warped, the glass is cracked, or the leak source remains uncertain. Removal can damage the sidewall, and a rushed reseal may require repeating the job.
A professional inspection can separate a failed flange seal from water entering above the window. It can also identify a defective window before you spend money on the wrong replacement. That diagnostic step often saves more than the sealant and parts.
Maintenance Tips and When to Call Us
Utah conditions are hard on exterior seals. Dust settles in tracks and weep holes, summer heat dries exposed material, mountain travel adds vibration, and freeze-thaw cycles challenge aging caulk during winter storage. Clean the window channels, keep the drainage paths open, and inspect the perimeter for cracking, shrinking, peeling, or separation.
Maintenance intervals vary by manufacturer and application. Some guidance recommends a full exterior seal inspection at least twice a year, while other recommendations call for checking roof, window, and door seals every three months, as outlined in this exterior seal maintenance guide. A quick inspection after winter storage and another before summer travel are sensible habits for Utah owners.
Know when the repair has moved beyond caulk
Call for help when you find any of the following:
- Soft wall material: Moisture may already have reached the structure behind the interior finish.
- Recurring leaks: A second leak after surface resealing usually means the flange, drainage path, or another exterior component needs diagnosis.
- Frame damage: Warping, corrosion, or broken fasteners can prevent even compression.
- Glass damage: Cracks, failed insulated panes, or a defective stationary window may require glass or full-unit service.
- Unsafe access: Large windows and awkward roof or sidewall positions deserve proper support and handling.
For related planning around glass work in the state, our guide to RV auto glass repair in Utah can help you think through the difference between a seal repair and a broader glass service.
Motor Sportsland helps Utah RV owners with service, parts, maintenance, and repairs when an RV window seal replacement requires more than a quick campsite fix. Visit Motor Sportsland to connect with our team, review available RVs, or arrange service at a Utah location before the next trip through the Wasatch Mountains.
RV window seal replacement FAQs
How do I know whether the gasket or flange seal failed?
A damaged glass-edge gasket affects the interface around the pane, while water stains, soft wall material, or separation around the exterior frame often point to the flange seal. Inspect both areas before ordering parts.
Can I reseal an RV window without removing it?
A surface bead may help with minor exposed caulk deterioration, but it won't reliably repair water entering behind the flange. A failed flange seal generally requires removing the window and replacing the underlying perimeter material.
Is butyl tape suitable for RV window installation?
Yes. Butyl tape is commonly recommended because it stays soft, conforms to the frame and sidewall, and supports an air- and watertight bond when installed continuously around the flange.
Why do RV windows need weep holes?
Weep holes help direct moisture away from the frame. Keep them clear during cleaning and installation, and don't cover them with tape or finishing sealant.
Can I use household or automotive caulk?
Use a product designed for RV movement, vibration, and exterior exposure. Household materials may not provide the mobility, adhesion, or temperature performance required by an RV window.
When should I call an RV service center?
Bring in the RV when the wall is soft, the frame is warped, the glass is damaged, the leak source is unclear, or the window can't be supported safely during removal.
