

Fan Tastic Vent Cover Install Guide

It's Saturday morning, and you're checking the RV before heading toward Jordanelle or Bear Lake. The roof vent still opens, but the plastic looks chalky, and you'd like to leave the lid cracked when rain moves through camp. A Fan-Tastic vent cover looks like a straightforward upgrade, right up until you open the box and start comparing brackets, screws, and roof sealant.
The important decision comes before you touch the drill: are you protecting a sound vent, or hiding a vent that needs repair? A hood can improve weather protection, but it won't strengthen a brittle frame, repair a leaking flange, or make a poorly fitted lid open properly. It also won't filter wildfire smoke or Utah's windblown dust.
At Motor Sportsland, our practical recommendation is to separate the job into fit, attachment, clearance, and weather use. Those checks help you decide whether this is a manageable driveway project or a roof repair worth handing to our service team. Pay particular attention to the installation instructions for your exact cover. A removable accessory hood and the underlying powered vent don't necessarily use the same hinge orientation or mounting hardware.
Check Whether a Fan Tastic Vent Cover Fits
Start with the opening, not the appearance of the old lid. The Ultra Breeze fit guidance identifies compatibility with most standard 14-by-14-inch RV roof vents and high-powered ventilators, including Fan-Tastic Vent fans. “Most” matters: matching the opening doesn't establish that every lid, bracket, and nearby roof accessory will clear the new hood.
Measure the opening and outer flange, identify the existing fan, and compare those details with the cover's compatibility information. Open the lid fully before fitting the hood. Check the surrounding space for solar-panel mounts, antennas, and other equipment that might obstruct installation or prevent future access.
Choose the correct hardware path
Cover job versus full vent replacement
| Roof condition | What to install | Hardware | New holes | Hinge direction |
|---|---|---|---|---|
| Standard opening, solid flange, lid still opens | Fan-Tastic vent cover such as Ultra Breeze | Supplied brackets, clevis pins, washers, and hairpin cotters | Usually none if existing screw rows are usable | Follow accessory-cover instructions; rear-facing where specified |
| Cover needs corner brackets and backside access | Bracket-style vent cover | Through-bolts, washers, and nuts | Only marked bracket holes | Louvers and hinge toward the rear |
| No backside access, manufacturer allows screws | Bracket-style vent cover | Manufacturer-specified self-tapping screws | Only marked bracket holes | Louvers and hinge toward the rear |
| Brittle, cracked, or leaking vent requiring replacement | New Fan-Tastic Vent, then a compatible cover if wanted | Specified flange screws, gasket or compatible sealant, and sealant over heads | New flange's specified screw pattern | Powered-vent hood hinge toward the direction of travel |
For the full replacement path, the Fan-Tastic Vent installation manual specifies 16 number 8 self-tapping flat-head screws, 3/4 to 1 inch long, a gasket or compatible sealant beneath the flange, and additional sealant over screw heads and along the flange. That's a different job from attaching an accessory cover to an intact assembly.
Rearward and the direction of travel aren't the same thing. Rear-facing louvers on an accessory rain hood shouldn't be confused with the powered vent's forward-facing hinge requirement. Identify which component the instruction describes before orienting it.
Make the go-or-no-go inspection
A sound frame should hold its hardware without flexing, splitting, or allowing screws to turn without gripping. A cracked lid needs replacement, but a sound frame may not require replacing the entire fan. A cracked frame, soft roof around the flange, or evidence of water intrusion deserves a closer repair assessment.
Prepare the mounting area without stripping sound roof sealant unnecessarily:
- Clean the contact area. Remove dirt, leaves, and loose sealant that prevent the brackets from seating.
- Check material compatibility. Choose cleaner and sealant approved for the roof membrane and vent materials.
- Preserve drainage. Don't turn an open, ventilated accessory hood into a sealed enclosure by caulking around its entire perimeter.
- Confirm service access. Make sure you can remove the cover later to clean and inspect the vent.
Practical rule: Order the cover when the mounting structure is sound and the lid has room to operate. Stop when the flange or roof feels soft.
Install the Fan Tastic Vent Cover Step by Step
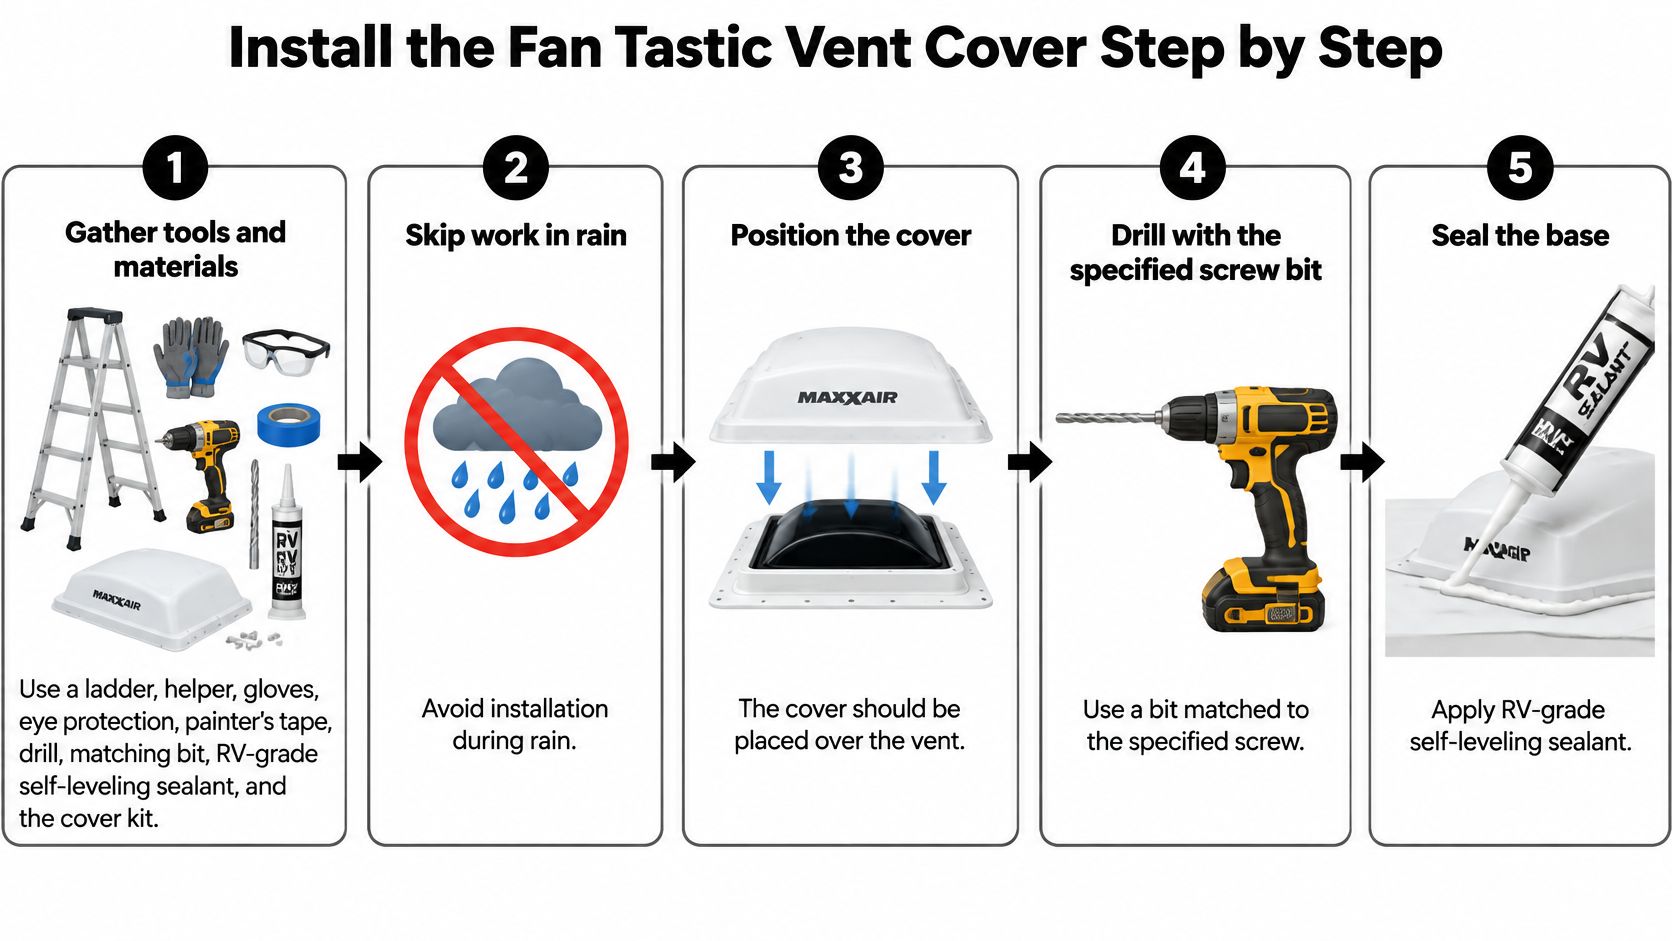
Set up a stable ladder and have a helper available before carrying tools onto the roof. Verify that the RV manufacturer permits walking where you intend to stand. Stay off air-conditioner shrouds, vent lids, and unsupported roof areas, and postpone the job during rain, lightning, or strong Wasatch winds.
Use this installation visual as an overview, then follow the instructions packaged with your specific cover.
Prepare without creating unnecessary holes
Gather gloves, eye protection, painter's tape, a measuring tape, a screwdriver, a drill, the specified pilot bit, compatible RV-grade self-leveling sealant, and the complete cover kit. A pilot bit must match the fastener and material specified by the manufacturer, not the screw's outside diameter.
A cover-only job shouldn't require altering the fan wiring. Keep the fan switched off while your hands are near the blades, and don't open electrical connections just to attach an exterior hood.
The RVgeeks roof-vent-cover installation guide describes the bracket-style approach for a standard 14 × 14-inch vent, including corner placement, checking backside access, rearward orientation, and a full lid-clearance test.
Confirm the kit and vent match. Check the fan model, cover model, mounting locations, and roof condition before removing hardware. Don't assume brackets from another brand will establish the correct height.
Remove the cover's top section if its design requires it. Keep the supplied hardware organized so you don't substitute a longer screw that could damage something beneath the mounting surface.
Position the cover. Place it over the vent and set the brackets near the outer frame corners where the kit requires them. Check lid clearance before marking anything.
Check whether you can reach the backside of the mounting points. Mark only the required holes, then pre-drill with the specified bit. Tape can help make marks visible, but it doesn't protect hidden wiring or replace an access check.
Use the correct fastening branch. Where the kit specifies through-bolts and backside access exists, fit bolts, washers, and nuts. Where access isn't available, use only the manufacturer-approved self-tapping screws.
For an Ultra Breeze bracket-and-pin kit, use its dedicated sequence instead. Remove the designated existing flange screws, seal those penetrations, install the supplied side brackets, place the cover slots over the clevis pins with washers, and fully seat the hairpin cotters. Don't combine this arrangement with an improvised corner-bracket layout.
Align the accessory hood as its instructions specify. For the rear-facing bracket-style design, point the hinge and louvers toward the rear, then tighten the hardware without crushing plastic or distorting the frame.
Seal the mounting penetrations and test operation. Apply compatible sealant around required bracket bases and exposed fastener heads. Run the lid from closed through its full opening range, then operate the fan and listen for rubbing or strain.
Finish with a functional check
Watch the lid rather than relying only on motor sound. A powered opener can meet resistance beneath the hood even when the installation looks square from above. Don't accept a scraping lid as something that will wear in.
Let the sealant cure according to its label before travel or weather exposure. Cure requirements aren't interchangeable between products, and a dry-looking surface doesn't necessarily mean the material underneath has cured.
For another view of the mounting process, watch the installation demonstration before climbing onto the roof.
Clear Lid Hits Leaks and Weak Airflow
If the lid stops or scrapes, release the control rather than repeatedly driving the opener against the obstruction. Inspect the contact point with the fan off. Misalignment, incorrect brackets, an incompatible hood, or a damaged lid can produce similar symptoms, so don't assume a stronger screw or tighter nut will solve the problem.
Use the symptom to choose the correction. Adding hardware before finding the cause can create another leak path without improving clearance.
Cover problems after installation
| What you notice | Usual cause | Correction |
|---|---|---|
| Lid stops or scrapes the cover | Reversed accessory-cover orientation or brackets inset from the corners | Correct orientation and bracket position according to the kit, then cycle the lid |
| Cover buzzes or shifts on the road | Cotter pin or side bracket not fully seated | Confirm side brackets, aligned clevis pins, washers, and fully seated hairpin cotters |
| Drip at a new screw | Poorly prepared penetration or unsealed fastener head | Remove failed sealant, dry and prepare the area, then seal the penetration and head |
| Fan sounds normal but the rig stays stale | Blocked louvers, dirty screen or blades, or inadequate makeup air | Clean obstructions, verify lid travel, and open an opposite window when outdoor air is safe |
| Smoke or fine dust indoors with the hood on | Vent left cracked in contaminated outdoor air | Close and latch the vent; the cover isn't a filter |
Check the attachment before adding screws
The Ultra Breeze installation instructions specify removing the second number 8 by 1-inch screw from the front and second from the back on both sides, then fitting brackets with number 10 by 1 1/4-inch Phillips pan-head screws. The cover attaches through aligned clevis pins, washers, and hairpin cotter pins.
That hardware sequence gives you a useful inspection map. Check each attachment point, not just the side closest to the ladder. A missing washer or incompletely seated cotter needs the correct replacement, not a bead of sealant to stop movement.
Separate a sealing repair from structural damage
A drip near a screw doesn't prove that screw is the only entry point. Water can travel beneath a flange, so inspect the surrounding sealant and check the ceiling for staining before treating the visible drip.
If a flange must be lifted and rebedded, Contractor's Den butyl tape is a useful material reference when comparing bedding options. Use butyl only where the vent and roof manufacturers permit it; it isn't a substitute for specified exposed-head sealant or a repair for cracked plastic.
Our travel-trailer roof repair guide provides broader context when the problem extends beyond the vent.
A cover can protect a working vent. It can't repair the roof beneath it.
For weak airflow, compare operation with a safe makeup-air opening before condemning the motor. A cover can preserve ventilation during suitable weather, but it can't create cross-ventilation in a tightly closed RV.
When to Leave the Cover Open in Utah
Treat the cover as weather gear, not an air filter. More precisely, the accessory hood generally stays installed while you open or close the vent lid beneath it. The decision is whether outdoor conditions justify leaving that lid open.
A rain cloud over camp and a smoke-filled horizon call for different settings, even when the same hood is overhead.
Warm rain at camp
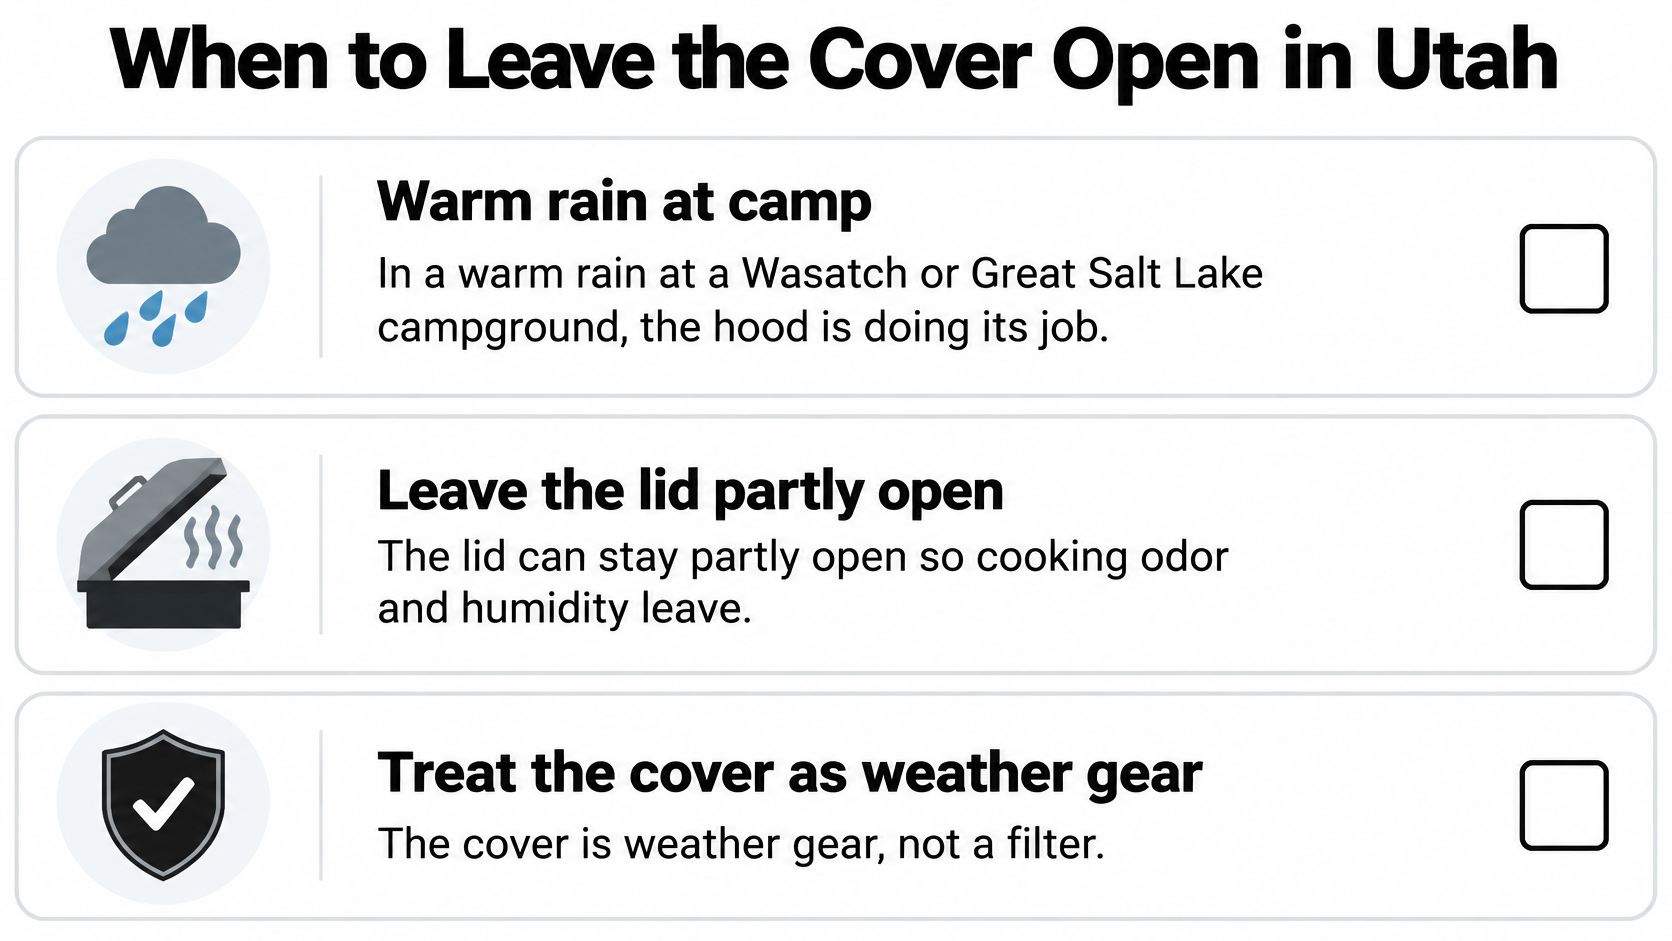
During a warm rain at a Wasatch Mountains or Great Salt Lake campground, a correctly fitted cover can let you leave the lid partly open so cooking odors and humidity escape. Check for wind-driven water, and don't assume the hood makes the opening waterproof in every storm.
Use the fan speed that provides useful air exchange without unnecessary noise or drafts. If the RV remains stuffy, check for a clear intake path rather than immediately turning the fan higher.
Use this weather checklist before leaving the vent open overnight.
Snow and ice need a different response
Heavy snow can obstruct the hood's openings, and ice can interfere with lid movement. Close and latch the vent during accumulating snow, then inspect it after the storm rather than forcing a frozen mechanism.
The RV Pro maintenance guidance recommends checking full lid movement, deteriorated seals, brittle plastic, loose cover hardware, and debris. Winter storage doesn't remove those inspection needs.
Cold-weather ventilation is a trade-off: exhausting moist air also releases heated air. Manage cooking moisture and wet gear, use ventilation when conditions allow, and don't rely on an opening that snow has blocked.
Dust and wildfire smoke mean closing the lid
Windblown dust isn't another kind of rain. If dust is entering through the vent, stop the fan and close the lid rather than trying to solve the problem by increasing exhaust speed or adding restrictive mesh.
Wildfire smoke calls for the same closed-vent response. The RV wildfire-smoke and dust checklist recommends closing and latching roof vents completely, because a cracked lid can admit smoke and a screen isn't an adequate barrier.
Check local air-quality alerts before leaving the lid cracked overnight or while you're away. Smoke may reach Salt Lake City or a mountain campground from a distant fire, even when the nearby sky initially looks usable.
Our camper bug-screen guide addresses insect protection. Keep that function separate from fine-particle filtration.
Make a seasonal inspection pass
The Camping World roof-inspection guide identifies brittle plastic, damaged hinges, debris, loose hardware, and deteriorated sealant as recurring inspection targets. For Utah's sun exposure and freeze-thaw conditions, inspect before and after the travel season and following severe weather.
- Operate the lid. Confirm smooth opening, closing, and latching.
- Clear the airflow path. Remove leaves and insects; clean screens and blades safely.
- Inspect the seal. Check flange corners, fastener heads, and lap sealant for lifting or cracks.
- Repair the cause. Correct loose hardware or damaged components before resealing dry, prepared surfaces.
Hand the Roof Job to Motor Sportsland
Stop the driveway job when the flange feels soft, water has reached the ceiling, sealant failure extends beyond the vent, or you can't identify the roof material. An unsafe ladder setup is also a sufficient reason to stop. A small accessory isn't worth a fall or a damaged membrane.
Multiple roof vents on a fifth wheel or Class A can make professional installation practical, particularly when access requires moving around other roof equipment. The question isn't whether you can turn the screws. It's whether you can inspect the mounting surface, use compatible materials, and safely verify the finished work.
Bring information that helps identify the repair
Before booking, collect what you can from safe ground or interior access. Don't climb back onto a questionable roof just to get a better photograph.
- Vent identification. Photograph the brand, model label, interior controls, and existing lid.
- Mounting details. Bring opening measurements and clear flange photographs if you already have them.
- Leak symptoms. Note whether water appears during rain, after driving, or while the RV is parked.
- Parts already purchased. Bring the cover box, instructions, and complete hardware kit.
Those details help distinguish a cover installation from a lid replacement, flange reseal, or roof repair. They also help prevent ordering an accessory around a vent that needs replacing.
Our Motor Sportsland service team handles maintenance, installations, repairs, plumbing and electrical work, upgrades, and RV parts. You can schedule RV service with Motor Sportsland and describe the vent's condition before bringing the RV in.
Choose a repair, not a cosmetic patch
An extra layer of sealant can hide loose hardware or cracked plastic without correcting either. If the lid still hits after proper realignment, have the assembly checked rather than trimming the hood or changing bracket height without manufacturer approval.
Bruce described his Motor Sportsland repair this way:
“His fix is how the thing should have been built in the first place!”
That's a customer's assessment, not a reason to promise that every vent needs rebuilding. If the cover is secure, the lid cycles freely, the sealant is sound, and the ceiling is dry, the sensible next step is routine monitoring.
If you're preparing for another Bear Lake or Jordanelle weekend and the vent still leaks or binds, arrange the repair before departure. You can also visit our Salt Lake City-area showroom if you're considering a different RV and want to discuss roof access and maintenance alongside the floorplan.
Frequently Asked Questions About Fan-Tastic Vent Covers
Can I put a Fan-Tastic vent cover on any standard RV roof vent?
No. Ultra Breeze-style covers fit many standard vents and high-powered fans, but you still need to confirm the exact fan model, mounting arrangement, and lid clearance. A damaged frame needs attention before an accessory hood goes over it.
Does installing the cover require new holes?
Often, an existing-flange mounting system can reuse the designated screw locations. Corner-bracket designs may require specified holes, so identify the mounting system before drilling and don't substitute your own attachment pattern.
Which way should the hinge face?
For the bracket-style accessory cover described above, the hinge and louvers face the rear. The underlying powered Fan-Tastic Vent has its own installation orientation, so don't apply an accessory hood's direction rule to a full vent replacement.
Can I leave the vent open during wildfire smoke?
No. Switch the fan off and close and latch the lid when outdoor air is smoky or dusty. The rain hood and insect screen don't make contaminated air safe to bring inside.
Do I need sealant for a Fan-Tastic vent cover installation?
Use compatible RV-grade sealant wherever the mounting instructions require it, including specified bracket bases and exposed roof penetrations. Prepare clean, dry surfaces, respect the product's cure requirements, and don't seal drainage or ventilation openings.
When should I call a professional?
Call when the mounting area feels soft, ceiling stains suggest water intrusion, the roof material is unfamiliar, or the lid continues to bind after correct adjustment. Professional help also makes sense whenever you can't establish safe roof access.
Motor Sportsland offers RV maintenance, roof-related repairs, and cover installations to help keep your vent working properly through Utah's changing conditions. Bring your vent measurements, cover details, and any leak photos, then visit Motor Sportsland to arrange service before your next trip.
